


- Web templates
- E-commerce Templates
- CMS & Blog Templates
- Facebook Templates
- Website Builders
FAQs
General Tutorials
Featured templates
MonsterONE Subscrioption


Cherry Sidebar Manager plugin is used to create custom sidebars with specific sets of widgets. This tutorial will show you how to manage it.
Cherry Framework 4. How to add custom sidebars and attach them to a page
In order to add a new sidebar, you should do the following:
Log into you WordPress dashboard.
Navigate to the Appearance – Widgets section and click Create a new sidebar:
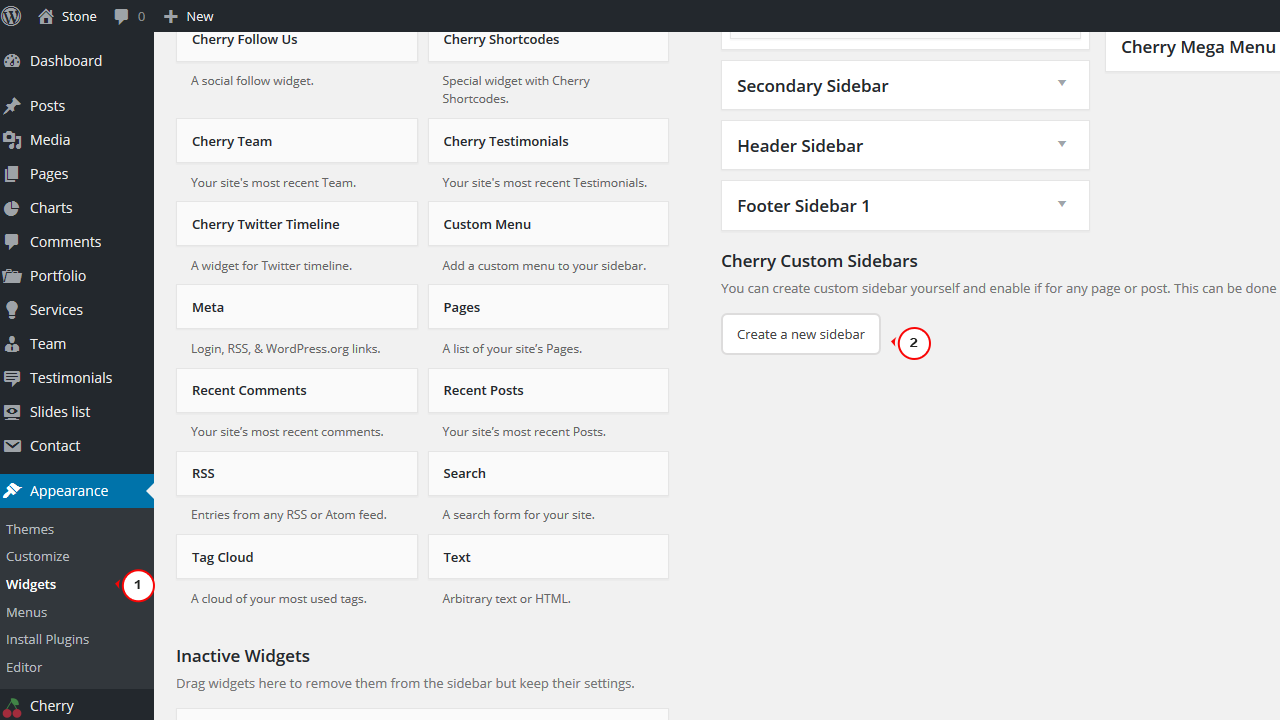
Input Sidebar name and Sidebar description.
Then click Creating Sidebars.
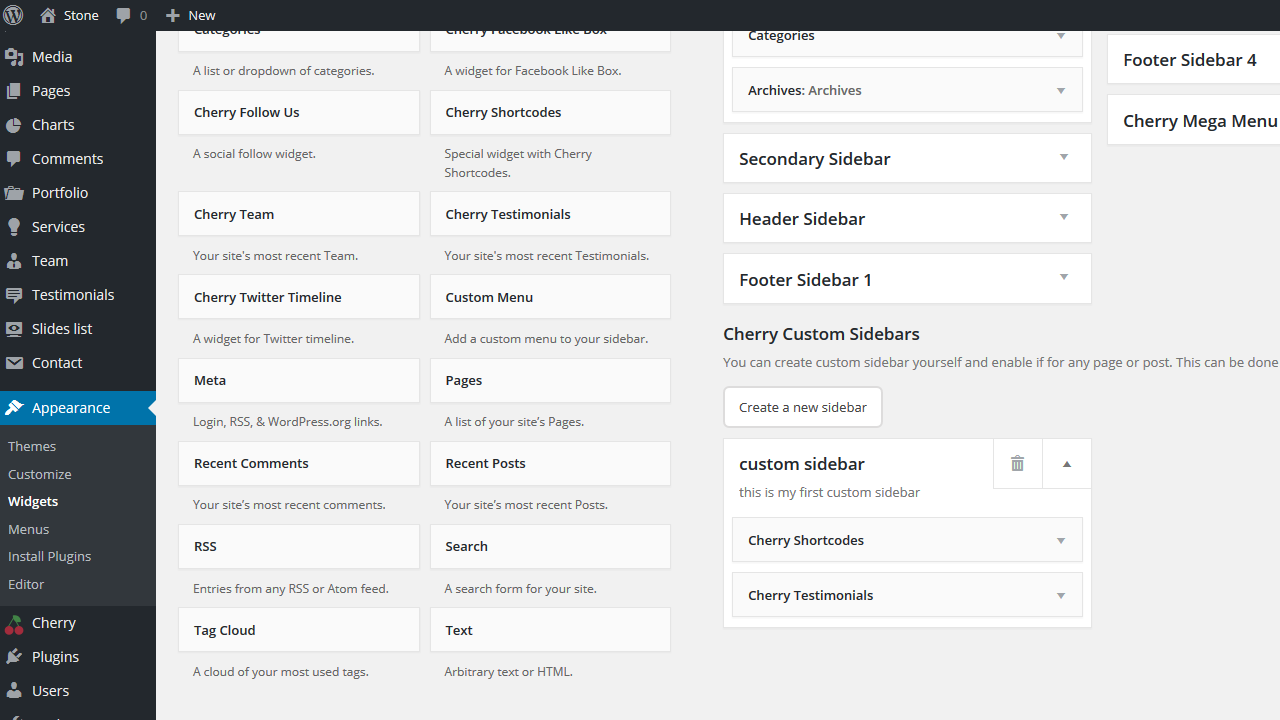
You can arrange your widgets set in your sidebar by adding new ones, changing the order of widgets and removing unused ones:
In order to select a sidebar for the page, please do the following:
Navigate to WordPress dashboard Pages – All pages, select the desired page to edit.
On the right side you will see the following options on the page editing screen:
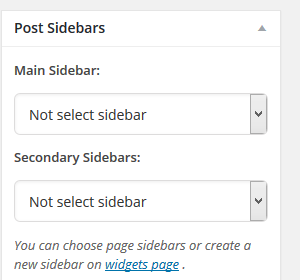
You can select the sidebar from the drop down.
Main Sidebar – list of available main sidebars;
Secondary Sidebars – list of available secondary sidebars.
Feel free to check the detailed video tutorial below:
Cherry Framework 4. How to add custom sidebars and attach them to a page
