- Web templates
- E-commerce Templates
- CMS & Blog Templates
- Facebook Templates
- Website Builders
Cherry Framework 3.x. How to add Log in/Log out options
April 29, 2013
This tutorial shows how to add Log in/Log out features for WordPress Cherry Framework theme.
Cherry Framework. Adding Log in/Log out options
1. Open options.php file. You can find it in your theme folder. Usually it is called like themeXXXX (XXX are actual theme numbers). Add the following code after custom PHP code (check video version for detailed information):
$options[] = array(
"name" => "Authentication",
"id" => "authentication",
"type" => "heading"
);
$options[] = array( "name" => "Display login links?",
"desc" => "Display login links in the header?",
"id" => "login_display_id",
"std" => "yes",
"type" => "radio",
"options" => array(
"yes" => "Yes",
"no"	=> "No"));
$options[] = array( "name" => "Logged-in title",
"desc" => "Logged-in title",
"id" => "site_admin",
"std" => "Site %username%",
"class" => "tiny",
"type" => "text");
$options[] = array( "name" => "",
  "desc" => "",
  "id" => "log_out",
  "std" => "Log out",
  "class" => "tiny",
  "type" => "text");
$options[] = array( "name" => "Register link.",
  "desc" => "Register link.",
  "id" => "sign_up",
  "std" => "Sign up",
  "class" => "tiny",
  "type" => "text");
$options[] = array( "name" => "Logged-out title.",
  "desc" => "Logged-out title.",
  "id" => "sign_in",
  "std" => "Sign in",
  "class" => "tiny",
  "type" => "text");
$options[] = array( "name" => "",
  "desc" => "",
  "id" => "login_questions",
  "std" => "Have an account?",
  "class" => "tiny",
  "type" => "text");
$options[] = array( "name" => "",
  "desc" => "",
  "id" => "word_delimiter",
  "std" => "or",
  "class" => "tiny",
  "type" => "text");
2. Code specified above will add Authentication tab in Cherry Framework Theme Options.
3. Open Authentication tab and click Save.
4. Now we need to copy wrapper-header.php file from “wp-content/themes/CherryFramework/wrapper” folder to wrapper folder of themeXXXX (XXXX are actual theme numbers). Replace the file in case it is available in your template package. Open this file and add the following code:
<div class="row static-login-out">
<div class="span3" data-motopress-type="static" data-motopress-static-file="static/static-login-out.php">
<?php get_template_part("static/static-login-out"); ?>
</div>
</div>
5. In themeXXXX (XXXX are actual theme numbers) folder you need to create the folder called static in case it does not exist and add static-login-out.php file with the following code:
<?php /* Static Name: Log in - out */ ?>
<div id="loginout" class="clearfix">
<?php
if(of_get_option("login_display_id")=="yes"){
$username = get_userdata(get_current_user_id())->user_login;
$user_title = str_replace("%username%", $username, of_get_option("site_admin"));
$link_string_site = "<a href=\"".get_bloginfo('wpurl')."/wp-admin/index.php\" class='register-link' title=\"".$user_title."\">".$user_title."</a>";
$link_string_logout = '<a href="'. wp_logout_url($_SERVER['REQUEST_URI']) .'" title="'.of_get_option("log_out").'">'.of_get_option("log_out").'</a>';
$link_string_register = "<a href=\"".get_bloginfo('wpurl')."/wp-login.php?action=register&redirect_to=".$_SERVER['REQUEST_URI']."\" class='register-link' title=\"".of_get_option("sign_up")."\">".of_get_option("sign_up")."</a>";
$link_string_login = "<a href=\"".get_bloginfo('wpurl')."/wp-login.php?action=login&redirect_to=".$_SERVER['REQUEST_URI']."\" title=\"".of_get_option("sign_in")."\">".of_get_option("sign_in")."</a>";
if (!is_user_logged_in()) {
echo "<span>".of_get_option("login_questions")." ".$link_string_login." ".of_get_option("word_delimiter")." </span>";
echo "<span>".$link_string_register."</span>";
}else{
echo "<span>".$link_string_site." ".of_get_option("word_delimiter")." </span>";
echo "<span>".$link_string_logout."</span>";
}
}
?>
</div>
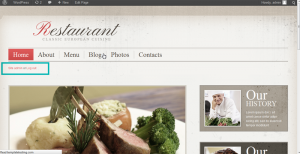
6. Refresh home page. Your site should look like on the screenshot in case you have performed all actions properly.
Feel free to check the detailed video tutorial below:


![[SCM]actwin,0,0,0,0;](/help/wp-content/uploads/2013/04/Cherry_FW_-Adding_Log_in_Log_out_options-3-276x300.jpg)

