


- Web templates
- E-commerce Templates
- CMS & Blog Templates
- Facebook Templates
- Website Builders
FAQs
General Tutorials
Featured templates
MonsterONE Subscrioption


This tutorial shows you how to insert HTML5 audio object that will be invisible and played automatically when you visit your WordPress website.
CherryFramework 3. How to insert an auto-played background audio using HTML5
.jpg)
In order to insert a HTML5 audio object in a WordPress template, you should perform the following:
Upload the audio file to the wp-content/themes/themeXXXXX/audio folder. If the folder doesn’t exist yet, create one. We recommend using the MP3 audio type since it is supported by all modern browsers.
Copy the header.php file from the wp-content/themes/CherryFramework folder to the wp-content/themes/themeXXXXX folder if the file doesn’t already exist there.
Open up the wp-content/themes/themeXXXXX/header.php file in any code editor.
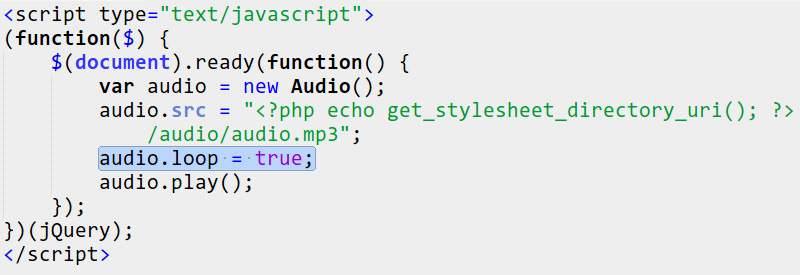
Insert the following code right before the closing head tag:
<script type="text/javascript">
	(function($) {
		$(document).ready(function() {
			var audio = new Audio();
			audio.src = "<?php echo get_stylesheet_directory_uri(); ?>/audio/file_name.mp3";
			audio.loop = true;
			audio.play();
		});
	})(jQuery);
</script>
</head>
Where file_name.mp3 is the name of the background audio file.
If you add the line audio.loop = true; the audio will start over again when finished:
Save the changes to the header.php file and upload it to the server. Now when you reload the page of your site, you’ll hear the background audio.
Feel free to check the detailed video tutorial below:
CherryFramework 3. How to insert an auto-played background audio using HTML5
