


- Web templates
- E-commerce Templates
- CMS & Blog Templates
- Facebook Templates
- Website Builders
FAQs
General Tutorials
Featured templates
MonsterONE Subscrioption


This tutorial is going to show you how to add a localization for plugins using a WordPress CherryFramework 4 template.
CherryFramework 4. How to add localization for a plugin
In order to add a localization for a plugin, you need to perform the following:
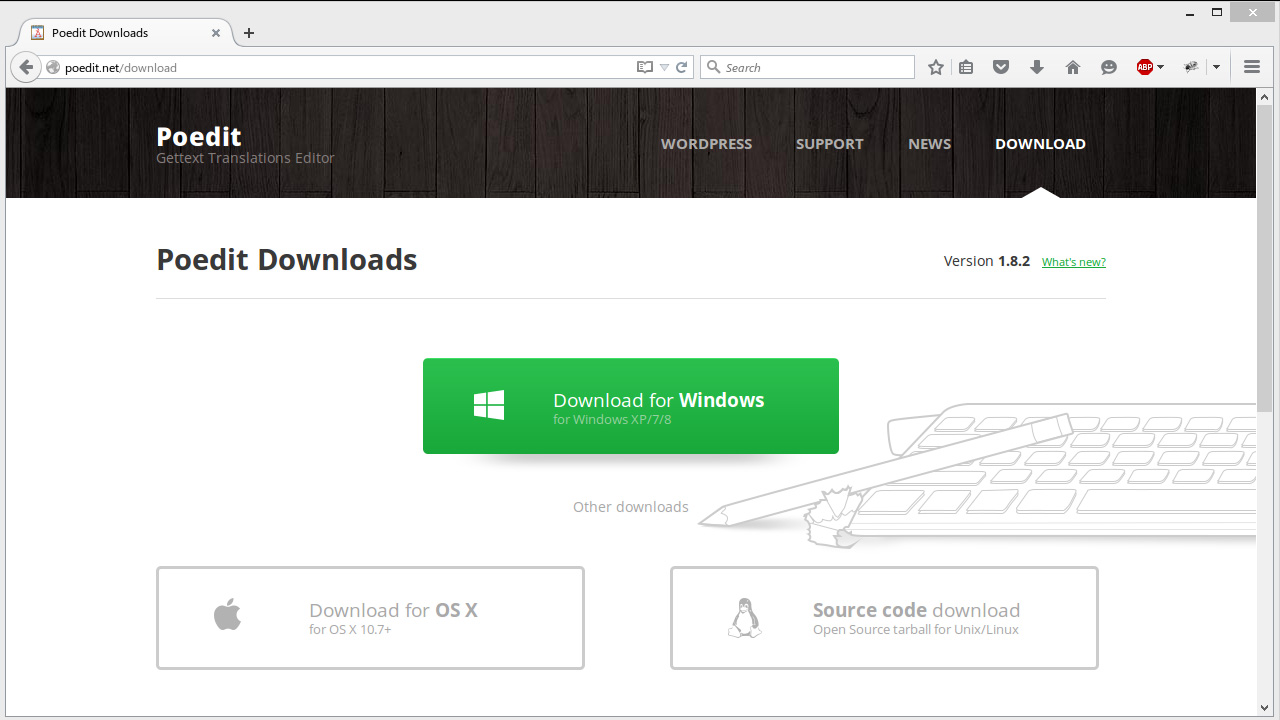
Go to http://poedit.net/download and download Poedit for your system (Windows/MAC). Poedit is a free, open source and cross-platform gettext catalog (.po file) editor to aid in the process of language localization:
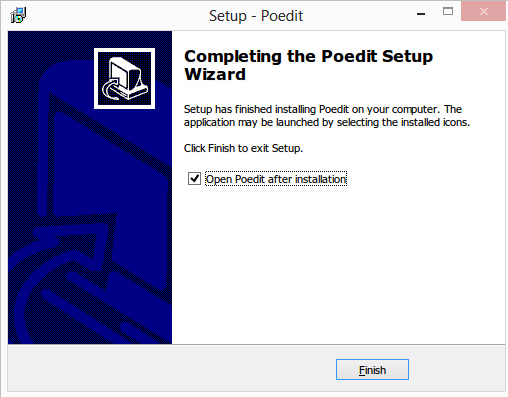
Install it on your computer: double click the file and follow the steps it suggests. At the end of the installation make sure the option Open Poedit After Installation is checked and click Finish:
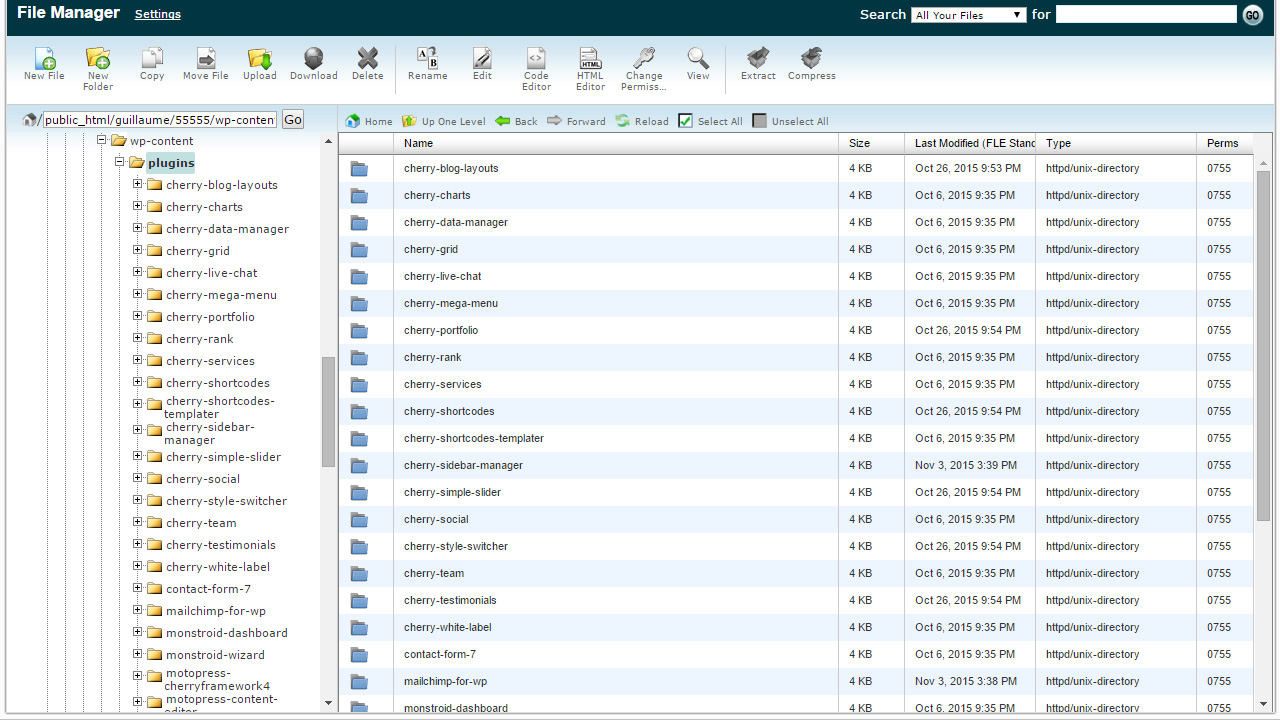
Go to the /wp-content/plugins directory. There you’ll see plugins folders:
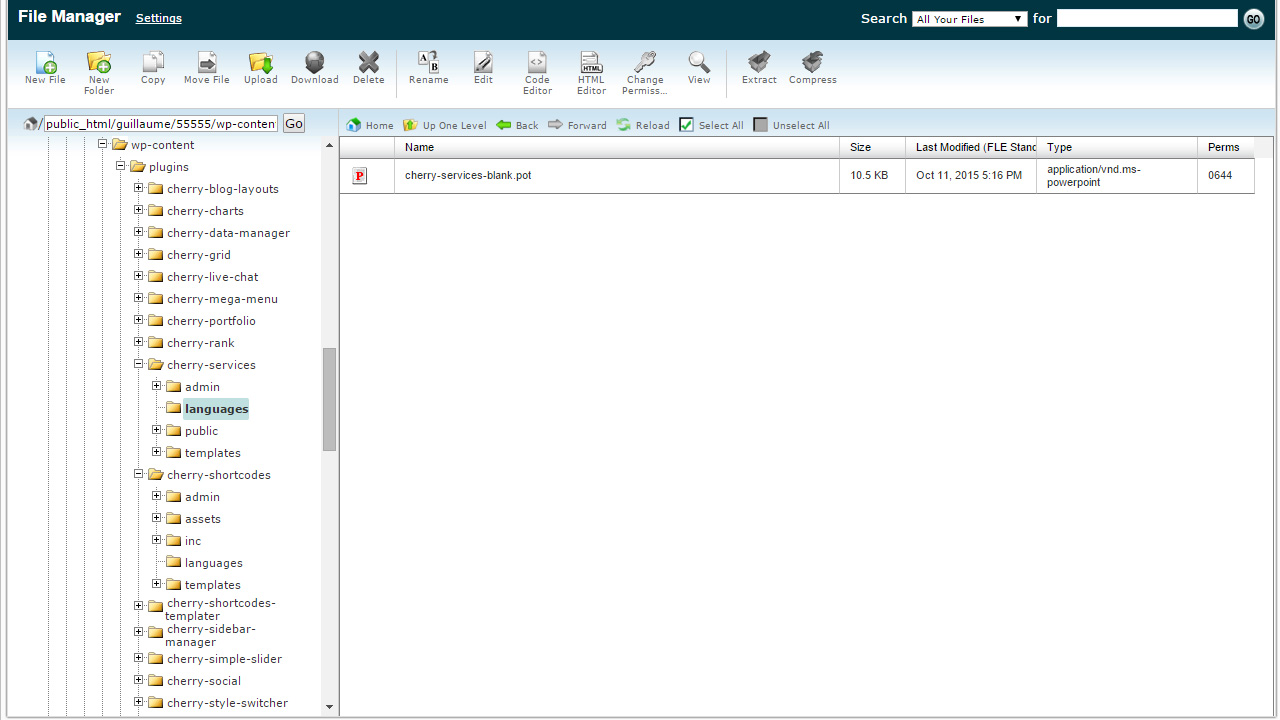
Each of the plugins folders has a languages folder, which contains a blank POT file that can be used to create a localization for the plugin. Some plugins already have localizations for several languages:
In order to add a new localization, you need to download the POT file to your local system and open it in Poedit by selecting in the main menu File -> New from POT/PO file…. When you do that, you’ll get to a dialogue box that says Translation Language:
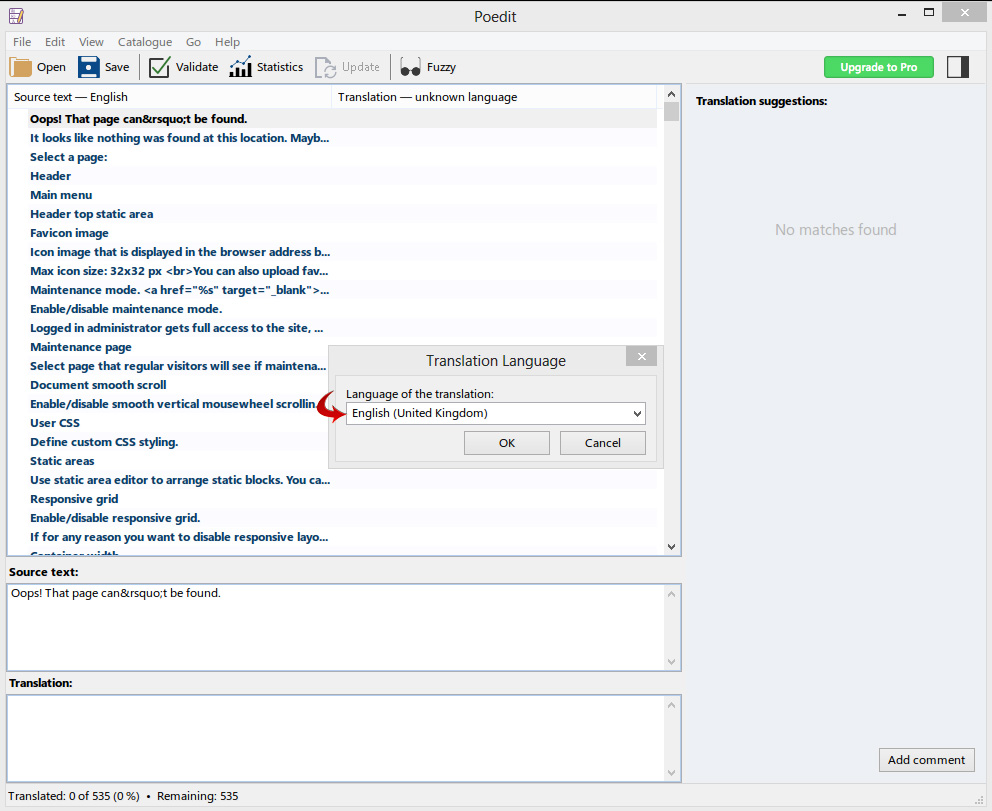
There you need to select the language you are going to add.
You need to make a translation for each string by writing it in the Translation field. Also, you can translate only those of them that need to be rewritten:
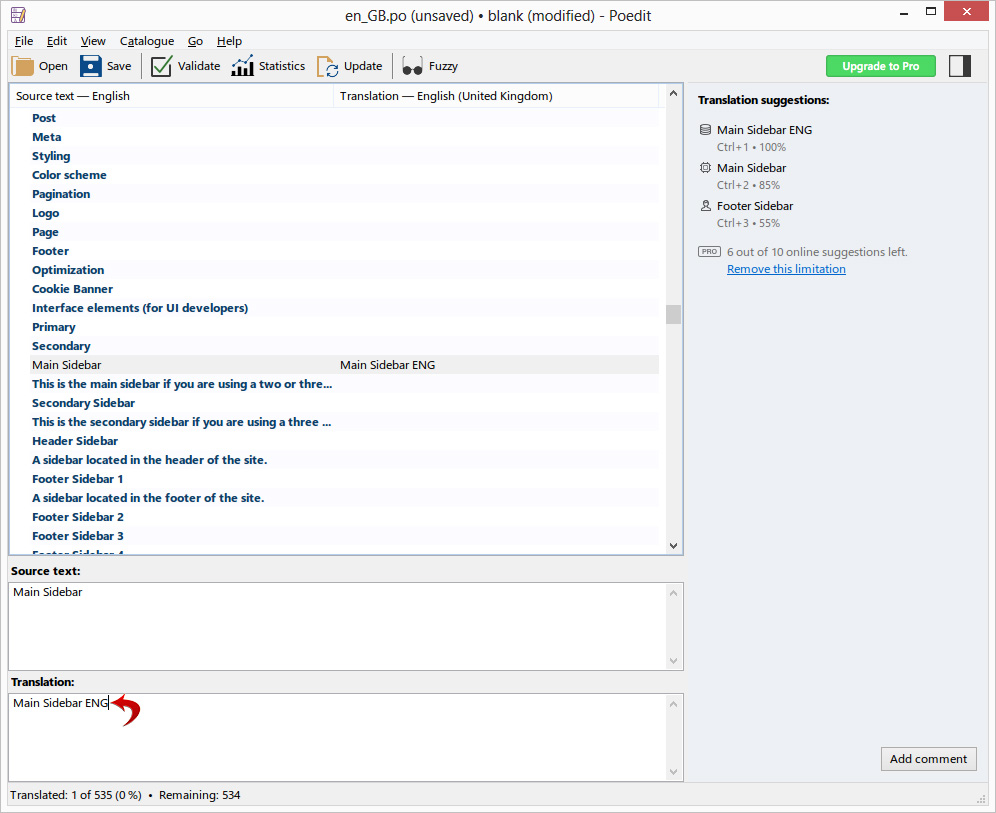
After all is done, go to File / Save or press Ctrl + S and save the localization. You’ll get two files with the extensions *.po and *.mo. You need to name them plugin_name-ln_LN, where ln_LN is the locale international code of the language and plugin_name is the name of the plugin you’re making translations for.
The PO/MO localization files that you created should be uploaded to the wp-content/languages/plugins folder. If the folder doesn’t exist, please create it.
The last step is to go to Dashboard – Settings – General and switch the Site Language:

Feel free to check the detailed video tutorial below:
