


- Web templates
- E-commerce Templates
- CMS & Blog Templates
- Facebook Templates
- Website Builders
FAQs
General Tutorials
Featured templates
MonsterONE Subscrioption


This tutorial shows how to add ‘Read more’ button to Blog Layout shortcode in CherryFramework 4 templates.
CherryFramework 4. How to add “Read More” buttons for Blog Layout shortcode.jpg)
Locating the shortcode on your page
The first thing you need to do is to check shortcode parameters to find out what file to edit for adding Read more button there. Please locate shortcode on the page, it will look similar to the example below:
[cherry_blog posts_per_page="4" order="DESC" orderby="date" paged="yes" layout_type="grid" filter_type="none" grid_column="grid-4" columns="4" columns_gutter="10" timeline_item_width="48" use_timeline_breakpoint="yes" timeline_breakpoint="month" timeline_breakpoint_date_format="F j, Y" show_marker_date="no" timeline_marker_date_format="F j, Y" pagination_previous_label="" pagination_next_label="" class="grid-type-1" template_type="type-1"]
Locating the file to edit
The next step is to locate file based on shortcode parameters.
Please check layout_type, it can be set to “grid”, “masonry” or “timeline”. In this example it’s set to ‘grid’.
Next, check template_type, in our case it’s ‘type-1’.
The last part of filename complex is file type, for example, standard, image, gallery , etc. Therefore we need to locate layout-grid-type-1-video.tmpl file to add Read more button to video post displayed on the page by using Blog Layout shortcode.
Log into your hosting control panel and select File Manager or connect to FTP.
Select wp-content/themes/monstroid/blog-layouts/tmpl/ directory to reach shortcode source files:
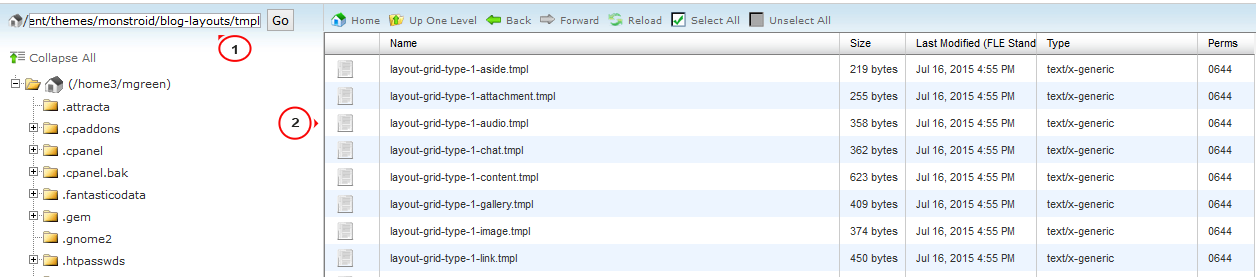
Open your file, in our case it’s layout-grid-type-1-video.tmpl one.
Editing file
Add read mode button code below the content part by changing code from:
%%CONTENT%%
to
		%%CONTENT%%
		<div class="read_more">
			%%BUTTON where="loop"%%
		</div>
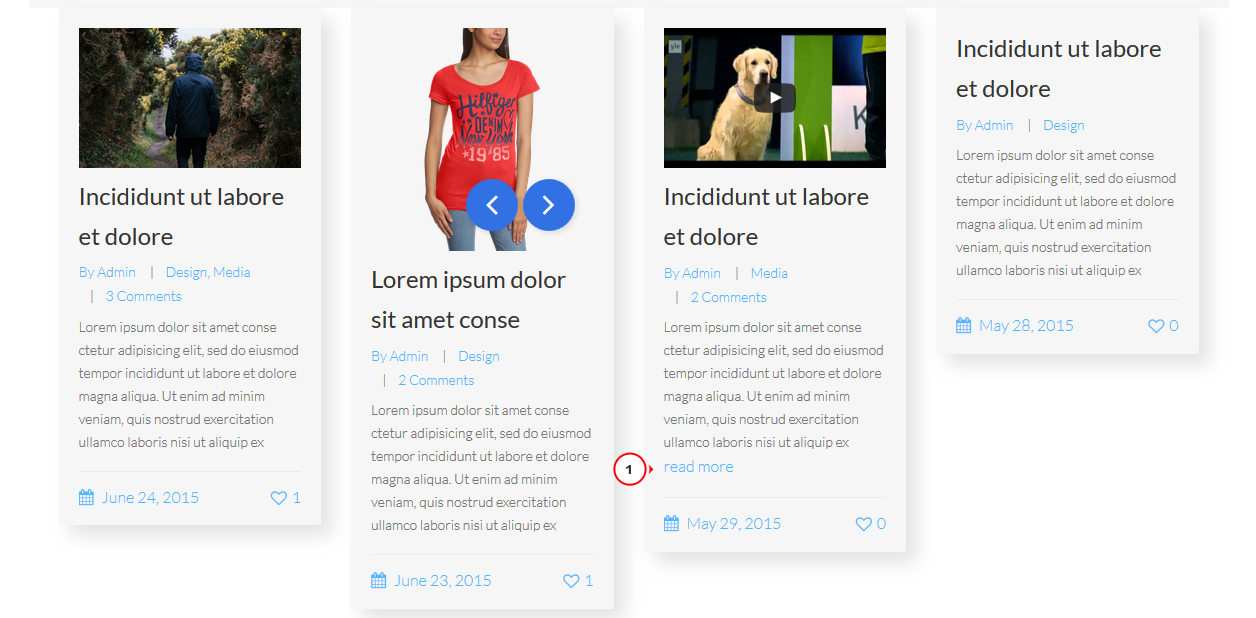
Save changes and check your site, the button appears now. You can also add specific style rules to this button by using .read_more class name in your CSS code:
Feel free to check the detailed video tutorial below:
CherryFramework 4. How to add “Read More” buttons for Blog Layout shortcode