


- Web templates
- E-commerce Templates
- CMS & Blog Templates
- Facebook Templates
- Website Builders
FAQs
General Tutorials
Featured templates
MonsterONE Subscrioption


Hello! This tutorial will show you how to use PO Editor software to apply changes to site language files in CherryFramework 4 templates.
CherryFramework 4. How to edit PO filesSometimes you need to perform changes to the live site titles that were already translated. In this case please follow the steps listed below:
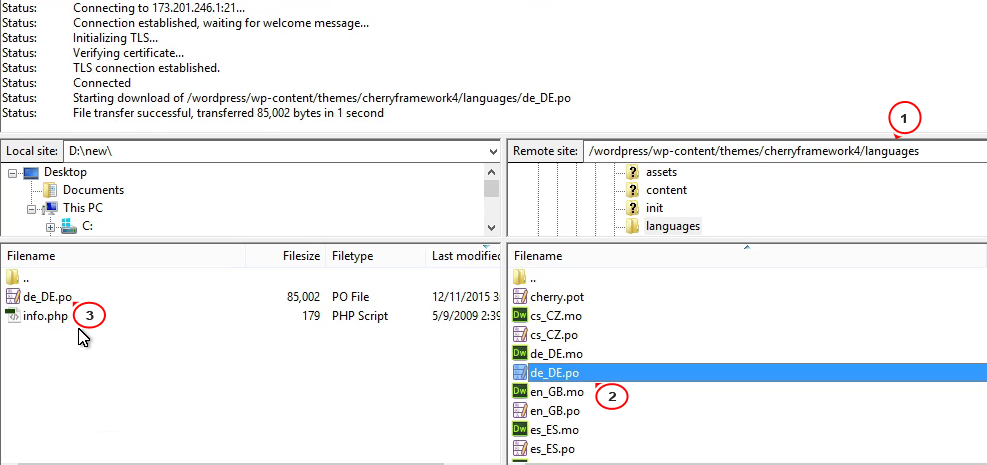
First, you need to connect to FTP or open hosting cPanel File Manager tool and navigate to wp-content/themes/cherryframework4/languages folder.
Locate file for corresponding language (for example, de_DE.po for German) and download it to your computer:
Open this file with PO Editor. On the left side you’ll see original text and on the right side – translated/changed version:

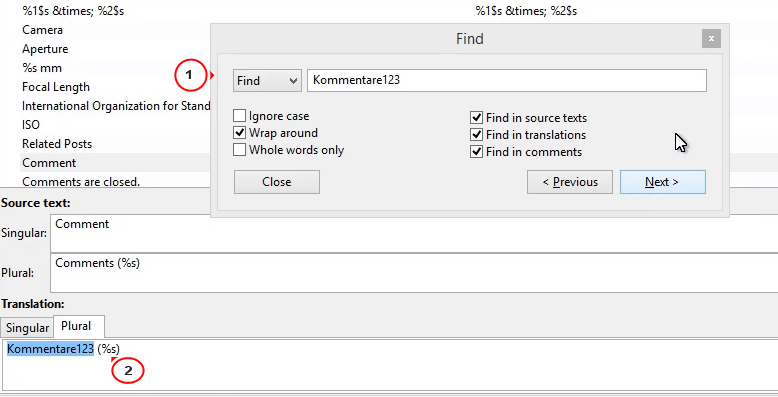
Press on Ctrl+F hotkeys and search for the title you need to change.
Change translation at the bottom and save the file then:
After saving you’ll have 2 files: de_DE.po and de_DE.mo in your local folder. Make sure to upload them both to server:.

Please, upload files to wp-content/themes/cherryframework4/languages and wp-content/languages folders on server.
Refresh your site to see the changes, they were applied successfully.
Feel free to check the detailed video tutorial below:
CherryFramework 4. How to edit PO files