


- Web templates
- E-commerce Templates
- CMS & Blog Templates
- Facebook Templates
- Website Builders
FAQs
General Tutorials
Featured templates
MonsterONE Subscrioption


Hello! This video tutorial shows how to manage gallery thumbnails cropping and disable cropping for featured images in Cherry Framework 3 templates.
CherryFramework3. How to manage gallery thumbnails cropping and disable cropping for featured images.jpg)
You may want to disable the cropping effect for some images on your site since you may not like it.
Let’s learn how to do that.
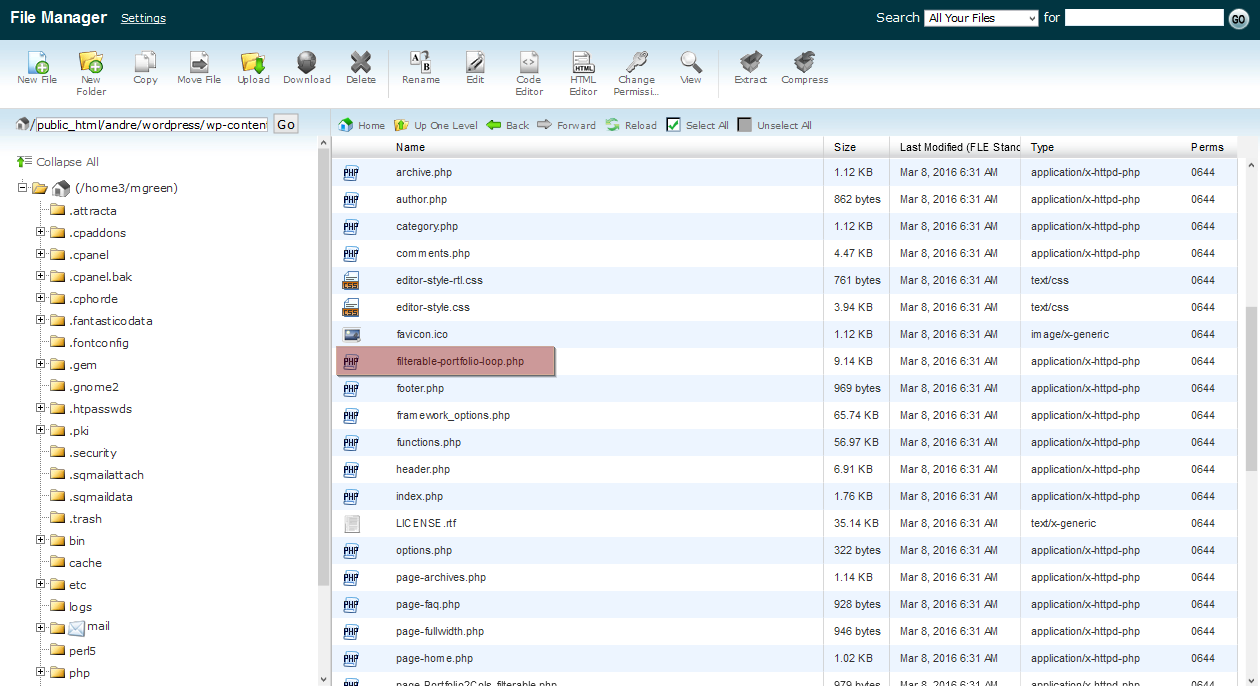
Using your FTP/hosting Cpanel File Manager navigate to /wp-content/themes/CherryFramework/ directory and find the filterable-portfolio-loop.php file there:
Copy the file to the /wp-content/themes/themeXXXXX/ directory (where XXXXX is your theme number) so you can perform changes to it without losing them in case the framework is updated in the future.
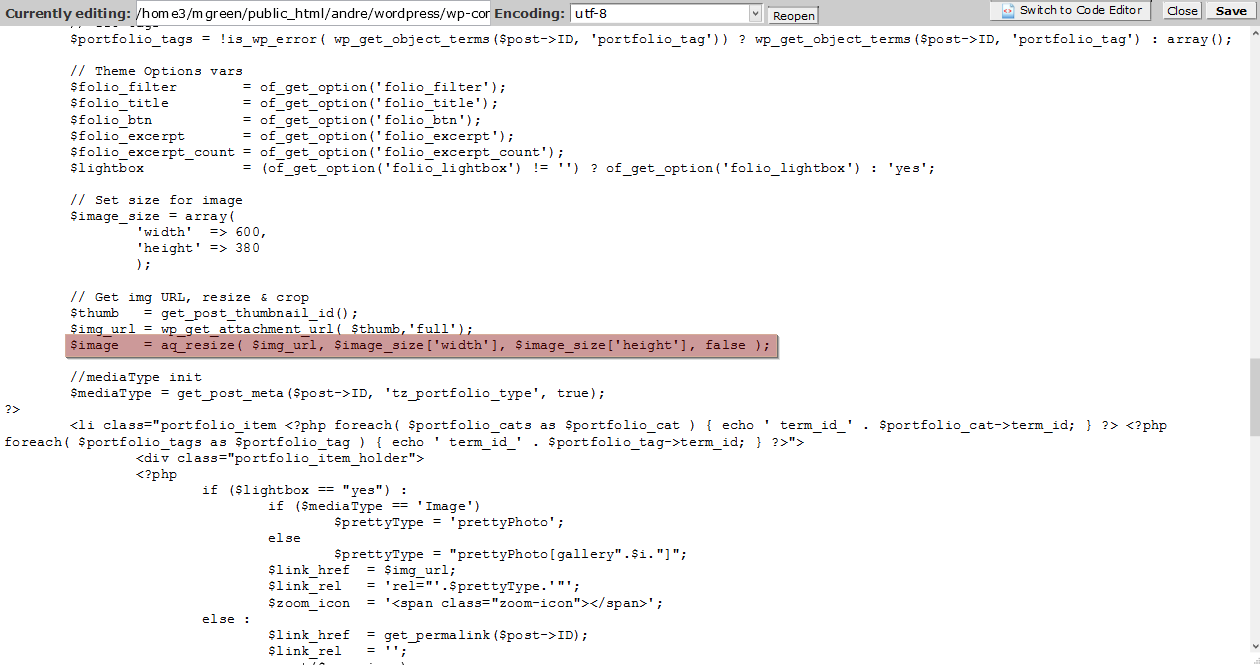
Open the file for editing and look for the following string of code:
$image = aq_resize( $img_url, $image_size['width'], $image_size['height'], true );
Replace it with the below code:
$image = aq_resize( $img_url, $image_size['width'], $image_size['height'], false );
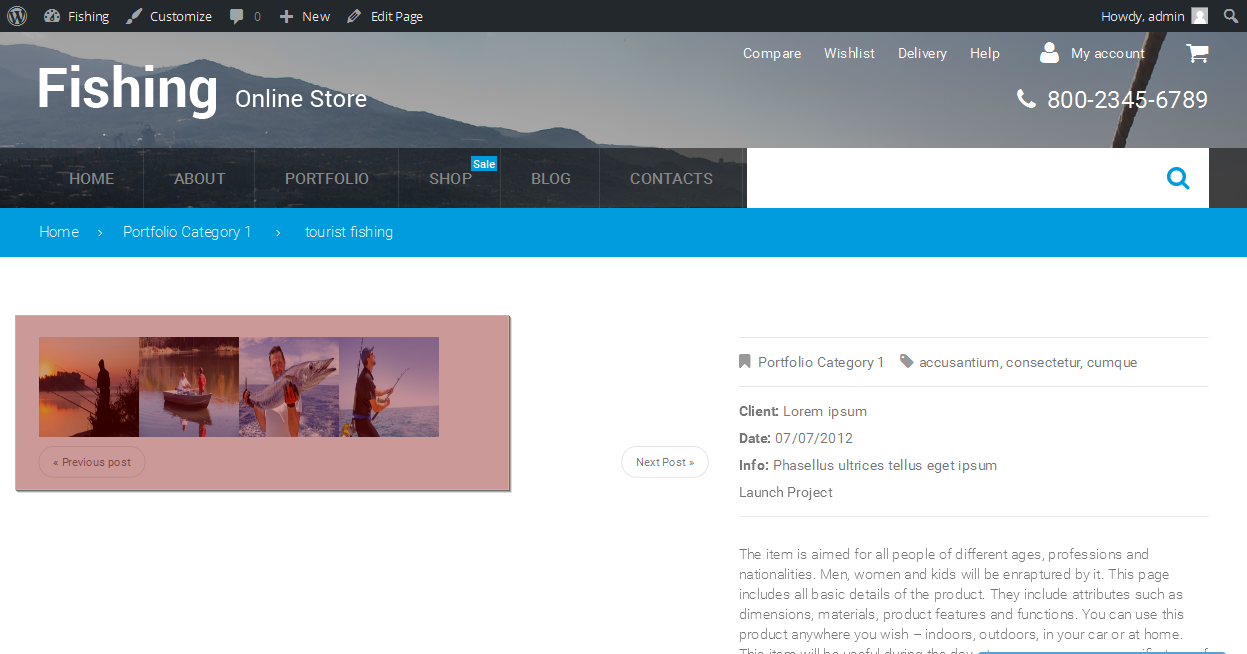
You can see the gallery thumbnails cropping is disabled now:
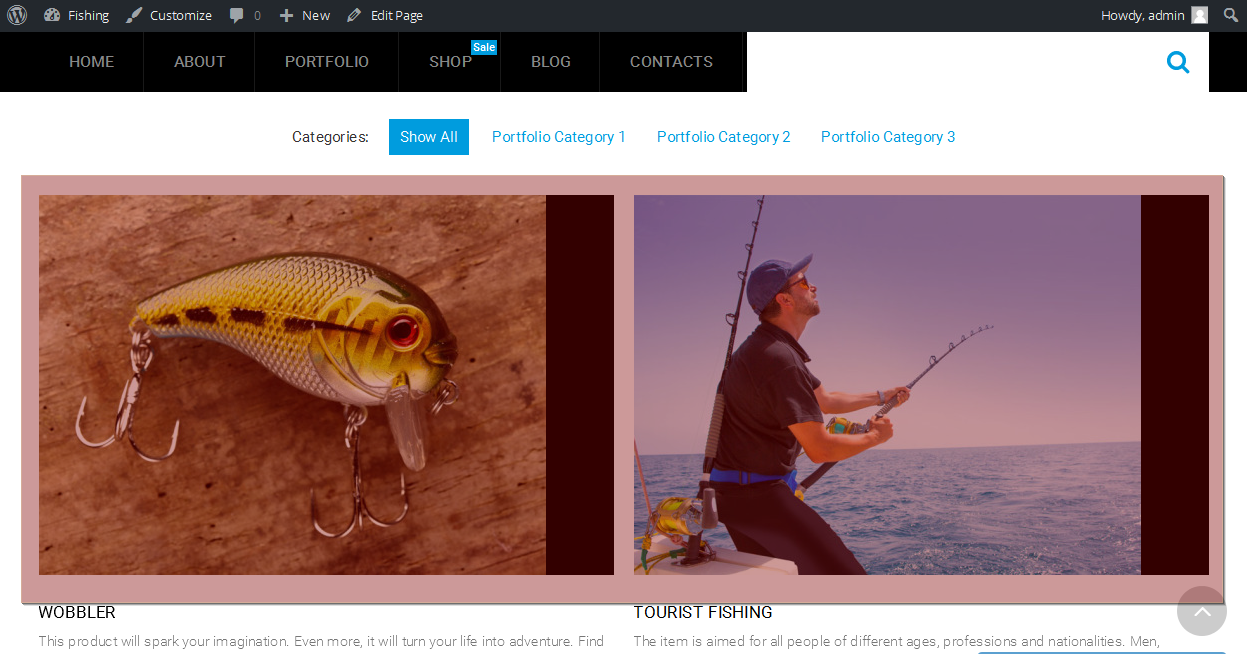
Note that you will need to re-upload them so they fit the image thumbnail container nicely.
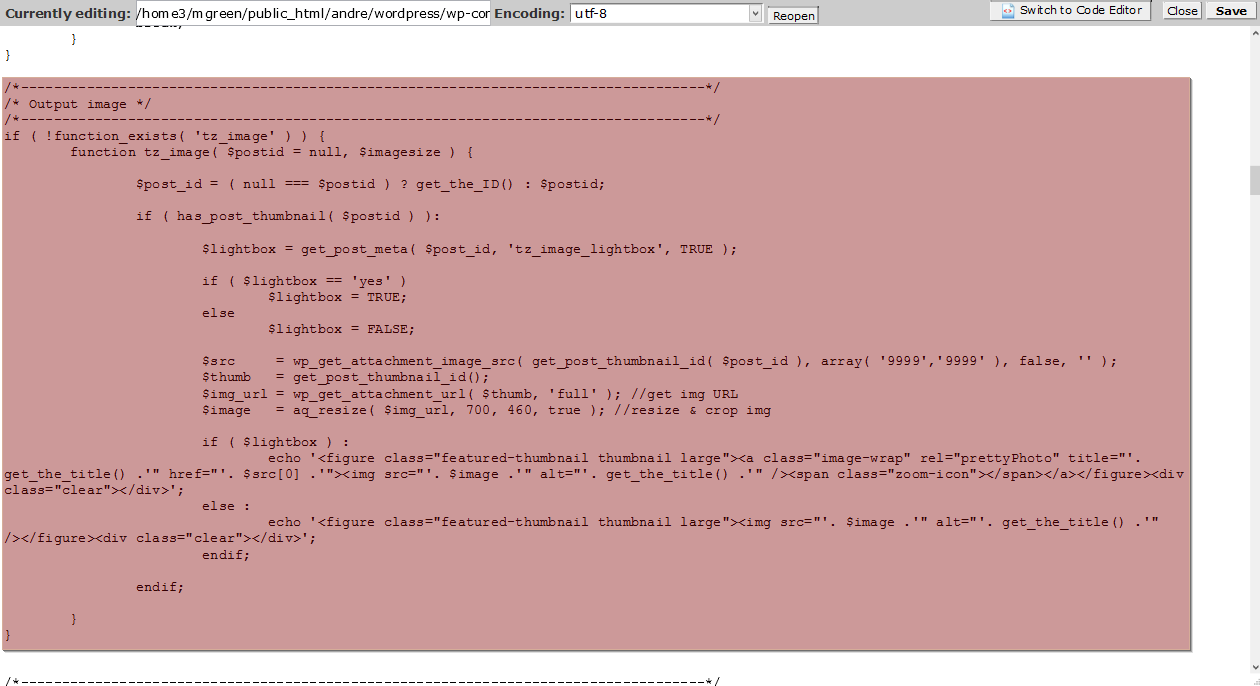
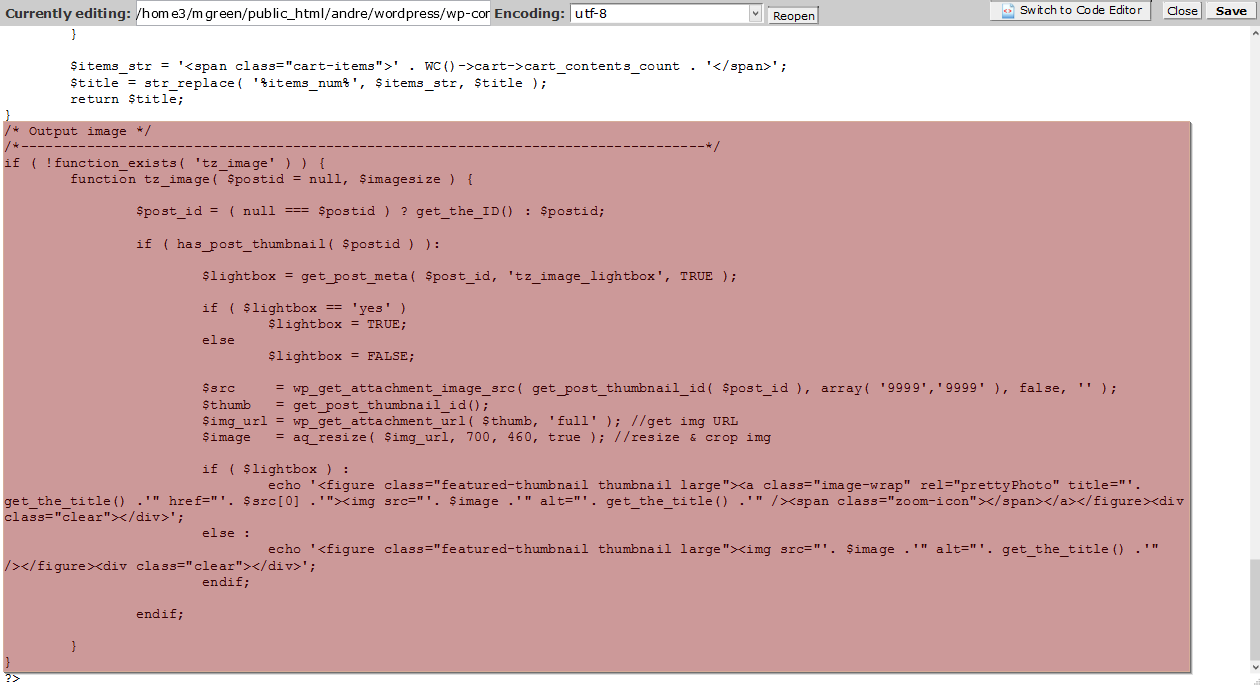
Navigate to /wp-content/themes/CherryFramework/includes/ directory to locate the theme-function.php file and open it for editing.
Find the code for the tz_image function approximately on lines 177–208:
Copy this code and paste it to the custom-function.php file under /wp-content/themes/themeXXXXX/includes/ directory (where XXXXX is your theme number) before the closing php tag:
Save the file and check your site to see changes.
Navigate to /wp-content/themes/CherryFramework/includes/ directory again and open the theme-function.php file for editing.
Look for the code on lines 211-317, copy it and paste to the custom-function.php file under /wp-content/themes/themeXXXXX/includes/ directory before the closing php tag:

Change the first width and height values in the function to change the grid gallery thumbnails size:
Save the file and refresh the page to see changes.
Make sure to re-upload gallery images in order to have the changes applied.
This is the end of the tutorial. You have learnt how to manage gallery thumbnails cropping and disable cropping for featured images in your Cherry Framework 3 template.
Feel free to check the detailed video tutorial below:
CherryFramework3. How to manage gallery thumbnails cropping and disable cropping for featured images