- Web templates
- E-commerce Templates
- CMS & Blog Templates
- Facebook Templates
- Website Builders
Drupal 7. How to manage translations
May 29, 2012
Once the new language is installed, you can add translations to the content of your site for visitors to choose from.
- In your Drupal admin panel, go to Modules and enable the one called “Content Translation”. Scroll to the bottom and click Save Configuration.
- Go to the Structure top menu and click Content types.
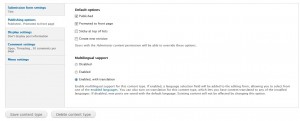
- Click on Edit next to the content type that keeps the text you want to add the translated version to. In the Publishing options check the Enabled, with translation option and click Save Content Type.
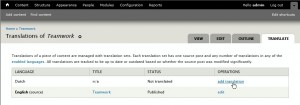
- Still logged as administrator, if you open the text connected to the content type from point 2 of this article from the front end of your site, you should notice a Translate tab added to it (next to View and Edit).
Click on it.
- On the next page, click on “add translation” next to the new language you added.
- To the Title and Body fields, add their translated versions. Click Save.
- Now your site visitors can click on the link named as the new language at the bottom of your text to open its translated version. Your translation is added to the content. You can also add a Language switcher block, and the corresponding text version will be switched by default.
Feel free to check the detailed video tutorial below:


