- Web templates
- E-commerce Templates
- CMS & Blog Templates
- Facebook Templates
- Website Builders
Drupal 7. How to work with JS slider
May 29, 2012
This tutorial is going to show you how to work with the JS slider on your Drupal 7 template and add more slides to it.
The slider will show up on your template exactly the same way you it does on the live demo preview only after you have installed your template with the sample demo profile.
Once you have done that, you can proceed to editing the existing slides:
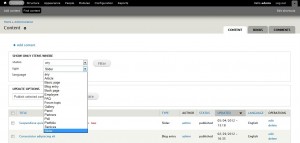
- To find them in your admin, go to the top Content menu. Under Show only items where select type -> Slider and click on “Filter”. This will open a list of all slides that come with your template sample data.
- Click on “edit” under the “OPERATIONS” column in order to edit each particular slide.
- On the next page, you will see the fields:
- Title where you can change the name of your current slide;
- Body where you can change the slider description text;
- Text format where you can choose the input format for your content;
- Upload slide. To change the current slider image, click on Remove.
- Click on Browse , navigate to your new image on your computer, select it, click Open. Click Upload;

- Menu Settings where you can add a menu tab pointed to the description text you added to the Body;
- URL Path Settings where you can manually insert an alternative URL by which this content you added to the Body can be accessed;
- Publishing options where you can enable/disable the slide on your site.
In order to add a new slide:
- Click on the Add content menu at the top.

- On the text page, click on Slider (use to create slides in content-slider).
- Specify the title for the slider content page in the Text field;
- Click on “Browse” under the Upload slide and navigate to the image on your computer. The image should have the same height and width as the rest of the slider images. If your new image is larger, it will be wrongly scaled/cropped.
- Make sure that the slide is published by checking the Published option in the Publishing options;
- Click on Save at the very bottom;
- Still logged as an administrator, go to the to page on your site where the Slider block is enabled and mouse over the top right corner of your slider image on the front page. You will see a menu. Click on it. Select “Edit View” to modify the display of your Slider view. Or, alternatively, go to admin -> Structure -> Views -> Slider.
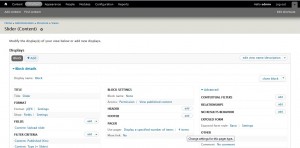
- On the next page, under Displays -> Pager -> Use pager: Display a specified number of items | # items click on # that stands for the current number of slides in your slider.
- In the lightbox window change the number and click on Apply (all displays);
- Click on “Save”;
- Open the front end of your site to preview the changes.
Feel free to check the detailed video tutorial below:


