- Web templates
- E-commerce Templates
- CMS & Blog Templates
- Facebook Templates
- Website Builders
Full Site. Quick Start Guide
September 12, 2012
Table of Contents
-
- Unzipping Template Package
- General Information and Template Structure
- Editing Static version of the template
- Static version software requirements
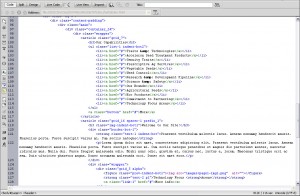
- Editing HTML and CSS files
- Editing PSD files
- Custom Fonts
- Editing Animated version of the template
- Flash version software requirements
- Installing custom fonts
- Editing FLA files
- Uploading template
Unzipping Template Package
-
After unzipping the template package you will find 3 folders: "screenshots", "site", "site_flash" and another zip archive called "sources_############.zip" that you need to unzip.
The sources package contains all source files for the template. The package is password protected and can be extracted only with WinZip (Windows OS) and StuffitExpander (MAC OS).
You can download both application for free using the free trial options:
While unzipping “sources_############.zip” archive you will be prompted to enter a password, which you can find at your Product Download Page (open the link in the email you received from our company).
As soon as you are done with the unzipping the template you should now have 4 folders in total: "screenshots", "site", "site_flash", "sources"
General Information and Template Structure
-
Full Site template includes 2 versions of the same design: one with a Flash (animated) header, and the other one – with HTML (static) header. Refer to the corresponding section of the instructions below depending on which version of the template you would like to use:
- HTML version (non-animated header)
- Flash version (animated header)
The following scheme displays the Full Site template files structure.
- “screenshots” – contains screenshots of the template.
- “site” – contains the .HTML files and style.css file (a non-animated version of the template)
- – “images” – contains all the images used in .HTML files;
- “site_flash” – contains the .HTML files and style.css file (an animated version of the template).
- – “flash” – contains .SWF flash movie(s) used in .HTML files.
- – “images” – contains all the images used in .HTML files.
- “sources” – contains source files
- – “flash” – contains .FLA source file(s).
- – “fonts” – contains all the fonts used in .PSD and .FLA files – True Type (.TTF), Adobe fonts (PFB\PFM), or both.
- – “psd” – contains Adobe Photoshop .PSD files.
Editing HTML (Static) version of the template
-
Static version software requirements
Adobe Dreamweaver (download free trial). Used to edit the .HTML and .CSS files
Adobe Photoshop CS or later (download free trial). Used to edit .PSD filesWorking with the static version of the template you need to edit the .html files, .css files and .psd files.
Editing HTML and CSS files
All editable HTML files are located in “site” folder of the template package (index.html, index-1.html,index-2.html, etc.) Each index-#.html file represents a single template page.
To open .html file with Adobe Dreamweaver application, you should right mouse click on the file, and in the context menu select Open with -> Adobe Dreamweaver. When the file is opened you can start editing it.
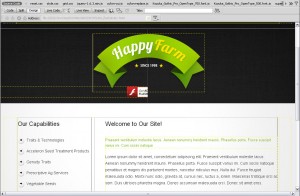
Adobe Dreamweaver is a recommended application as it allows you to edit the HTML files content in visual mode. You don’t even need to work with the HTML code itself. Open any .html file and click the Design button at the top of the screen to switch to visual mode.


Feel free to check the detailed text and video tutorials on how to edit HTML files with Adobe Dreamweaver
CSS files are used to change the template appearance like fonts (font-family, font-size, color etc), backgrounds, column width values etc. You can edit the css files with Adobe Dreamweaver application. Detailed tutorials on how to work with the CSS files are available at our online help center.
Editing PSD files
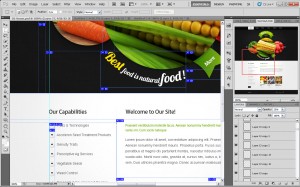
PSD files are located in the "sources/psd" folder in your template package. PSD are the source files of the template design. They are divided into layers so any part of the template design can be changed.
During the customization process you can refer to the PSD files in order to change the images used in the content pages or in the design.

You can learn more about working with photoshop checking the detailed tutorials
Custom Fonts
Some templates may contain the non-default fonts used in the design. Be default the internet browser can render only fonts that are installed to your operating system. In other words if your website design uses some custom fonts and these custom fonts are not installed on your website visitor’s computer, custom fonts won’t be displayed. Default fonts will be rendered instead. That’s why web developers should look for some alternative solutions. In our templates custom fonts can be embedded using two techniques: Cufon Java Script fonts and Google Web Fonts.
Cufon Java Script fonts
Cufon generated fonts are created using Java Script. By default the cufon fonts support only Latin characters. If you want to use custom fonts with your language characters please check the tutorial on how to work with cufon generated fonts.
Google Web Fonts
Custom fonts can also be embedded into the HTML page using the Google Web Fonts service. You can learn more checking the tutorial on how to work with Google web Fonts.
These methods can only be used with static HTML content and can’t be applied to the Flash animation.
Editing Animated (Flash) version of the template
-
Flash version software requirements
Adobe Dreamweaver (download free trial). Used to edit the .HTML and .CSS files
Adobe Photoshop CS or later (download free trial). Used to edit .PSD files
Adobe Flash (download free trial). Used to edit .FLA filesWorking with the Animated version of the template you’ll need to edit the .html files, .css, .fla and .psd files.
The only difference between the animated and static versions of the template is the flash header in the animated version. All other customization steps (working with html, css and psd files) are the same. Please check the customization instructions from the Editing Static version of the template part of this manual.
Installing custom fonts
All custom (non-standard) fonts used in the animated part of the template should be installed into your system. This will allow you to edit the custom font text in the flash animation source files.
Custom fonts files can be stored in the “sources/fonts” folder of your template package. In case you don’t have the “sources/fonts” folder in your template package search for the fonts_info.txt file in the template package root. This file contains links to websites where the custom fonts used in flash animation can be downloaded.
When you are done with the fonts download you need to install them into your operating system. Please check the detailed tutorial on how to install fonts.
Custom fonts in flash animation are saved in the final SWF movie so they will render fine on any computer regardless of the installed fonts availability
Editing FLA files
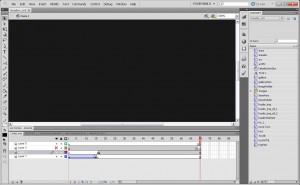
As soon as you are done with the fonts installation you can proceed with the flash document customization. Feel free to check the detailed text and video tutorials on how to work with flash files

Uploading template
-
In order to make your site “live”, you need to upload specific template files from your local computer to your hosting server.
Depending on the version of the template you selected (Flash or HTML) you should upload content of the corresponding folder
- If you customized HTML (static) version of the template upload all the content of “site” folder
- If you customized Flash (animated) version of the template upload all the content of “site_flash” folder
Please note: your website root depends on the directory structure on your hosting server. If you upload the "site" or "site_flash" folder into your server the root to your website will be http://your_domain_name/site or http://your_domain_name/site_flash. To avoid this and make the website root http://your_domain_name/ please open the "site" or "site_flash" folder and upload the folder content.
This video tutorial will show you how you can upload files to your host using free FTP software FileZilla (you may use any other software you like, or upload directly via Hosting Cpanel)
Please do not upload the sources directory or any of the template source files to the hosting server.
Conclusion
-
We hope this manual was useful for you and helped you to install, edit the template and to resolve your issues.
More instructions are available from the following links:


