Categories

How to install phpMyAdmin tool and limit it’s access to specific database

Aaron Liberman July 13, 2012
Rating: 4.5/5. From 4 votes.
Please wait...
  1. Download phpMyAdmin tool package at http://phpmyadmin.net
  2. Unzip it using WinZip or any other unzipping software you like and upload to your hosting account using any FTP manager you like.
  3. Create config folder in main phpMyAdmin folder and ensure that your web server has read and write access to it.
  4. Open http://your_host.com/path_to_phpMyAdmin/setup/ in your browser (substituting the correct path information) and click New Server button
  5. Fill in Server hostname field. Please contact your hosting provider and ask them which hostname you should use to connect to your database.
  6. Select Authentication tab at the top.
  7. Select http from ‘Authentication type’ drop-down menu. ‘User for config auth’ field should be blank. Fill in ‘HTTP Realm’ field. The message will be displayed to the user when logging in to phpMyAdmin and click Save button at the bottom.
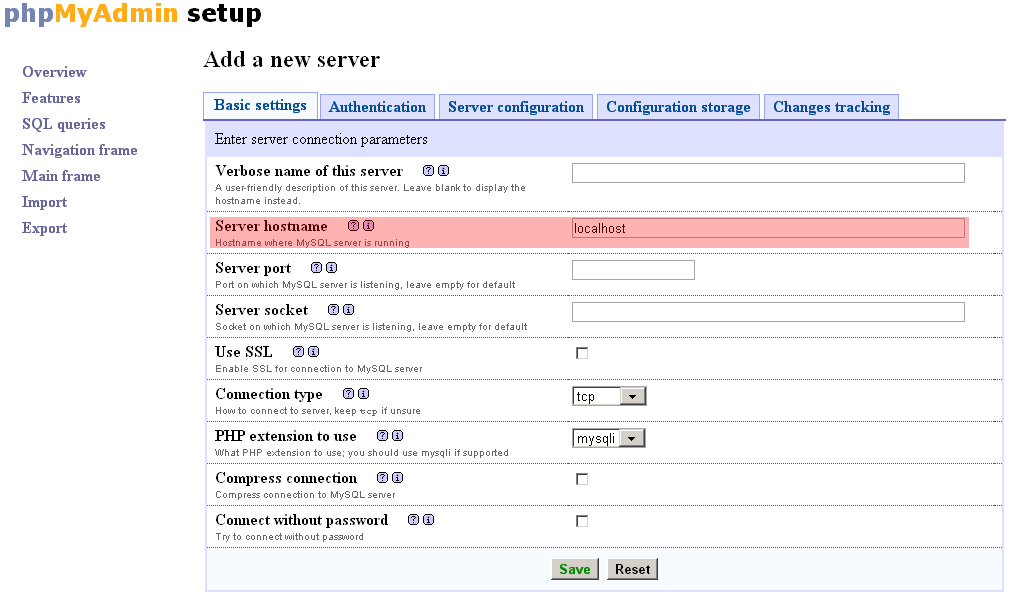
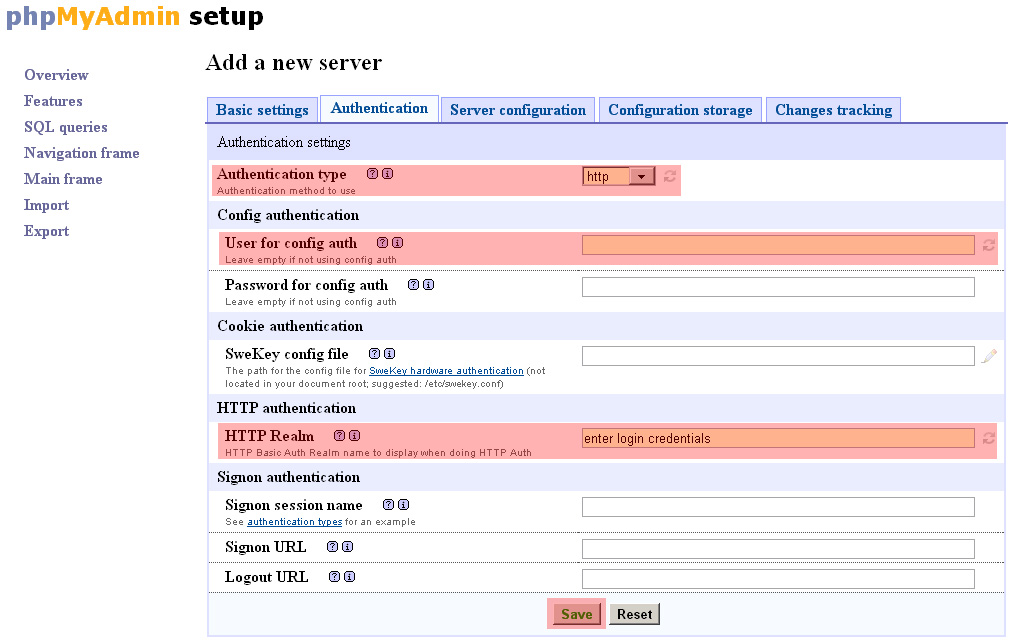
  8. You should see the following screen

  9. Click Save button to save config file.
  10. Navigate to config folder on your FTP and move config.inc.php file to main phpMyAdmin folder. Delete config folder and rename setup folder.
  11. Open http://your_host.com/path_to_phpMyAdmin in your browser (substituting the correct path information)
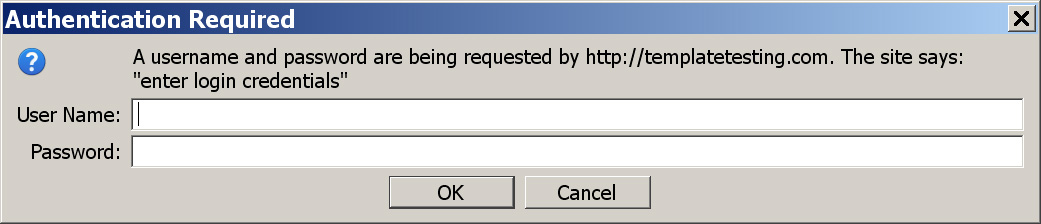
  12. You should see similar form which is asking for User Name and password

  13. Login using your database username and password.
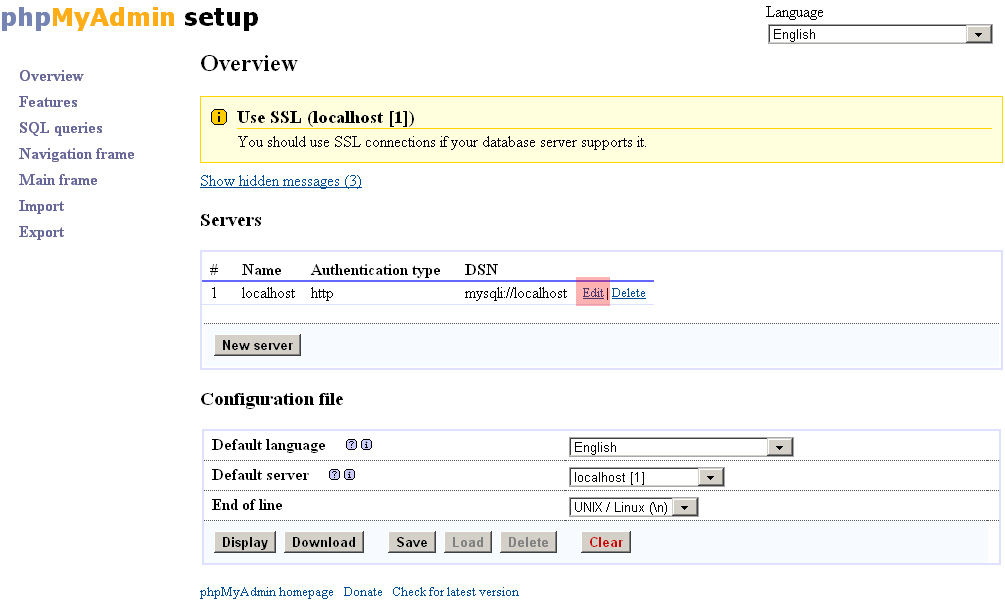
  14. Feel free to manage your databases.

  15. To display one or selected set of databases you should create config folder in main phpMyAdmin folder and open http://your_host.com/path_to_phpMyAdmin/setup/ in your browser (substituting the correct path information).
  16. Click Edit button which is highlighted on the screenshot.
  17. Select Server configuration tab at the top.
  18. Type the names of the databases you would like to display in your phpMyAdmin to Show only listed databases field (one on a line). Note: escape _ sign, e.g. use ‘my\_db’ and not ‘my_db’.
  19. Click Save button
  20. Click Save button highlighted on the following screenshot to save configuration file.
  21. Navigate to config folder which is located in your main phpMyAdmin folder and move config.inc.php file to main phpMyAdmin folder.
  22. Refresh phpMyAdmin in your web browser. You should see the databases you have added to Show only listed databases field.
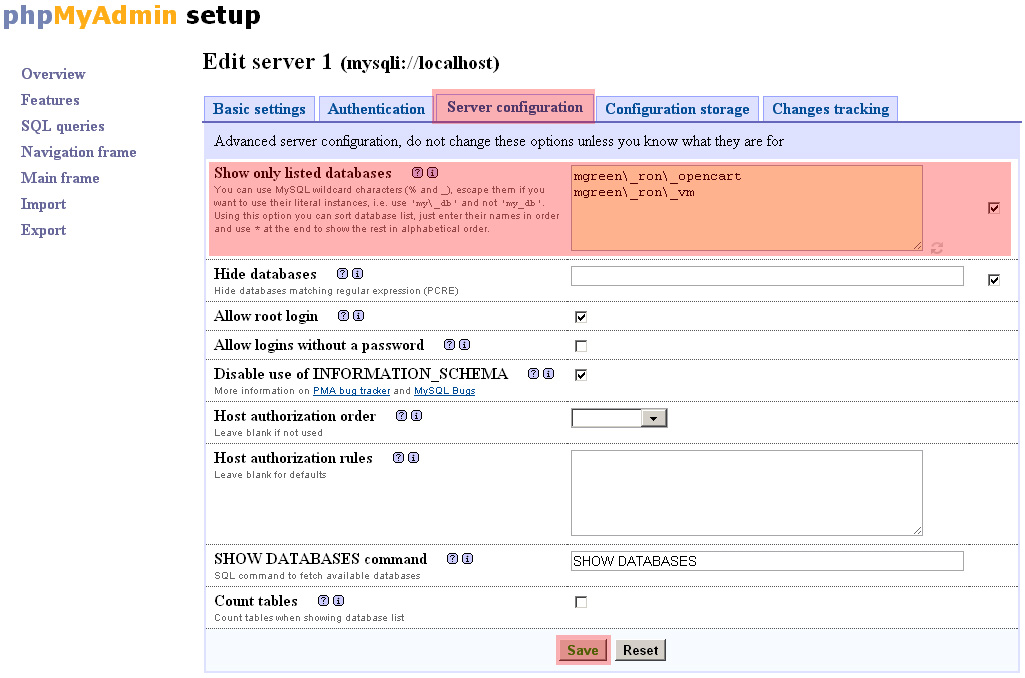
  23. Feel free to check the detailed video tutorial below:

    How to install phpMyAdmin tool and limit it’s access to specific database
This entry was posted in Hosting FAQ and tagged access, install, limit, phpMyAdmin. Bookmark the permalink.

Submit a ticket

If you are still unable to find a sufficient tutorial regarding your issue please use the following link to submit a request to our technical support team. We'll provide you with our help and assistance within next 24 hours: Submit a ticket