


- Web templates
- E-commerce Templates
- CMS & Blog Templates
- Facebook Templates
- Website Builders
FAQs
General Tutorials
Featured templates
MonsterONE Subscrioption


If you don’t have access to automatic WordPress updates or you want to control any single update on your own, then you need to follow WordPress manual update process. In order to get your WordPress engine easily updated you need to perform the following steps:
Step 1. At the very beginning of updating process it is required to backup your previous engine files, you may change your mind after you install a new version and want your site back to the way it was before. Feel free to check the detailed instructions on how to backup all of your files in your WordPress directory and your .htaccess file below: https://codex.wordpress.org/WordPress_Backups
Please notice: the upgrade process will affect all files and folders included in the main WordPress installation. This includes all the core files used to run WordPress. If you have made any modifications to those files, your changes will be lost.
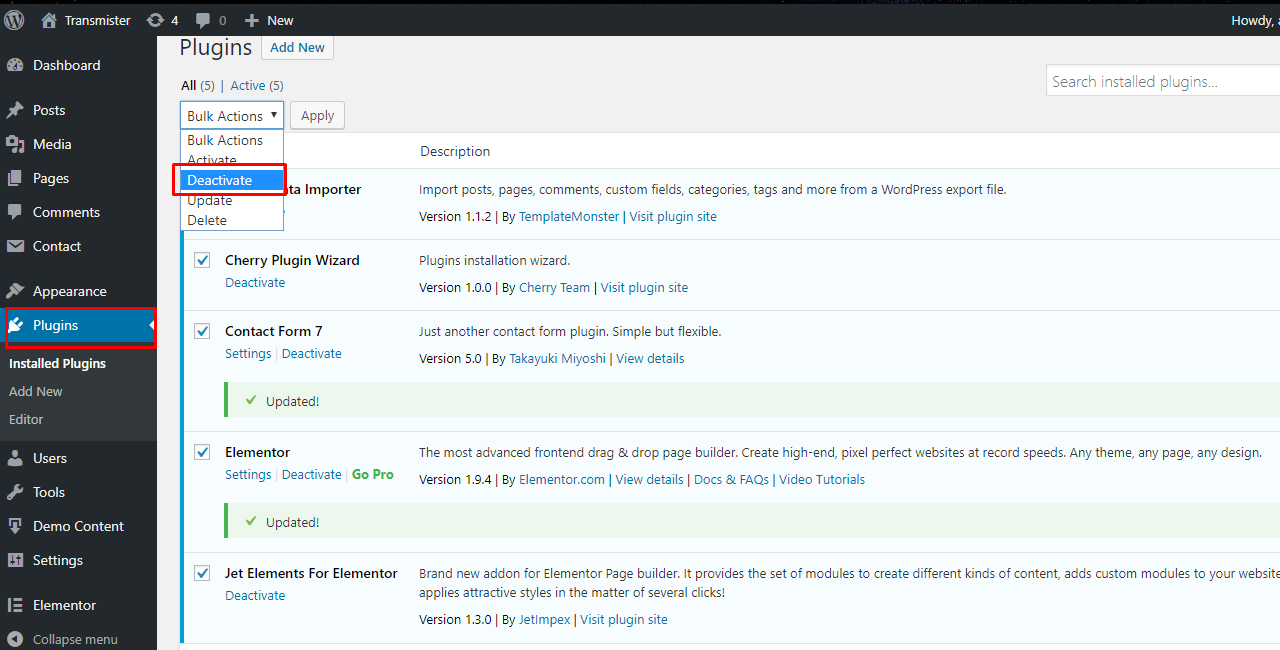
Step 2. To get WordPress updated without troubles, we would also recommend to deactivate your plugins under Plugins tab in your dashboard:
Step 3. Once backup is done, you need to download a fresh copy of latest WordPress software from WordPress.org to your desktop and extract the zip archive. Inside the zip archive, you will find a folder named WordPress.
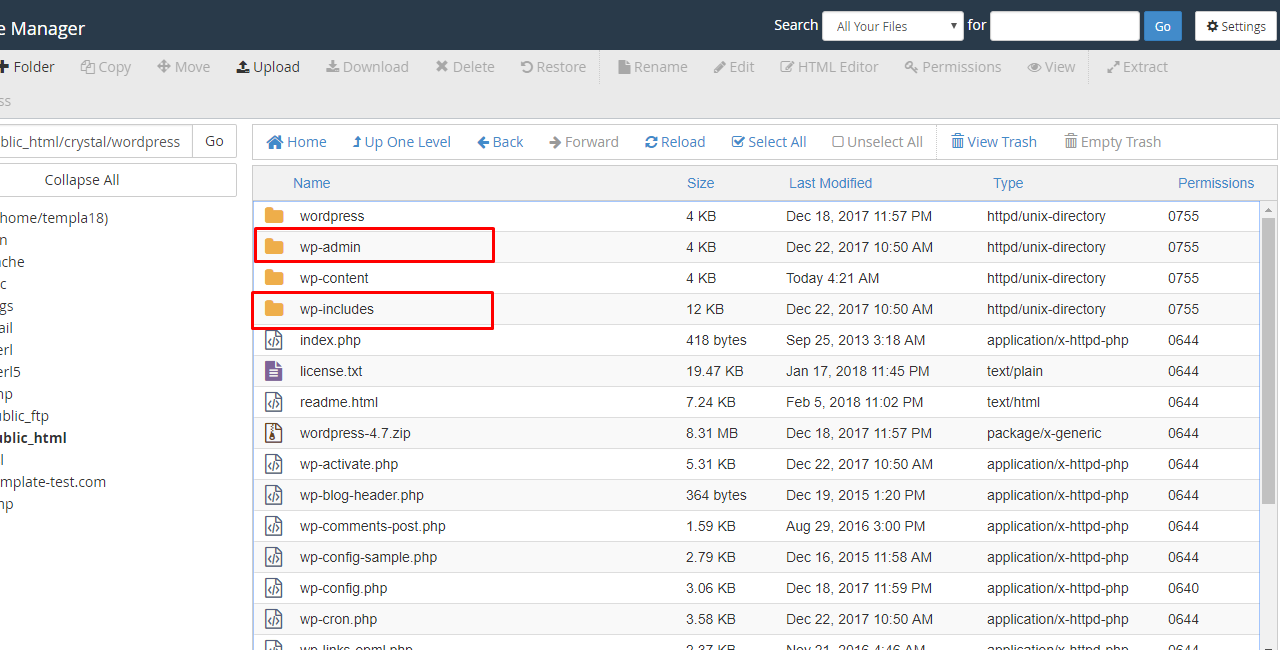
Step 4. Using FTP or your shell access, delete the old wp-includes and wp-admin directories on your web host. And then you need to upload the new wp-includes and wp-admin folders in place of the previously deleted directories:
Step 5. Upload the individual files from the new wp-content folder to your existing wp-content folder, overwriting existing files. Do NOT delete any files or folders in your existing wp-content directory (except for the one being overwritten by new files).
Make sure that you only copy the files from inside this directory, rather than replacing your entire wp-content directory. This is where your themes and plugins live, so you will want to keep them. If you have customized the default or classic themes without renaming them, make sure not to overwrite those files, otherwise, you will lose your changes.
Step 6. You should replace all the old WordPress files in the root directory (such as index.php, wp-login.php and so on). Furthermore, take a look at the wp-config-sample.php file, to see if any new settings have been introduced that you might want to add to your own wp-config.php.
Step 7. Visit your main WordPress admin page at /wp-admin. You may be asked to log in again. If a database upgrade is necessary at this point, WordPress will detect it and give you a link to a URL like http://example.com/wordpress/wp-admin/upgrade.php. Follow that link and follow the instructions. This will update your database to be compatible with the latest code.
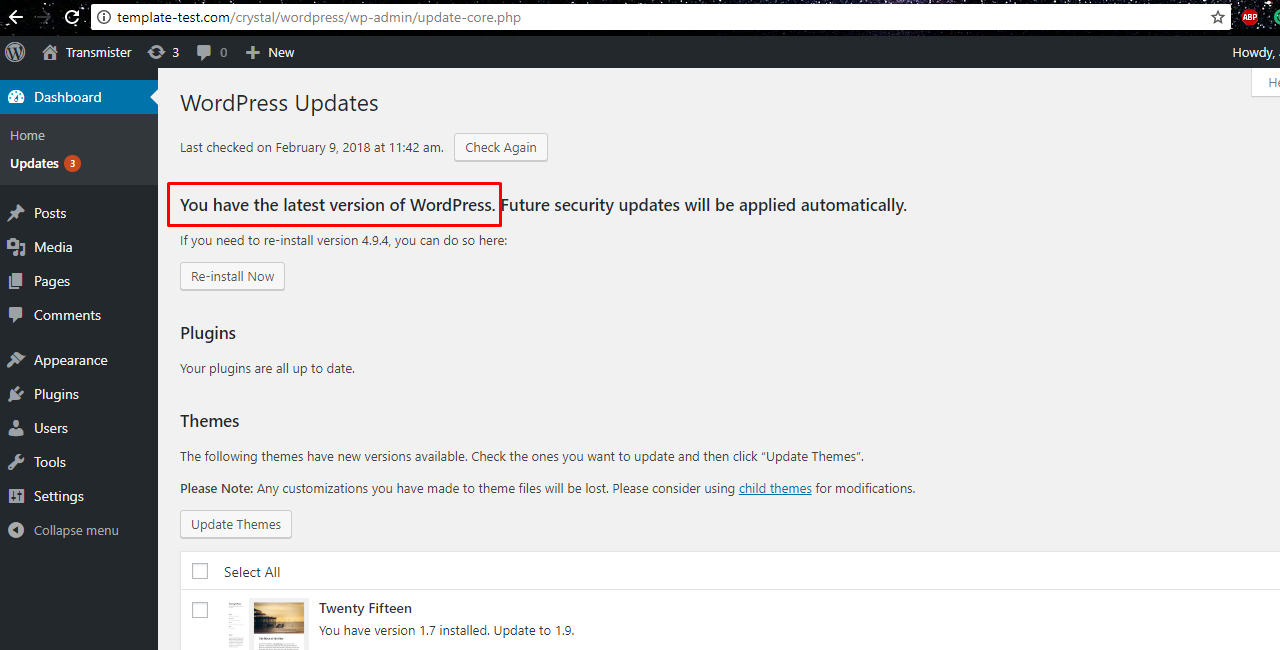
Step 8. Your WordPress engine has been updated:
Reactivate plugins in case you disabled them on step 2. If you have issues with logging in, try clearing cookies in your browser.
Now you’ve got the hang of how to upgrade WordPress engine manually, so you can play around with the latest version of WordPress.
We hope this step-by-step guidance was useful for you. Feel free to check our blog to learn more tweaks on how to manage your WordPress website as a guru of the web design!
Browse our brand new WordPress Templates and extend the functionality of your website.
