


- Web templates
- E-commerce Templates
- CMS & Blog Templates
- Facebook Templates
- Website Builders
FAQs
General Tutorials
Featured templates
MonsterONE Subscrioption


This tutorial is going to explain you how to manage K2 category settings in Joomla 2.5.x templates.
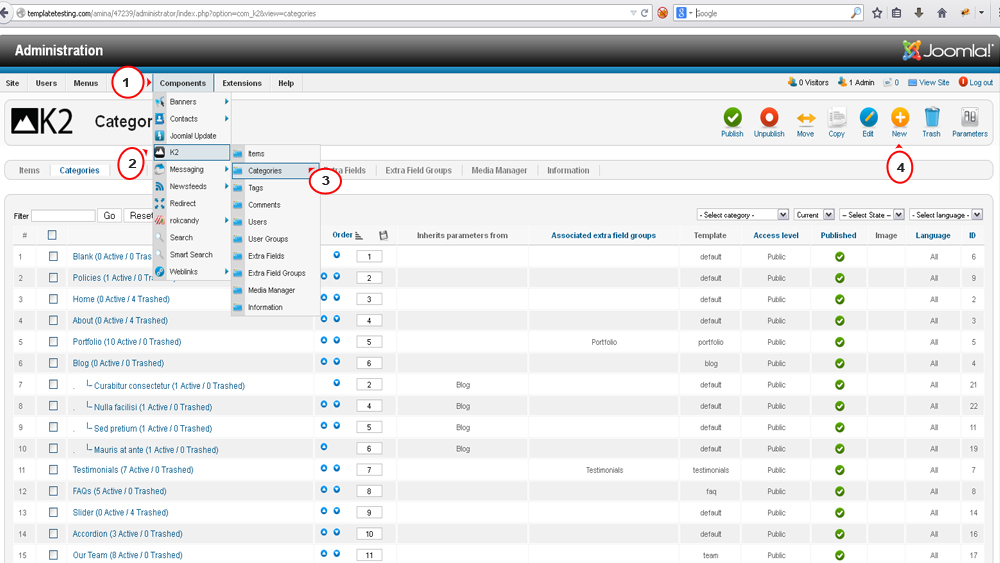
In your Joomla admin panel go to Components -> K2 -> Categories menu. In this section you can edit existing K2 categories or add new ones.
Let us add a new K2 category. To create a new K2 category, click the orange New button in the top right menu.
A new window will appear. Enter the following details:
Title. This is the category title.
Title alias (URL). This is the url display, for example, www.mysite.com/test.
Parent category. If you want to create a subcategory, select a parent category for it in the drop-down list.
Inherit parameter options from category. This is a very useful feature. If you have already configured the layout and display options of another category, you can inherit that category settings and apply them to this new category. This can save you a lot of time during the configuration process. Plus, if you update the inherited category options, they automatically apply and update here too.
Associated Extra Field Groups. Leave blank if you haven’t set this up yet.
Published. Set to “Yes” to activate the category.
Access level. You can make this category open for all users or limit access level.
Language. Select “All” to display category for all languages. You can also create specific categories for different languages.
Description. If you want to have a category description that informs viewers about the category content, enter the details in the Description field.
Image. If you want to display an image for this category, click the Image tab and upload an image.
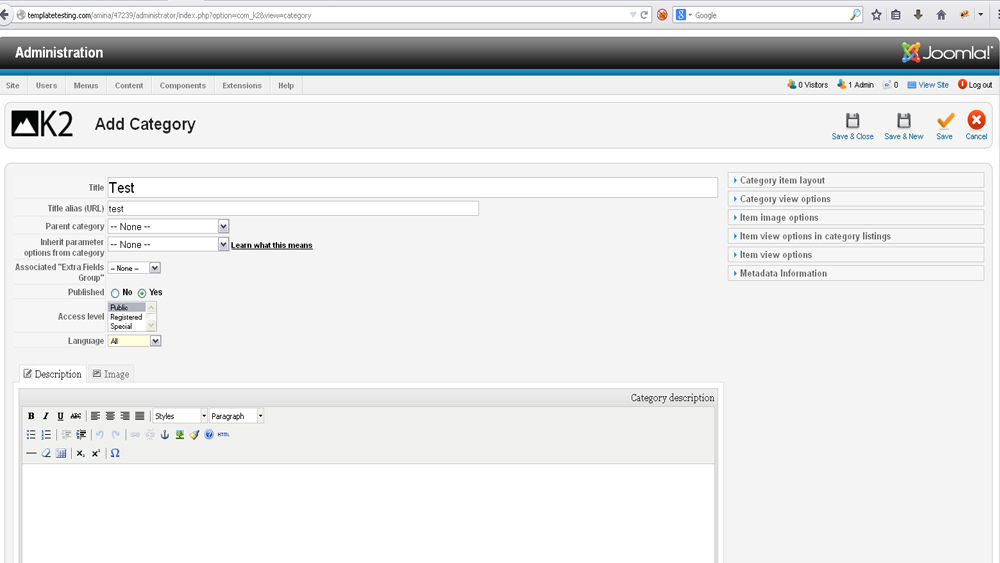
Click Save button in the top right menu to save the changes.
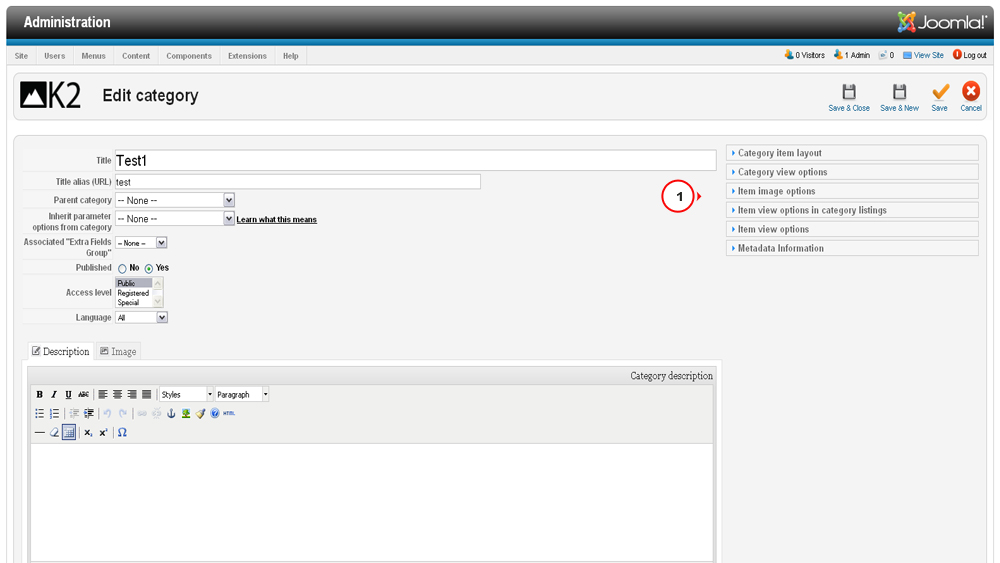
These options will be enough for the new category. However, if you want to configure the category layout and display options, check K2 category layout settings in the right column. The only real way to understand what each of the setting do is to have a little play around with them and see if you like the display at the front end.
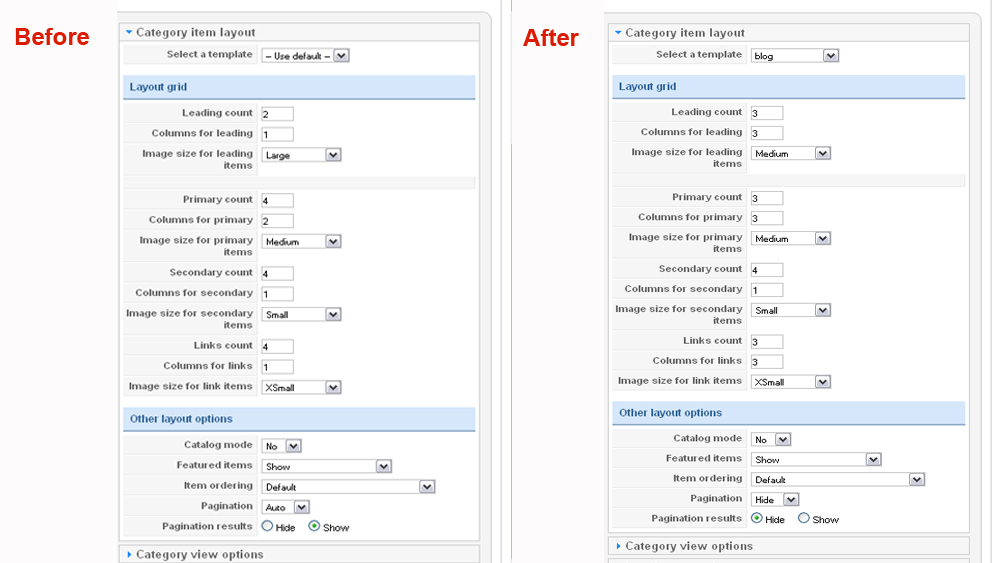
Category item layout:
Select a template that will define the general category layout. Each template has its specific styles.
There are three item lists: leading, primary and secondary. This allows to customize such variables as image sizes for different item listings within a category. You can set the leading number of items, as well as a primary one.
Set the number of Links to display in the Links area of the page.
Hide or Show Pagination support. Pagination option allows to add page links at the bottom of the page to navigate to additional pages. It is required if the articles do not fit one page.
We performed some changes in the Category item layout settings. You can see the results on the following screenshots:
Before:
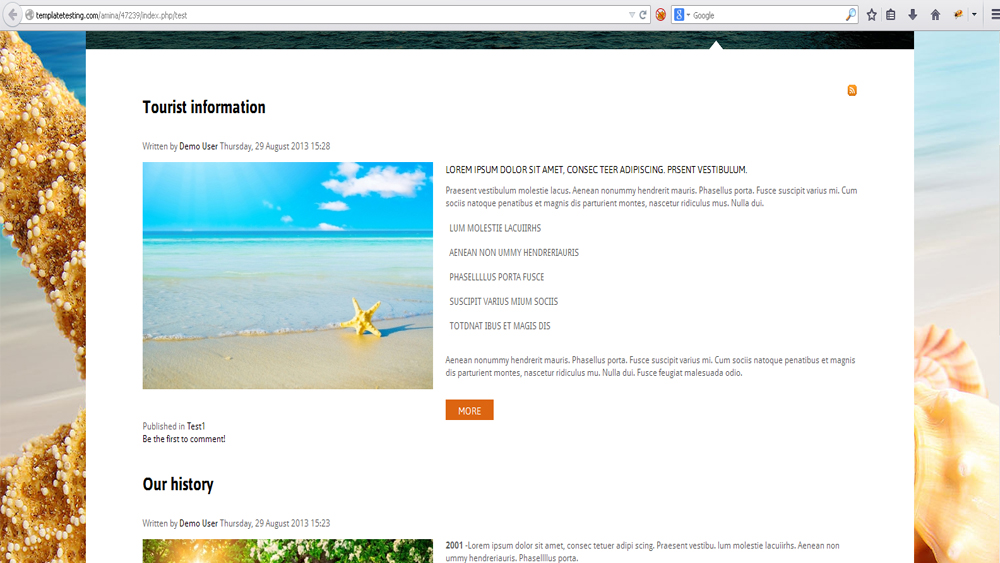
After:

Category view options. Here you can set whether to show the category Title, Description, Image and RSS feed and configure sub-categories settings.
Item image options. Here you can set the item image sizes that will overwrite the component’s general parameters.
Item view options in category listings. Here you set how items are displayed when you view the category items as a list. You can set to show the Item Title, Link, Image, Author details, “Read more” link, etc. including whether to allow visitors to leave comments or not.
Item view options. Here you set how the full item display will look and what functionality it will have, for example, Date and time, Social sharing, Font resizer, Author details and other related items created by the same author.
We performed some changes in the Item view options settings. You can see the results on the following screenshots:
Before:

After:


Metadata Information. This is the last and one of the most important fields you need to complete.
Description: Write a brief description about the items saved in this category.
Keywords: Add your keywords separated by commas.
Robots: In the robots field add: index, follow.
Author: In the Author field add your name or company name.
This is the end of the tutorial. Now you know how to manage K2 category settings.
.jpg)
