


- Web templates
- E-commerce Templates
- CMS & Blog Templates
- Facebook Templates
- Website Builders
FAQs
General Tutorials
Featured templates
MonsterONE Subscrioption


Hello, this guidance will explain you how to manage Swiper Slider module in Joomla template.
Swiper is most modern fully responsive slider, integrated to our Joomla-based templates to make your site appearance truly amazing.
Let us check what kinds of slides can we add to the site slider using this module. First of all, it might be a regular animated slide with an image and a caption on it:

But it can be also a slide with the background video or a configurable slide with the parallax image background. There’s actually a vast of options to choose from. Let’s learn how to use them.
First, open your site admin panel and navigate to the Extensions -> Modules section.
Use the Search field or the Search tools dropdown to locate your slider.
We will filter the ‘Swiper’ modules with the help of ‘Search tools’ dropdown, ‘Filter by type’:

As you can see, this template has two Swiper slider modules, added by default. Let’s edit the Home slider. Click on a title to open the module for editing.
The first tab allows you to edit general module settings. Here you can select the category for your slide articles, choose whether to display the slides’ titles and images, set the titles and links, etc. You may also define the number of slides to show up at this section:

The Swiper slider module has the regular modules’ settings, such as Menu Assignments (here you can select what pages include the slider), Module Permissions (you may select group of site users who can see the module), Advanced (feel free to define slider bootstrap size and CSS classes here). They can be set at the respective tabs.
As to the unique module’s settings, they are available at the Swiper Settings tab. Here you can add specific effects to each slide if needed. Let’s take a closer look on this section:
You may select the slide to apply the effect to. E.g., with ‘1’ entered you will add the effect to the first slide.
In our case slide #3 has the parallax effect applied to the background image. You may also select other options from the dropdown or specify the parallax settings in a respective section below:
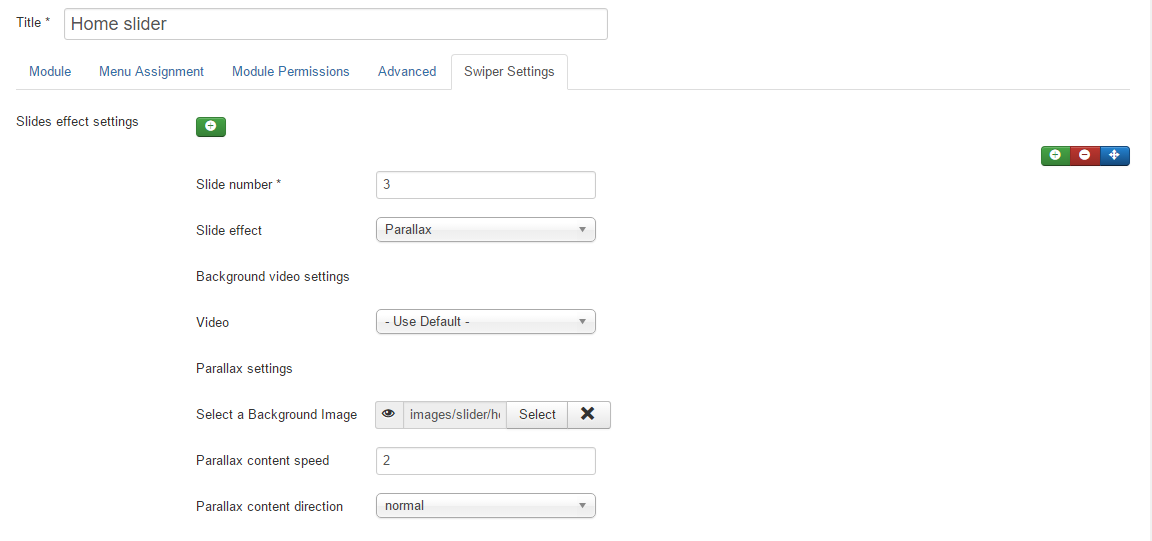
Slide #2 is the video slide, you may select its video file from your site media library (upload file to the Content -> Media Manager).
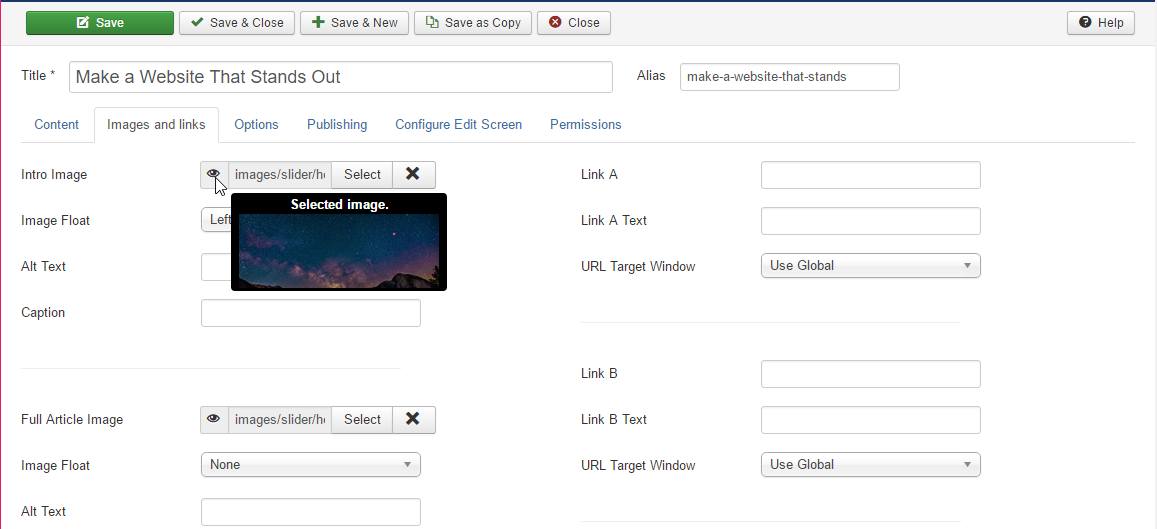
Slide #1 has no specific effects added, so its image is set at the slider article itself (Content -> Articles -> Slider Category -> Slide #1 -> Images&Links tab).
Below are the general slider settings. You may select if the slider starts automatically, choose the sliding speed, set sider height, use different kinds of animation and so on.
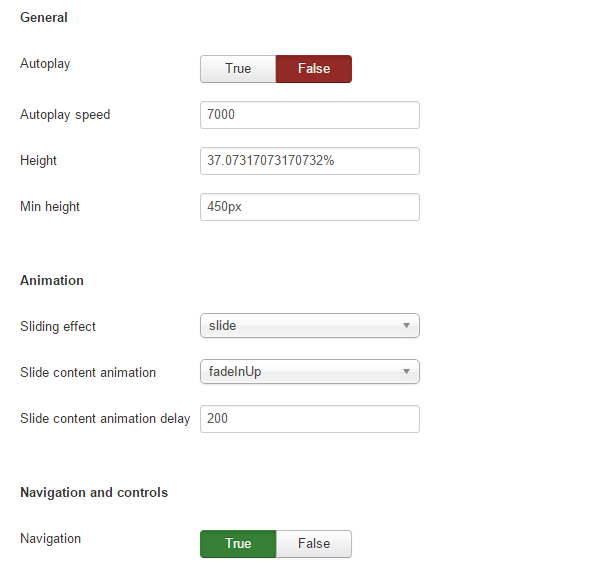
As to the ‘Navigation and controls’ section, each option here has the ‘Yes/No’ or ‘True/False’ trigger that allows you to configure the desirable view for your slider in a few simple clicks.

Feel free to try different options here to configure slider up to your needs. Then save the module and check the result on site (refresh it to see the edits, you might also need to clear your browser cache).
That’s all for today, now you are one step closer to the greatest site ever. Stay tuned!
Feel free to check the detailed video tutorial below:
Joomla 3.x. How to manage Swiper Slider (based on Jumerix).jpg)
