


- Web templates
- E-commerce Templates
- CMS & Blog Templates
- Facebook Templates
- Website Builders
FAQs
General Tutorials
Featured templates
MonsterONE Subscrioption


Our Support team is ready to present you a new tutorial that will become an indispensable guide for setting up and working with the booking form in JS Animated templates and make this process easy and effortless.
JS animated. How to activate and work with booking formUse FTP or Cpanel to connect to your server. By default, template files are stored inside the site folder.
Modify index.html file located in your site root directory. Using the Find and Replace tool (CTRL+F) search for the ownerEmail. You will locate code for your booking form that way. Modify line as follows:
$(function (){
        $('#bookingForm').bookingForm({
            ownerEmail: '#'
        });
    })
    $(function() {
     $('#bookingForm input, #bookingForm textarea').placeholder();
    });
Replace # with your email. Save file and upload it back to your server.
You can change booking form fields titles. For example, let’s change Your Name field title:
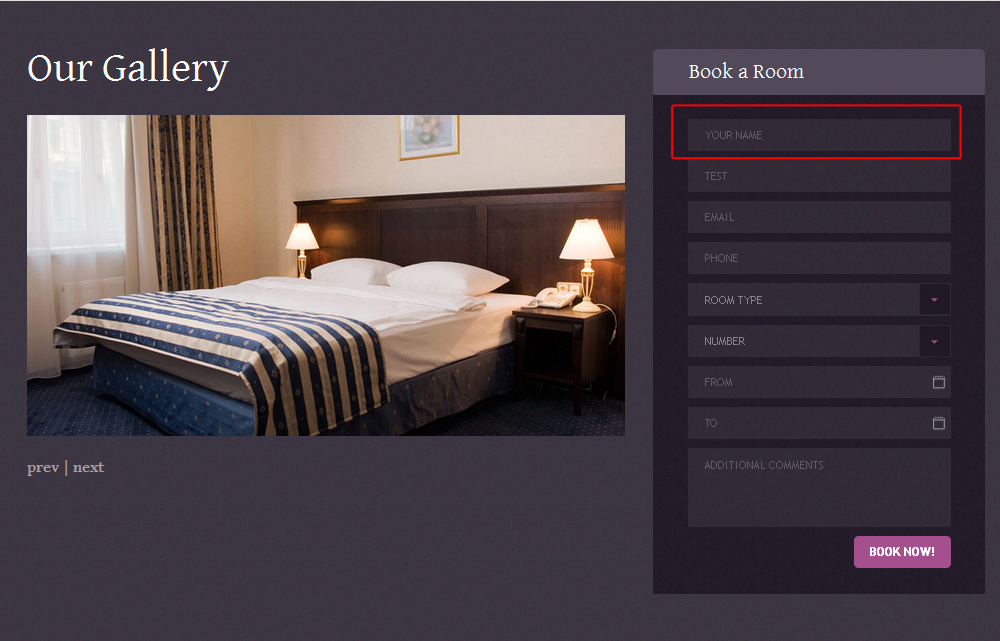
To change that title, modify index.html file used for the page with the booking form. Use the Find and Replace tool (CTRL+F), search for the title you would like to change. You will locate HTML code as follows:
<div class="tmInput">
	<input name="Name" placeHolder="Your Name" type="text" data-constraints='@NotEmpty @Required @AlphaSpecial'>
</div>
Replace Your Name with your new title.
Open the .html file which represents page with the booking form in Dreamweaver or any HTML editor. Copy HTML code for one of your booking form fields.
For instance, the code for the “Name” field looks as follows:
	<div class="fl1">
		<div class="tmInput">
			<input name="Name" placeHolder="Name" type="text" data-constraints='@NotEmpty @Required @AlphaSpecial'>
		</div>
	</div>
Copy the code and paste it right after its closing </div> tag, so that “Surname” field goes right after “Name.”
Change the title “name” to “surname” everywhere in the new code so it looks like this:
	<div class="fl1">
		<div class="tmInput">
			<input name="Surname" placeHolder="Your Surname" type="text" data-constraints='@NotEmpty @Required @AlphaSpecial'>
		</div>
	</div>
Save changes and check your site.
Feel free to check the detailed video tutorial below:
JS animated. How to activate and work with booking form