


- Web templates
- E-commerce Templates
- CMS & Blog Templates
- Facebook Templates
- Website Builders
FAQs
General Tutorials
Featured templates
MonsterONE Subscrioption


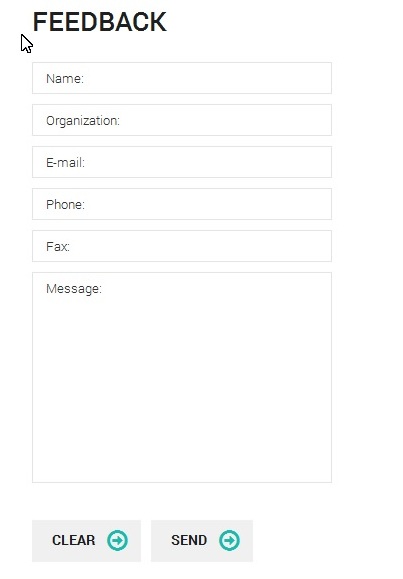
This tutorial is going to show you how to add a new field to the TMForm on your JS Animated template.
JS Animated. How to add a contact form field (based on TMForm)Open the .html file which represents your Contacts page in Dreamweaver or any HTML editor. Switch to the Split view. We are going to add 2 new fields called “Fax” and “Organization” based on the existing ones.
To add the “Fax” field, select the “Phone” field as the most similar one. That will highlight the necessary part of code in the Code window.
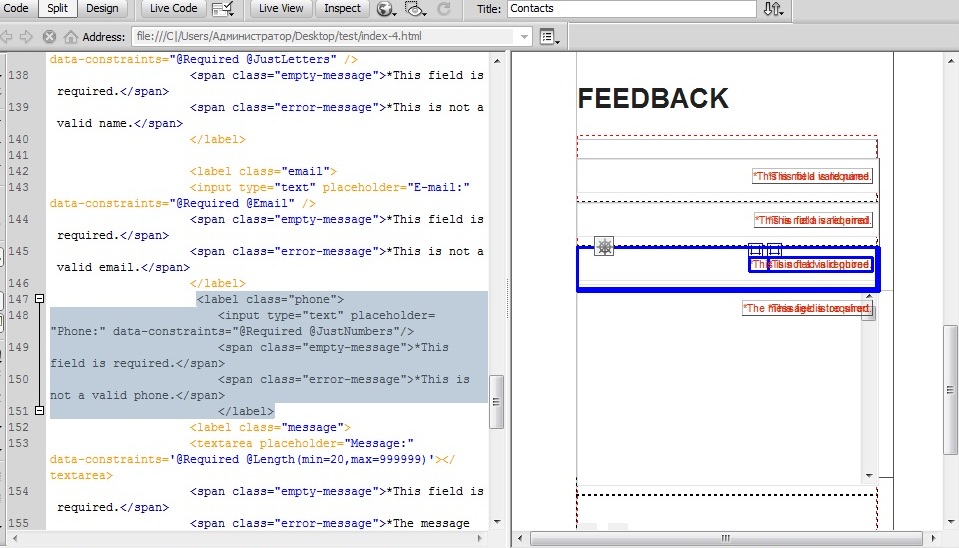
For instance, the code for the “Phone” field looks as follows:
<label class="phone">
    <input type="text" placeholder="Phone:" data-constraints="@Required @JustNumbers"/>
    <span class="empty-message">*This field is required.</span>
    <span class="error-message">*This is not a valid phone.</span>
</label>
Copy the code and paste it right after its closing </label> tag, so the “Fax” field goes right after “Phone.”
Change the word ‘phone’ to ‘fax’ everywhere in the new code so it looks like this:
<label class="fax">
    <input type="text" placeholder="Fax:" data-constraints="@Required @JustNumbers"/>
    <span class="empty-message">*This field is required.</span>
    <span class="error-message">*This is not a valid fax number.</span>
</label>
To add one more additional field called “Organization,” highlight the code for the “Name“ field that may look like:
<label class="name">
    <input type="text" placeholder="Name:" data-constraints="@Required @JustLetters" />
    <span class="empty-message">*This field is required.</span>
    <span class="error-message">*This is not a valid name.</span>
</label>
Copy the code and paste it right after its closing </label> tag, so the “Organization” field goes right after “Name.”
Change the word ‘name’ everywhere in the pasted code to ‘organization,’ so the result looks like this:
<label class="organization">
    <input type="text" placeholder=" Organization:" data-constraints="@Required @JustLetters" />
    <span class="empty-message">*This field is required.</span>
    <span class="error-message">*This is not a valid organization.</span>
</label>
Save the changes to the .html file.
Open the TMForm.js file located in the ‘js’ folder. Find lines 121-125 that run as follows:
name:getValue($('label.name input'))
,email:getValue($('label.email input'))
,phone:getValue($('label.phone input'))
,fax:getValue($('label.fax input'))
,state:getValue($('label.state input'))
Since this part of code already has the necessary lines for “fax” and “state” even though they initially aren’t used in the template contact form, we just need to add a similar one for “organization.”
Copy one of the existing lines, for example, for “email”:
, email:getValue($('label.email input'))
Paste the line right after it and change ‘email’ to ‘organization,’ so the final result looks like:
    name:getValue($('label.name input'))
    ,email:getValue($('label.email input'))
    ,phone:getValue($('label.phone input'))
    ,fax:getValue($('label.fax input'))
    ,organization:getValue($('label.organization input'))
    ,state:getValue($('label.state input'))
    ,message:getValue($('label.message textarea'))
Scroll down and change the hash symbol ( # ) to your email address at the bottom where it says:
$(window).load(function(){
    $('#form').TMForm({
    ownerEmail:'#'
    })
})
Save the changes.
Open MailHandler.php located in the ‘bat’ folder. Again, the necessary lines for “fax” and “state” are already there. For the field called ‘Organization,’ copy and paste the part for ‘name’:
if($_POST['name']!='false'){
    $messageBody .= '<p>Visitor: ' . $_POST["name"] . '</p>' . "\n";
    $messageBody .= '<br>' . "\n";
}
And change ‘name’ in it to ‘organization’ so it looks like:
if($_POST['organization']!='false'){
    $messageBody .= '<p>Organization: ' . $_POST["organization"] . '</p>' . "\n";
    $messageBody .= '<br>' . "\n";
}
Save the changes.
Now you can test your site on a remote server to see how the new fields are functioning.
Feel free to check the detailed video tutorial below:
JS Animated. How to add a contact form field (based on TMForm)