


- Web templates
- E-commerce Templates
- CMS & Blog Templates
- Facebook Templates
- Website Builders
FAQs
General Tutorials
Featured templates
MonsterONE Subscrioption


This tutorial shows how to add any custom font to your HTML based website and apply it to text.
JS Animated. How to add and use custom fontsIn order to apply a custom font to your site’s text, you should perform the following:
Download a font from the Internet or just copy it from your system folder. For example, Windows stores its fonts in the C:\Windows\Fonts directory. Make sure the font format is either TTF (TrueType Font) or OTF (OpenType Font).
Go to Font 2 Web website, choose the font file from your local system and hit the CONVERT&DOWNLOAD button:

You’ll get a zip archive. We need the fonts folder and fonts.css file that are inside the archive:
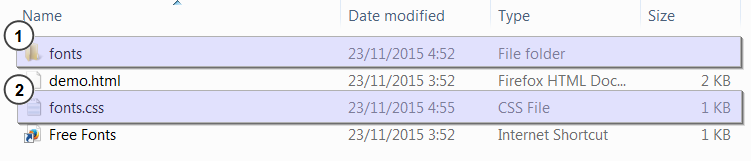
Upload the contents of the fonts folder to the /fonts/ directory on your server. Make sure the files have the permissions set to 644:

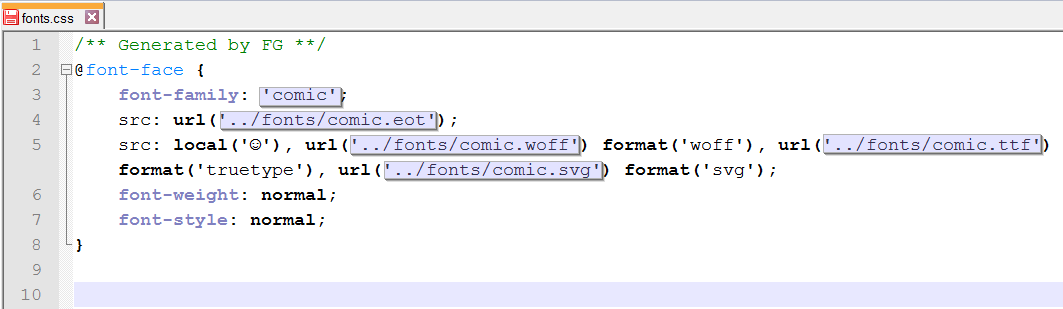
Open up the fonts.css file, locate url() attributes and correct their URLs from fonts/XXX.xxx to ../fonts/XXX.xxx (add two periods and a forward slash at the beginning). You also should change the font-family attribute to coincide with the names of files:
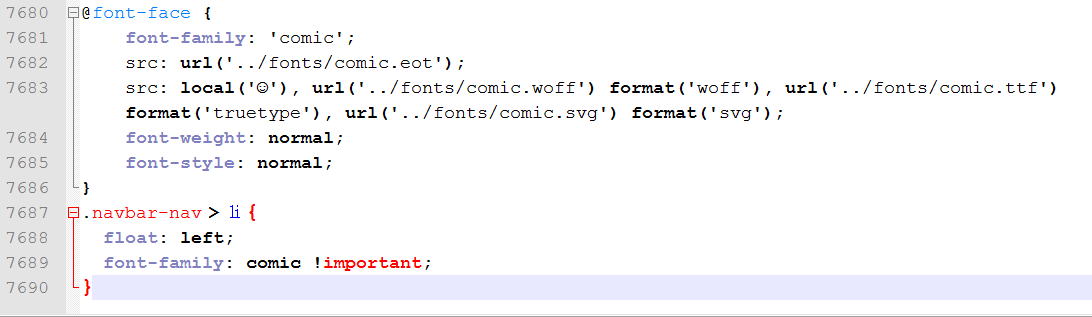
Open up the /css/bootstrap.css file and scroll down to the very bottom. There you need to paste the code copied from the fonts.css file.
Now you can apply the new font to any element by specifying the font-family attribute. You should add the following code to the very bottom of the file /css/bootstrap.css
			.navbar-nav > li {
			font-family: comic;
			}
.navbar-nav is the element specific selector. Sometimes the font-family attribute may already be declared in another file, and to overwrite it, you need to either find that place in code and put your font name instead or add the important specifier:
			.navbar-nav > li {
			font-family: comic !important;
			}
The resulting code should look like this:
Save the changes in the /css/bootstrap.css file and upload it to the server.
Feel free to check the detailed video tutorial below:
JS Animated. How to add and use custom fonts