


- Web templates
- E-commerce Templates
- CMS & Blog Templates
- Facebook Templates
- Website Builders
FAQs
General Tutorials
Featured templates
MonsterONE Subscrioption


Magento 2 has introduced a built-in command-line interface tool based on Symfony Console Component. The feature allows you to perform a wide range of recurring tasks, e.g. indexing, cache management, deployment of static view files, etc. The instructions below will brief you on basic frequently-used Magento 2/Unix commands and provide an insight into their application.
Magento 2 has introduced a built-in command-line interface tool based on Symfony Console Component.
The feature allows you to perform a wide range of recurring tasks, e.g. indexing, cache management, deployment of static view files, etc. The instructions below will brief you on basic frequently-used Magento 2/Unix commands and provide an insight into their application.
Note! This tutorial assumes your environment has been configured to meet Magento system requirements and recognize Magento commands.
Log into your server via Secure Shell( SSH). Determine your current location;
Stands for print working directory. The command will output the pathname of the directory in which you are located. In most cases, the pathname will be your system docroot in a hierarchy of directories.
Examples:
[~]$ pwd
/home/user/public_html
In this example, the user is located in public_html directory, where /home/user is document root directory.
Note! public_html, htdocs are the names typically given to server home(root) subdirectories. If you are having trouble locating your docroot, contact your hosting provider directly!
Change your working directory;
The cd command which stands for change directory will allow you to move around within your filesystem hierarchy.
Examples:
[~]$ cd public_html/magento/var
By executing the above command, you will jump from your current working directory which is the parent directory of public_html to var directory. Note, public_html/magento/var means a directory named var which is located in a directory named magento which is located in its turn in public_html directory which is a child directory of current working directory.
[~]$ cd /home/user/public_html
You might have noticed a forward slash at the beginning of the path in the second example, unlike the first. A single forward slash (/) represents system root directory which means that the command is initiated in document root.
This command will take you one level down.
[~]$ cd ..
Jump to your home directory using this command.
[~]$ cd ~
Show directory contents;
Stands for list. This command will display the contents of directory. Syntax:
ls [OPTION]... [FILE]...
Examples:
[~]$ ls var
./ ../ cache/ composer_home/ generation/ log/ page_cache/ session/
The above example will show the contents of var directory.
[~]$ ls -l var
-l flag with ls command lists the total of objects within directories and their subdirectories, names of the files in specified directory, size of the files, their permissions and the date of last modification.
Find a file;
find is a powerful command used to search for objects within filesystem based on various search criteria, e.g. extension, permissions, size, modification date, etc. The command lists files and directories based on conditions specified for files that match the arguments in the command expression. Syntax:
find [OPTION] path... [expression]
Examples:
[~]$ find var -type d -name Cache
The above command will find all directories (-type d argument), named Cache(-name argument), in var directory.
[~]$ find app/design -type f -name "*.xml"
This command will surf design directory to locate all files matching the arguments specified in expression, e.g. -type f only files, -name “*.xml” with .xml extension.
Change/assign access permissions;
Stands for change file mode bits. chmod is a unix-based system call which can modify access permissions to filesystem objects. It defines who can access specific file/directory and the way that file/directory can be accessed. Syntax:
chmod [OPTION]... Mode [,Mode]... file...
Options:
-R affects files and diretories recursively;
-f force, suppresses errors and forges ahead;
-v verbose, outputs the objects which have been processed;
Examples:
[~]$ chmod -Rfv 0777 var
The above command executed from [magento_install_dir] changes permissions of var directory and all other objects within to 0777 or rwxrwxrwx.
[~]$ chmod -v 0644 composer.json
mode of 'composer.json' changed from 0777 (rwxrwxrwx) to 0644 (rw-r--r--)
This command applies changes to specific file. You might be wondering if there is a way to assign different permissions to directories and files globally. This is where the power of find command might come in handy since chmod by default does not have options to sort objects by any criteria.
Run the following command from [magento_install_dir] to assign 0755 permissions to all sub-directories within magento application directory:
[~]$ find -type d -exec chmod -fv 0755 {} \;
Run the following command from [magento_install_dir] to assign 0644 permissions to all files within magento application directory:
[~]$ find -type f -exec chmod -fv 0644 {} \;
Run the following command from [magento_install_dir] to locate sub-directories with 0775 permissions and change them to 0755:
[~]$ find -type d -perm 0775 -exec chmod -fv 0755 {} \;
Run the following command from [magento_install_dir] to locate sub-directories without 0755 permissions and change them to 0755:
[~]$ find -type d ! -perm 0755 -exec chmod -fv 0755 {} \;
Note! -R flag should not be used here. It ignores arguments of find command thus apply permissions globally to both files and directories within specified sub-directory.
Remove an object;
The rm command is used to delete objects such as files, directories from Unix-like operating systems. Syntax:
rm [OPTION]... FILE...
Options:
-r affects files and directories recursively, so as not to leave files without directories to reside in;
-f overrides confirmation prompts, never prompts before removing files. It will not remove directories which are write-protected;
-v explains what is being done, which objects have been removed;
-i asks for confirmation before every deletion;
Examples:
[~]$ rm -rfv var/generation
The command recursively deletes generation directory with all its contents.
Remove the contents of var dir:
[~]$ rm -rfv var/*
Another way to remove subdirectories of specific folder, pub/static in this case, without removing parent directory is to use rm in conjunction with find command:
[~]$ find pub/static -mindepth 1 -maxdepth 1 | xargs rm -rfv
WARNING! Ensure that you verify current working directory, command options and files to be removed before executing rm -rf. The command cannot be reversed.
To sum up;
man is an online reference "manual". They are manual pages which provide detailed documentation about Unix commands, configuration files, system calls, etc.
Examples:
[~]$ man xargs
[~]$ man chmod
[~]$ man wget
The above commands once executed open manual page of the specified command within command-line console.
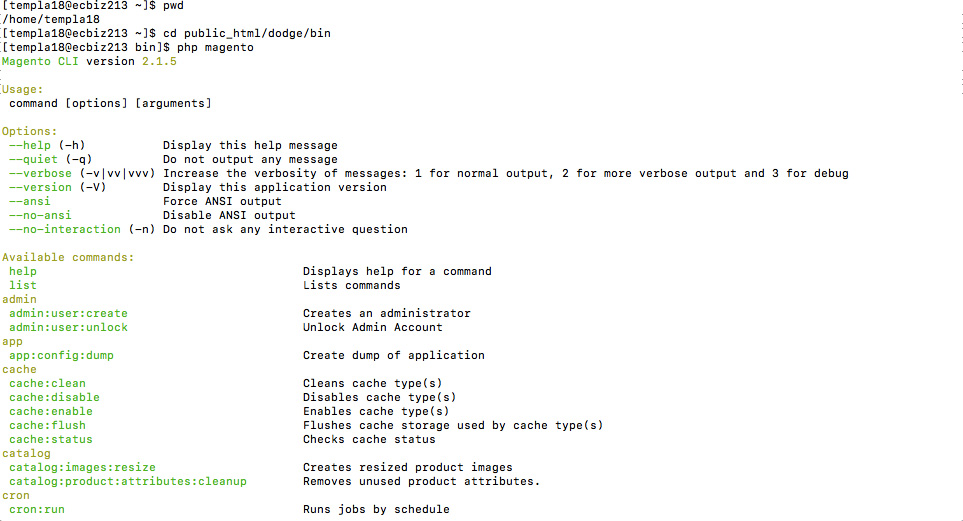
Log into your server via Secure Shell(SSH). cd to /[magento_install_dir]/bin directory from which the commands must be executed. Examples:
[~]$ cd /home/user/public_html/bin
[~]$ php magento
This command displays installed application version as well as the list of available commands.
The commands can also be run in the following ways:
[~]$ php /[magento_install_dir]/bin/magento [command]
[~]$ cd /[magento_install_dir]/
[~]$ php bin/magento [command]
Help commands
[~]$ php magento --list
This command will display the list of all available Magento 2 commands and their short summary;
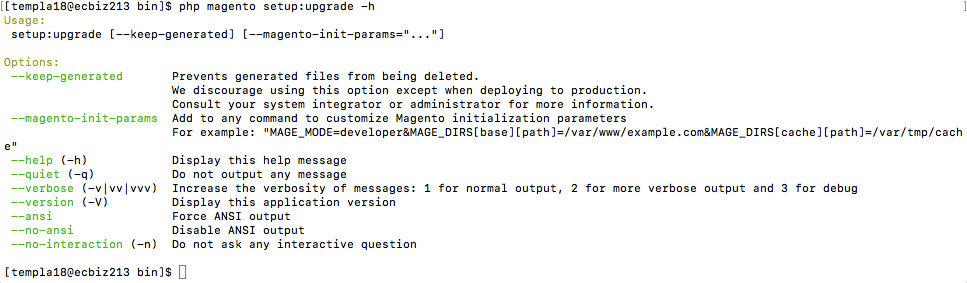
[~]$ php magento [command] -h
[~]$ php magento setup:upgrade -h
Use -h flag at the end of the magento command to receive detailed description of a particular command.
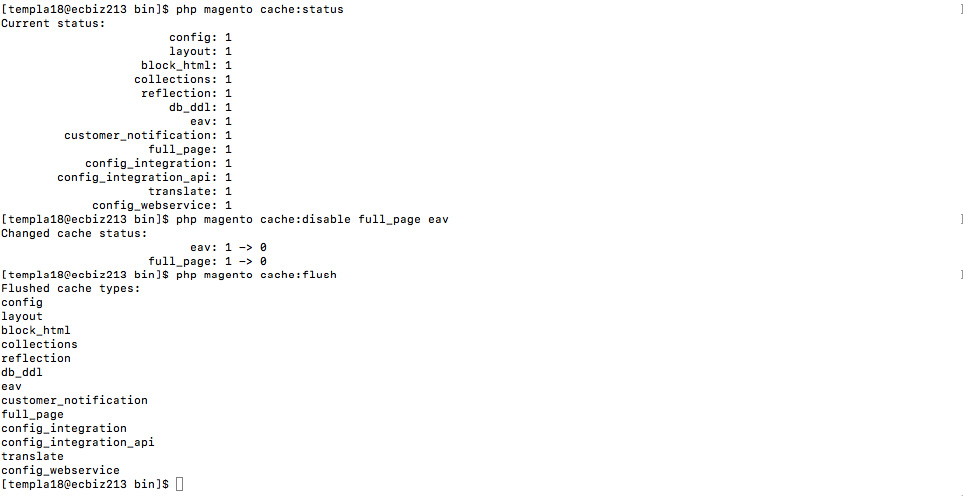
Display the status of cache types:
[~]$ php magento cache:status
Disable/enable cache/cache types:
[~]$ php magento cache:disable full_page eav
[~]$ php magento cache:enable
Clean magento cache. The command removes items from enabled cache types only:
[~]$ php magento cache:clean
Flush magento cache. Unlike cache:clean, cache:flush purges the entire cache storage, including that of disabled cache types:
[~]$ php magento cache:flush
Show indexer status:
[~]$ php magento indexer:status
Re-index all indexers or any selected indexer:
[~]$ php magento indexer:reindex
[~]$ php magento indexer:reindex catalog_product_attribute
Change indexer modes via CLI, i.e. Update on Save, Update by Schedule:
[~]$ php magento indexer:set-mode realtime
[~]$ php magento indexer:set-mode schedule

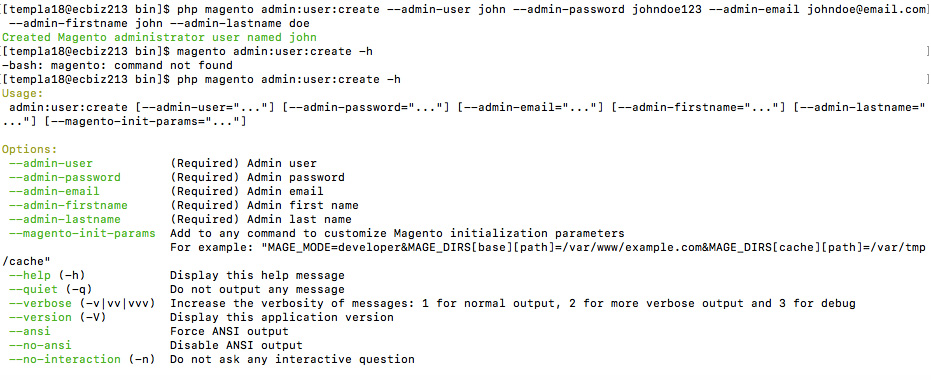
In case you have lost your admin password, the backend access can be regained by creating a new admin user. Example command creates a user named John Doe with username john and password johndoe123:
[~]$ php magento admin:user:create --admin-user john --admin-password johndoe123
--admin-email johndoe@email.com --admin-firstname john --admin-lastname doe
The options specified in the above command are mandatory.
Magento frontend is served through pub/static directory. This directory can be cached for browsers, so to speak, not dynamically served. If a new extension, or theme is installed, modified, you might need to remove existing pub/static contents and re-deploy static view files:
[~]$ php magento setup:static-content:deploy
Language packages are regular extensions which are to be deployed once installed. Find the language locale by running the following command:
[~]$ php magento info:language:list
Deploy static view files of the language pack by adding its locale to the end of command:
[~]$ php magento setup:static-content:deploy es_ES
Deploy static view files of specific theme
[~]$ php magento setup:static-content:deploy --theme Magento/luma

By executing setup:upgrade, you will update Magento database components as well as truncate var/di (if compiled) var/view_preprocessed and var/generation directories. The command is to be executed once particular extension has been installed or activated:
[~]$ php magento setup:upgrade

Trigger code generation and compilation by applying setup:di:compile(built-in code compiler). The command will generate var/di directory and compile factories, proxies, interceptors classes. The command is not mandatory to execute if your application is running in default or developer mode . The application code must be recompiled after certain code changes when in production mode:
[~]$ php magento setup:di:compile
Display the list of available enabled/disabled modules by using module:status command:
[~]$ php magento module:status
Enable/disable modules via CLI:
[~]$ php magento module:disable Namespace_Module
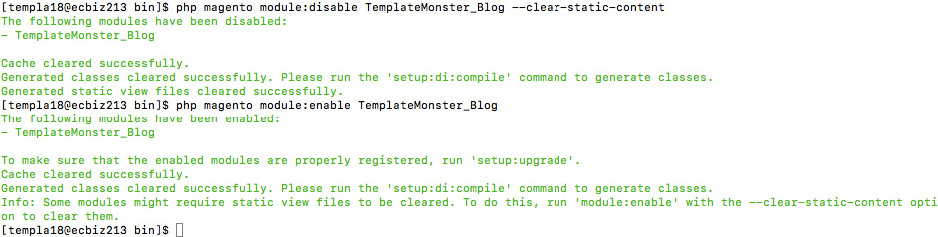
Disable Blog extension and clear all its static view files:
[~]$ php magento module:disable TemplateMonster_blog --clear-static-content
Uninstall Magento module:
[~]$ php magento module:uninstall TemplateMonster_blog
Magento comes with the option to enable/disable maintenance mode while configuring/maintaining the website:
[~]$ php magento maintenance:enable
The command creates var/.maintenance.flag file which is used by Magento to detect status.
Enable maintenance mode for everyone except 192.10.0.0, 192.192.2.11:
[~]$ php magento maintenance:enable --ip=192.10.0.0 --ip=192.192.2.11
The command creates var/.maintenance.ip file. Disable maintenance:
[~]$ php magento maintenance:disable

.jpg)
Instead of typing full command name, abbreviations or acronyms can be used. It will know which command you are trying to execute unless it is ambiguous. Example:
[~]$ php magento i:rein
For indexer:reindex.
[~]$ php magento c:f
For cache:flush
Feel free to check the detailed video tutorial below:
Magento 2. Working with command-line interface(CLI). Essential commands for store management and their applicationTake a closer look at the collection of Magento themes and select the best for your project.
