


- Web templates
- E-commerce Templates
- CMS & Blog Templates
- Facebook Templates
- Website Builders
FAQs
General Tutorials
Featured templates
MonsterONE Subscrioption


This tutorial will show you on how assign image(s) to a product in Magento.
Magento. How to assign image(s) to a product
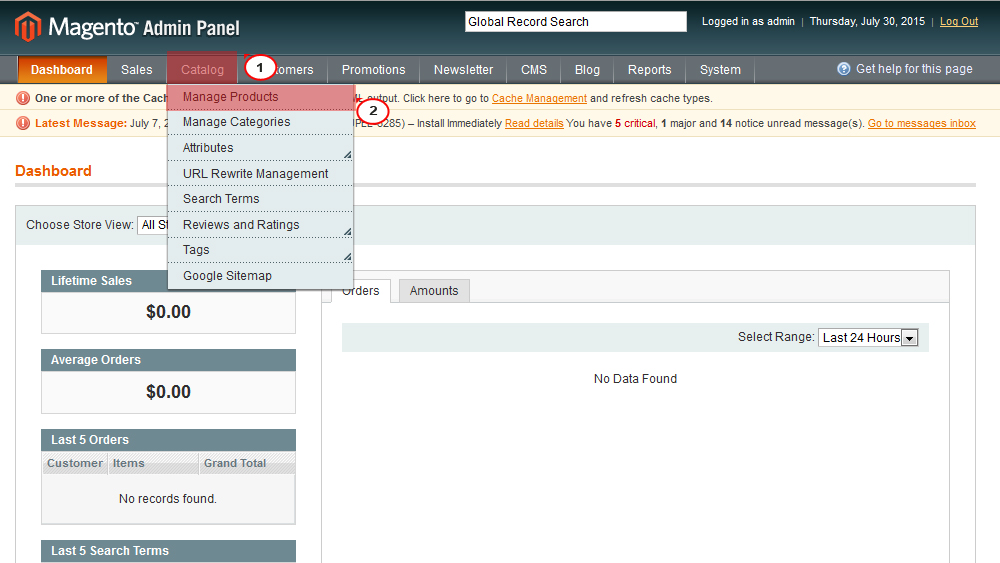
First, you should open Admin panel of Magento store and navigate to Catalog – > Manage products Section:
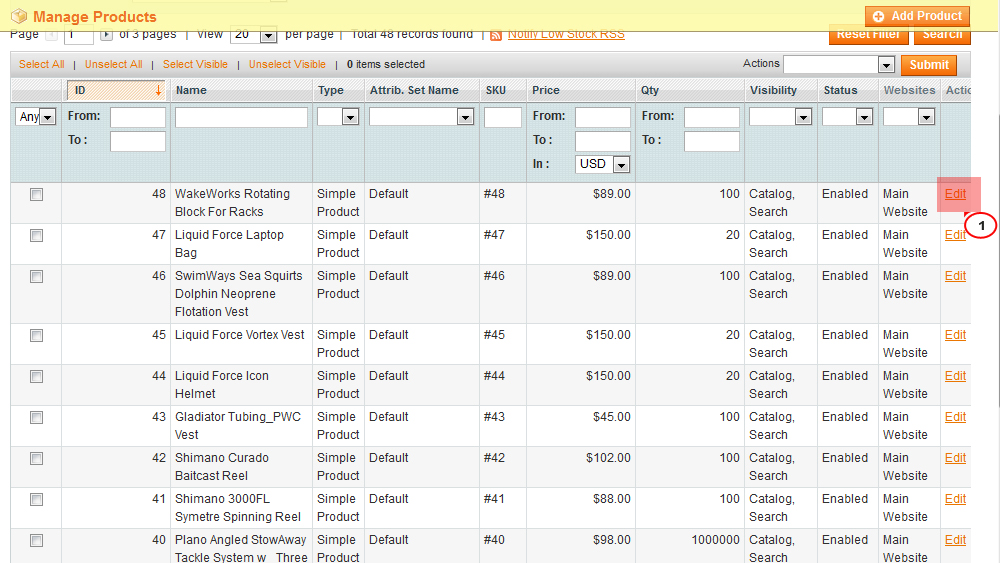
On the appeared page select product you want the image to be updated for and click Edit button:
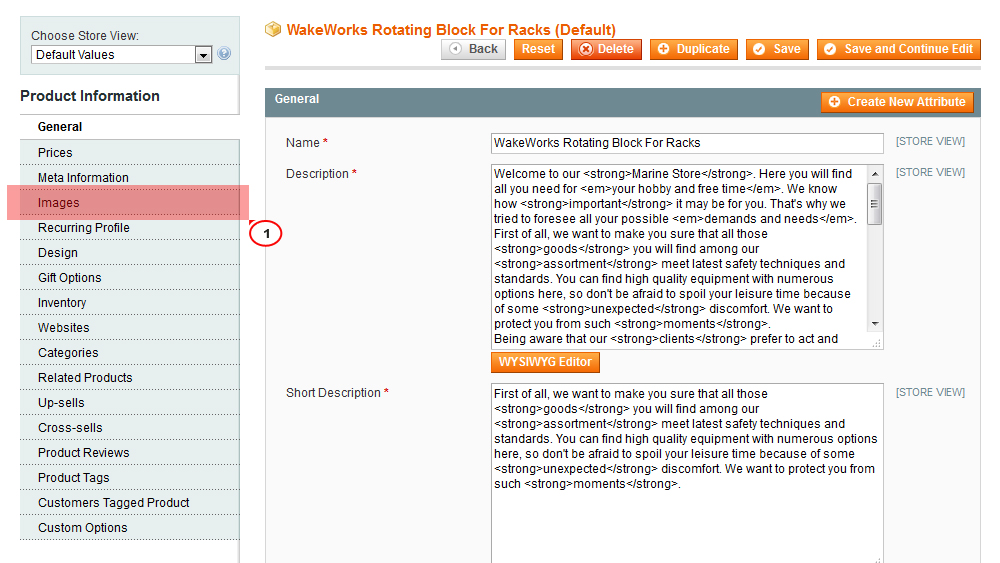
On the appeared page you need to select Images tab:
Click Browse Files… button and select image from your computer:
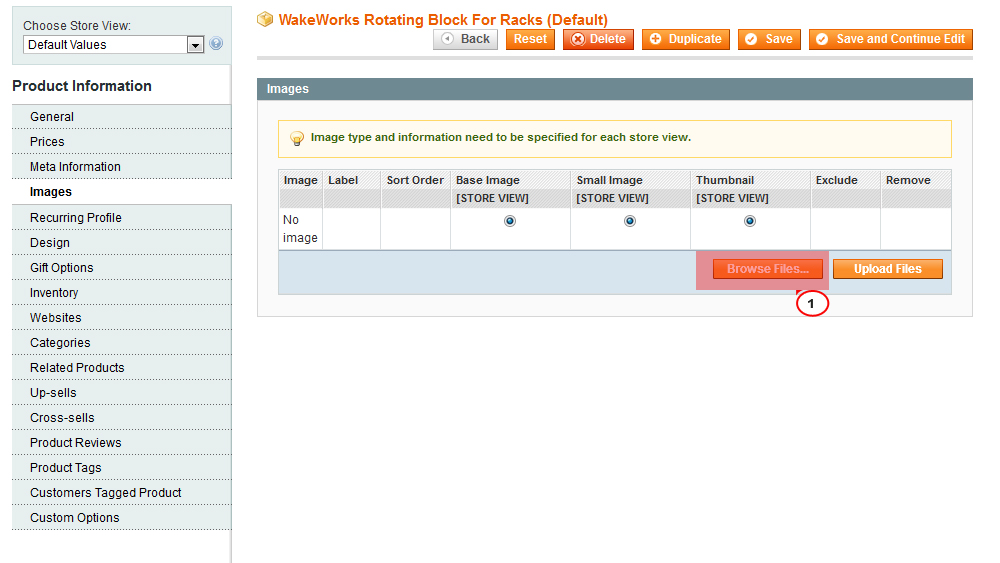
Next, you need to click Upload Files buttons in order to upload images:

In order to make image appear on product page, you need to select radio buttons for Base Image, Small Image, Thumbnail. If these radio buttons are not checked, images will not appear on product page:
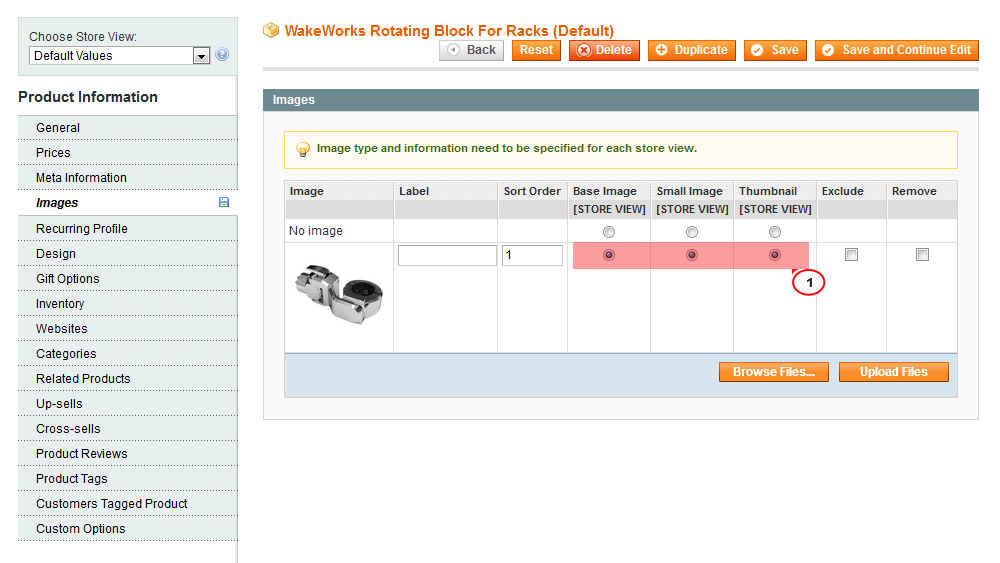
Click Save button to apply changes.
Clear Magento cache to check the changes applied.
.jpg)
Feel free to check the detailed video tutorial below:
