- Web templates
- E-commerce Templates
- CMS & Blog Templates
- Facebook Templates
- Website Builders
Magento. How to manage TM Google Map extension
April 13, 2015
This tutorial shows how to manage Google Map extension in Magento.
Magento. How to manage Google Map extension
In order to manage the Google Map, you should perform the following:
-
Go to Google Maps Site to generate the link to your location.
-
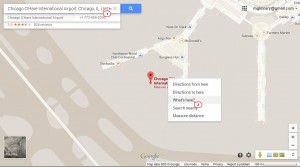
Find your location, right click it. Select ‘What’s Here’ option from the drop down menu:
-
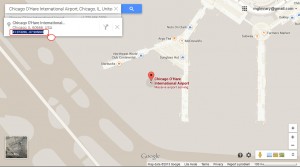
With that done you will see the Latitude and Longitude of the location on the left of the page:
-
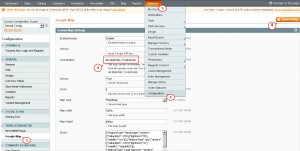
Log into your Magento Admin and navigate to System -> Configuration -> Templatemonster -> Google Map.
You will see the Embed Google Map settings section which stands for the display of the map in the footer of all pages except the contact page and the Contacts Map Settings section which is for the Contact Us page Map:
-
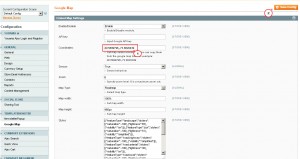
You should replace the default Latitude and Longitude with your location data in the Coordinates section there.
-
Do not forget to save the changes by clicking the ‘Save Config’ button on the Map settings page:
There are also the following module options:
-
API key – a Google Api Key which is necessary for the correct work of the map. The Google Maps JavaScript API v3 does not require an API key to function properly. However, you can learn more about it from this link.
-
Coordinates – the location data which will be shown in the centre of the displayed map.
-
Sensor – switching geolocation on and off.
-
Zoom – enlargement value (should not exceed 8).
-
Map Type – type of the displayed map (roadmap, satellite, hybrid, etc.).
-
Map width – width of the map.
-
Map height – height of the map.
-
Styles – in order to change the appearance of the map, use the styles provided on the website snazzymaps.
-
Disable UI – hides the elements which control the map.
-
Scrollwheel – disables the mouse scroll option.
-
Draggable – enables you to move the map using the left button of your mouse or using fingers for touch (sensor) devices.
-
Add marker – allows you to add the marker to the map.
-
Marker coordinates – sets the marker coordinates.
-
Marker title – text which will be displayed in the tool-tip while hovering over it.
-
Marker image – path to the marker image if you want to replace the default one. The image is saved in skin/frontend/default/themeXXX/images/ directory of your Magento installation.
-
Infowindow – additional information which will be displayed if you click the marker.
Feel free to check the detailed video tutorial below:


.jpg)
