


- Web templates
- E-commerce Templates
- CMS & Blog Templates
- Facebook Templates
- Website Builders
FAQs
General Tutorials
Featured templates
MonsterONE Subscrioption


Manually replacing your current version of ‘Monstroid 2‘ with an updated version is as easy as 1-2-3!
.jpg)
First off, you’ll need to download the updated version of the theme, which includes both the main theme and the child theme (which serves as a backup for all the custom changes you make to your styles, etc.).
Next on, installing it, the child theme and export-import steps are due:
Afterwards you’ll need to backup some of the settings, just in case:
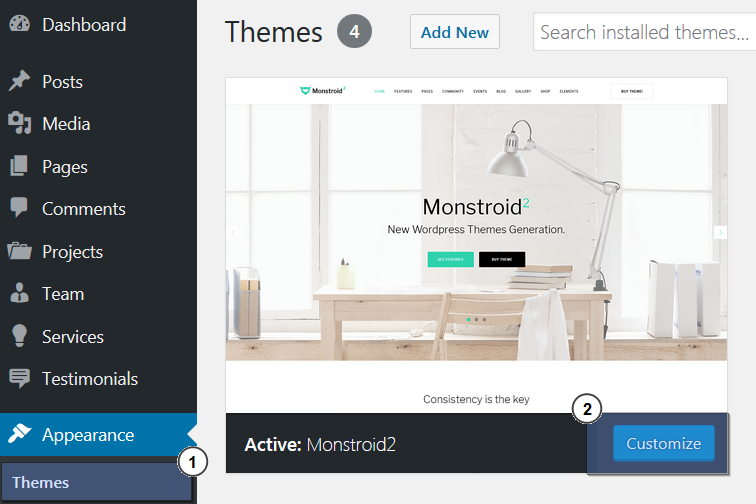
Backup the Customizer’s options. To do that go to your Monstroid admin dashboard > then on your left go to the ‘Customizing’ section > Export/Import:
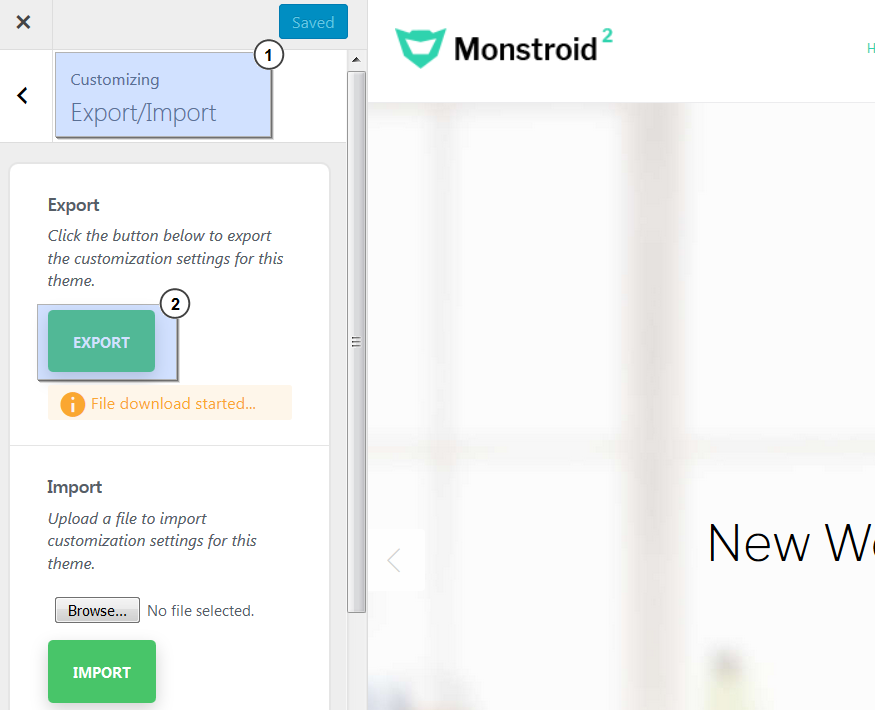
And hit ‘Export’ button:
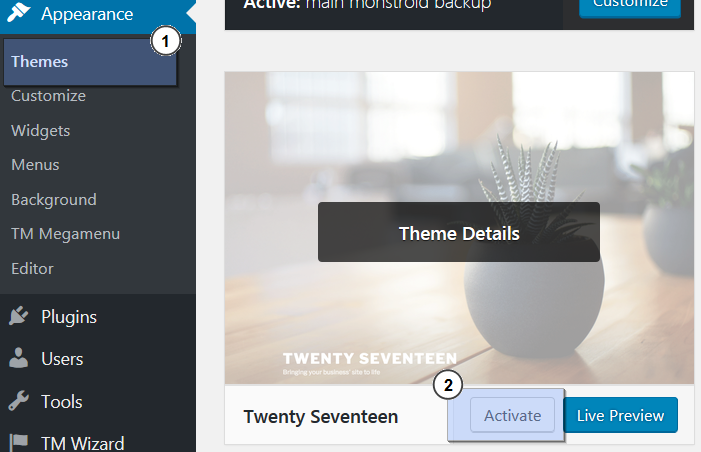
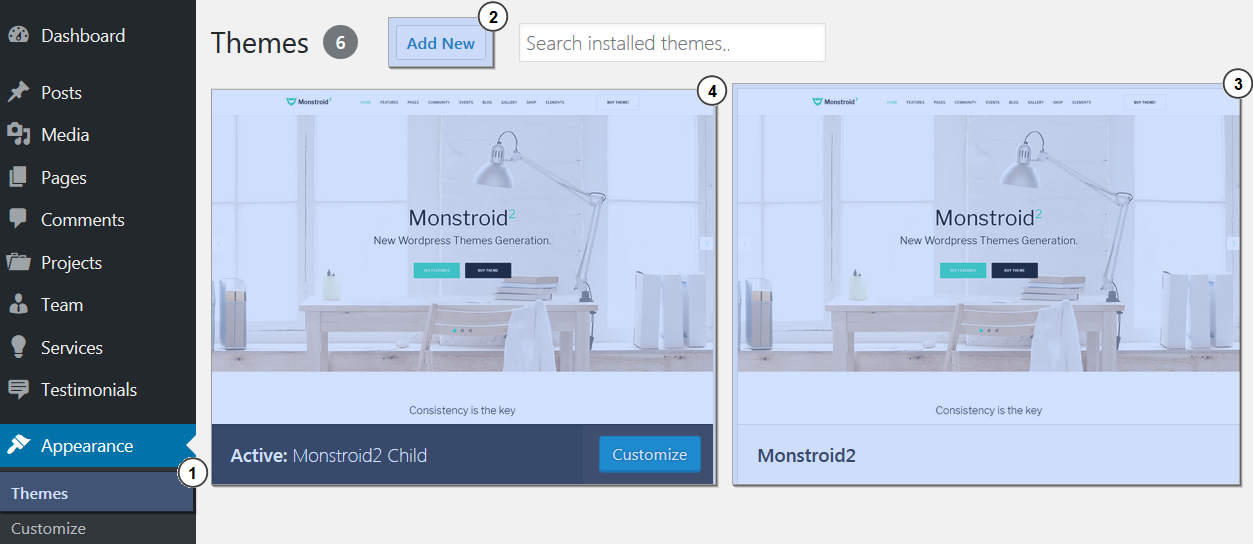
Afterwards proceed to the ‘Appearance’ > ‘Themes’ menu, switch to any other default WordPress theme as your current one:
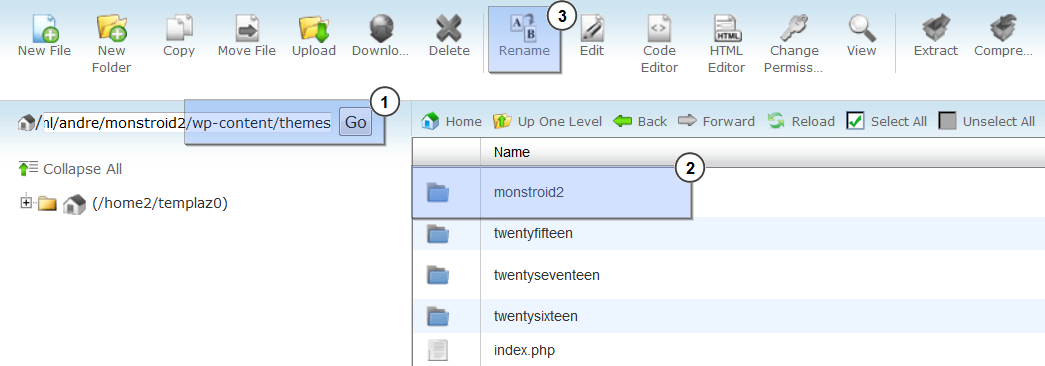
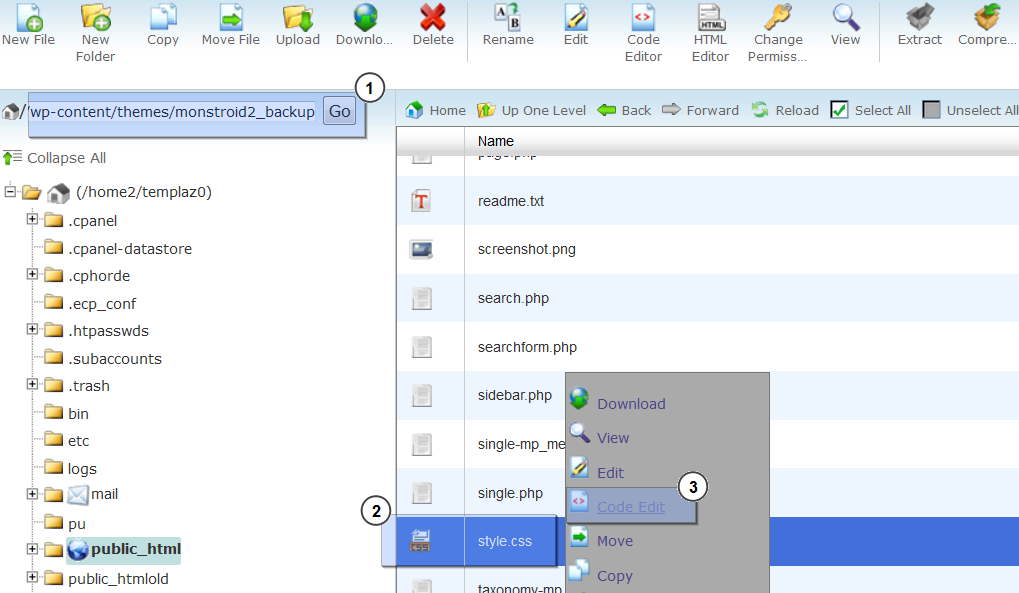
Save the ‘/wp-content/themes/monstroid2/’ folder (duplicate it), just so it stays somewhere on your web server, let’s say in a folder named ‘main monstroid backup’.
Returning now to the ZIP file of the updated version of the theme that you’ve downloaded previously, be sure to perform the following steps:
Open the WordPress admin panel and go to the ‘Appearance’ > ‘Themes’ section;
Press the ‘Add new’ button and click ‘Upload theme’;
After that, repeat the same steps for the Child theme, which you’ve previously unpacked from that same file as the main theme (two above steps).
After installing this updated Monstroid theme, proceed to update the Plugins, by going to the sidebar on your left > ‘Plugins’ menu;
Now you’ll need to import back those settings which you’ve exported in a previous step;
To do that go to your Monstroid admin dashboard , then on your left go to the ‘Customizing’ section;
Open ‘Export/Import’ tab and choose the ‘Import’ option;
Click the ‘Browse’ button, locate the file to import customization settings for this theme and click ‘Import’:

Following that, to save your custom styles, locate the ‘main monstroid backup’ folder on your web server (1.3 in the list of steps);
Open ‘style.css’ file for editing and copy those parts of the code that you’ve changed there into the ‘styles.CSS’ file that’s located in the new folder of an updated Monstroid version. You can skip this step in case you did not perform any changes to ‘style.css’ file previously:
Remove an old version of Monstroid theme (/wp-content/themes/monstroid2/ directory on your server).
This is the end of the tutorial. Now you know how to update Monstroid theme to the latest version manually.
Feel free to check the detailed video tutorial below:
Monstroid 2. Manual Update of the main theme