- Web templates
- E-commerce Templates
- CMS & Blog Templates
- Facebook Templates
- Website Builders
Monstroid. How to edit landing page generated with shortcodes
August 11, 2015
This tutorial shows you how to edit landing page generated with shortcodes in Monstoid.
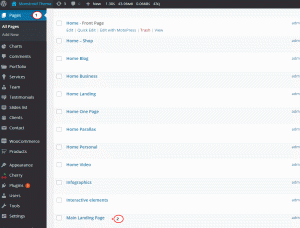
Monstroid. How to edit landing page generated with shortcodesThe content of the page was created using various shortcodes. Let’s see how to manage those. You can access the page editing area via Dashboard > Pages > All pages > Main Landing page :
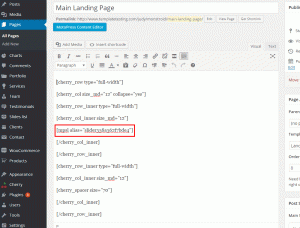
You will see the content to edit using Visual Mode. In the beginning of the page content there is a shortcode for the slider. It defines that MotoPress Slider has been used:
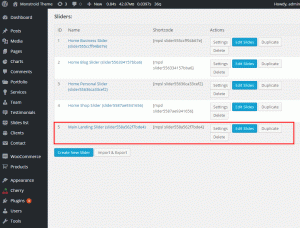
Its content can be managed via Dashboard > MotoPress Slider section. There is a list of existing slides, with shortcodes to display them. Find the one used on Landing Page and click ‘Edit Slider’ button to work with its content:
Feel free to check more detailed tutorial on how to work with MotoPress Slider.
The next shortcode lines specify the layout and determine the content to show up in the front-end. Let’s check the following examples:
-
[cherry_row_inner type="full-width"]
[cherry_col_inner size_md="12"]
[cherry_spacer size="70"]
[/cherry_col_inner]
[/cherry_row_inner]
[/cherry_col]
[/cherry_row]
type="full-width" specifies the width of the section, meaning this one occupies the complete width of the page;
size_md="12" means that 12 grid layout type is used for the medium screen size;
cherry_spacer size="70" defines the size of the spacer used for the area.
-
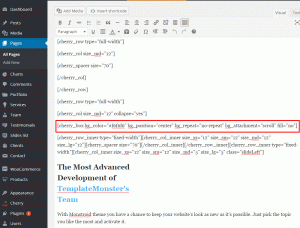
[cherry_box bg_color="#f6f6f6" bg_position="center" bg_repeat="no-repeat" fill="no"]
bg_color="#XXXXXX" defines color for the current area, it can be replaced with any other hex color instead of the default one;
bg_position="center" sets the position for the current background;
bg_repeat="no-repeat" defines if background is going to be repeated or shows up only once:
-
[cherry_button text="Live Demo" url="blog" size="large" centered="no" icon="icon: fa fa-desktop"]
The buttons are set up with the shortcodes as the one above. There you can determine available options:
text="Live Demo" sets up the words to be shown as the button text;
url="blog" determines the page to open when somebody clicks the button;
size="large" specifies the actual dimensions of the current button;
centered="no" manages the bottom position;
icons="icon:fa fa-desktop" points to the button icon. It refers to the FontAwesome icons by default:

-
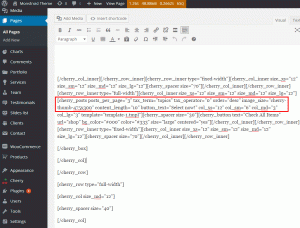
[cherry_posts  posts_per_page="3" tax_term="topics"  tax_operator="0"
  order="desc"  image_size="cherry-thumb-475x300" content_length="10"
  button_text="Select now!" col_xs="12" col_sm="6"  col_md="3" col_lg="3" template="template-1.tmpl"]
Such shortcodes render posts from the specific category and allow setting up their layout.
posts_per_page="3" sets the number of posts to show up;
tax_term="topics" specifies the category to pull posts from;
order="desc" allows to select the order of posts to show up;
image_size="cherry-thumb-475×300" points to the actual size of the featured images for the selected posts on landing page;
content_length="10" determines the excerpt length;
button_text="Select now!" specifies the title of read more button;
col_xs="12" col_sm="6" col_md="3" col_lg="3" defines the layout for different screen views (extra small // small /// medium // large);
template="template-1.tmpl" picks up the file for styling:
-
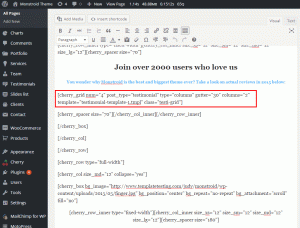
[cherry_grid num="4" post_type="testimonial" type="columns" gutter="30" columns="2" template="testimonial-template-1.tmpl" class="testi-grid"]
Such shortcode type is used for the grid layout of posts:
num="4" sets the number of items to display;
post_type="testimonial" defines the custom post type to be used (Testimonials posts in this example);
type="columns" is used to apply column layout for the area;
gutter="30" defines the gutter space size (in px);
columns="2" specifies the number of columns;
template="testimonial-template-1.tmpl" picks up the file for styling;
class="testi-grid" selects the specific CSS style:
Click "Update" button once finished with shortcode modifications to view the changes on the site.
Feel free to check the detailed video tutorial below:
Monstroid. How to edit landing page generated with shortcodes


