


- Web templates
- E-commerce Templates
- CMS & Blog Templates
- Facebook Templates
- Website Builders
FAQs
General Tutorials
Featured templates
MonsterONE Subscrioption


This video tutorial will show you how to manage Countdown Timer on a default Maintenance page in Monstroid.
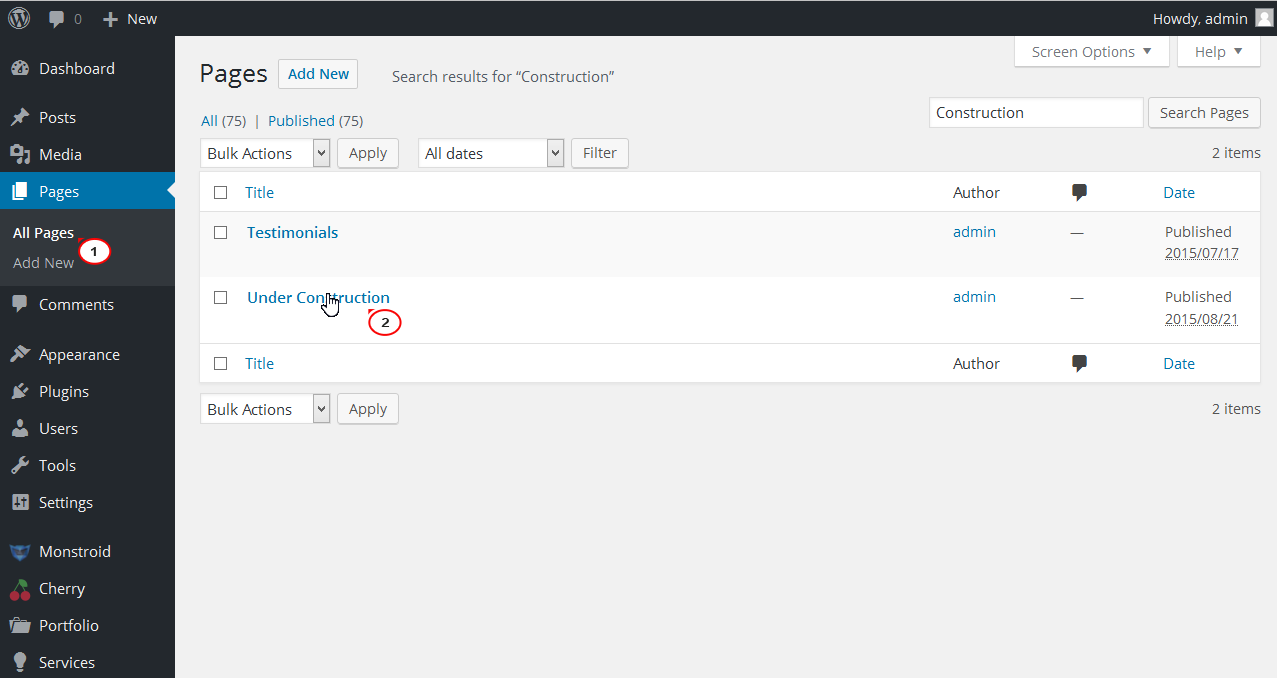
Log into WordPress admin panel, navigate to Pages and open the Under Construction page for editing.
.jpg)
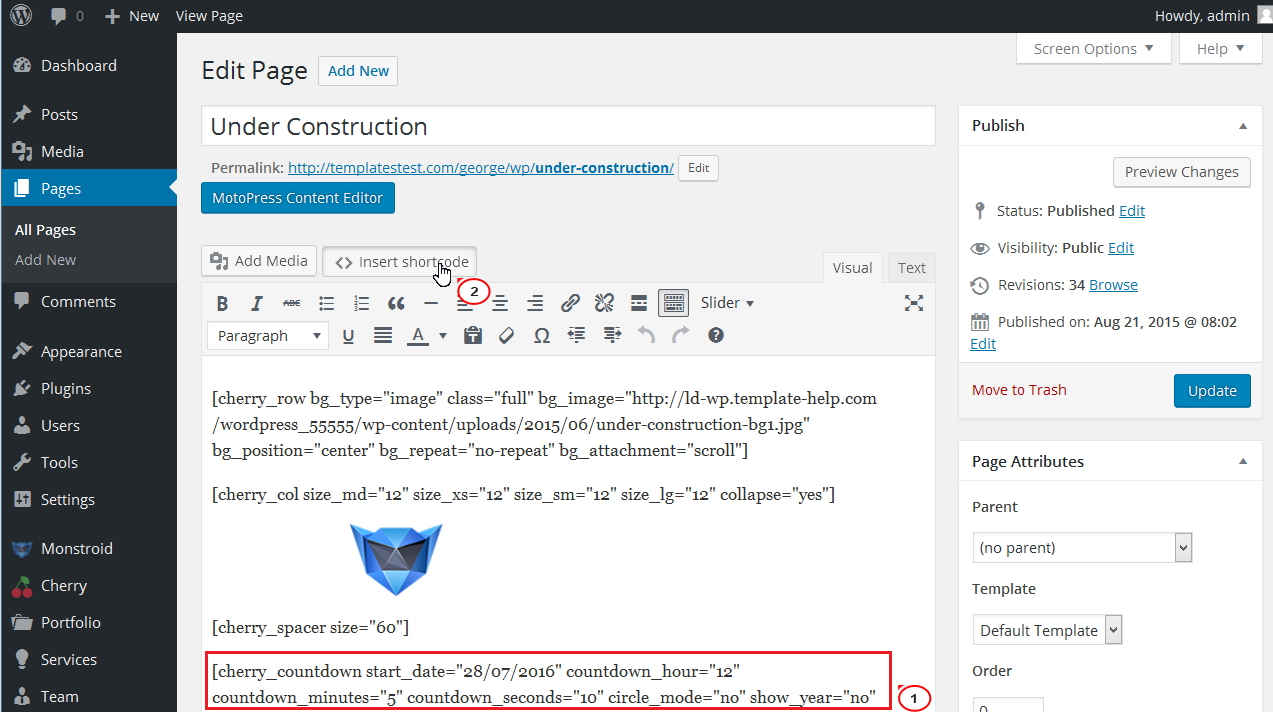
Search for the Countdown shortcode, or create a new one by using the cherry shortcode button.
This is how default Under Construction page looks like.

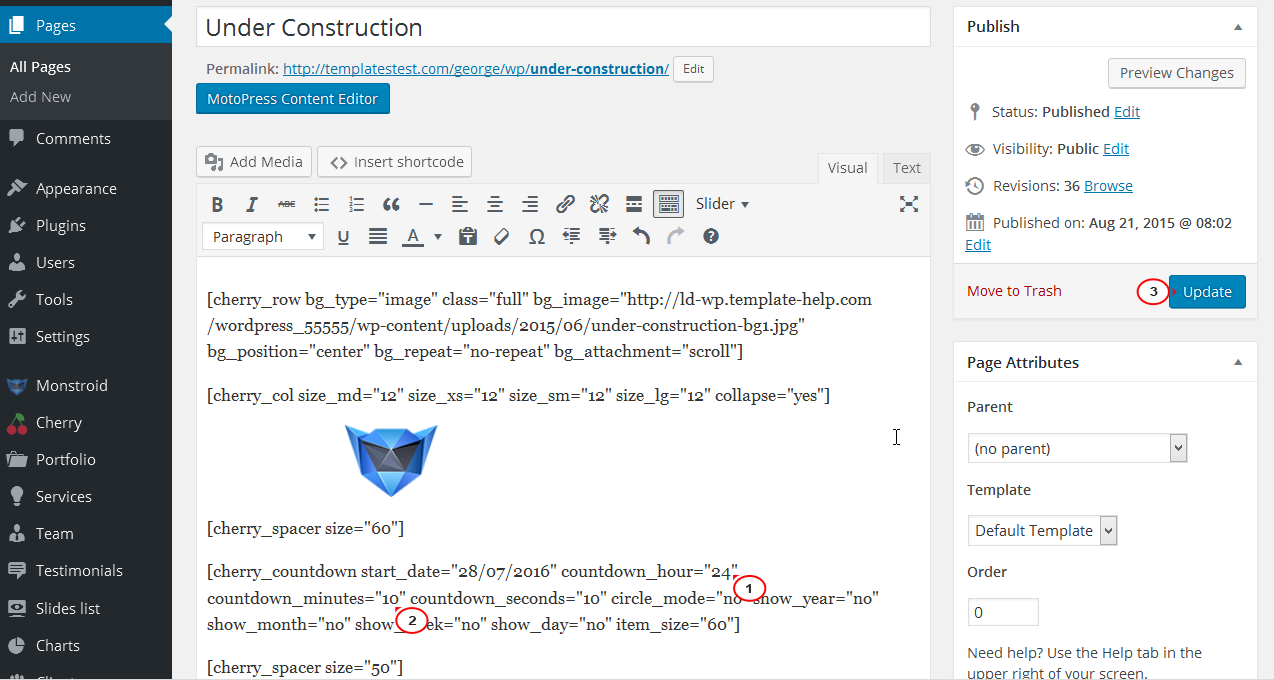
We are going to change Hours and Minutes in the Countdown Timer. In the shortcode search for coundown_hours value (in our case it is 23 and we will change it to 46), do the same for countdown_minutes (change 5 to 10). When you are done, press the Update button.
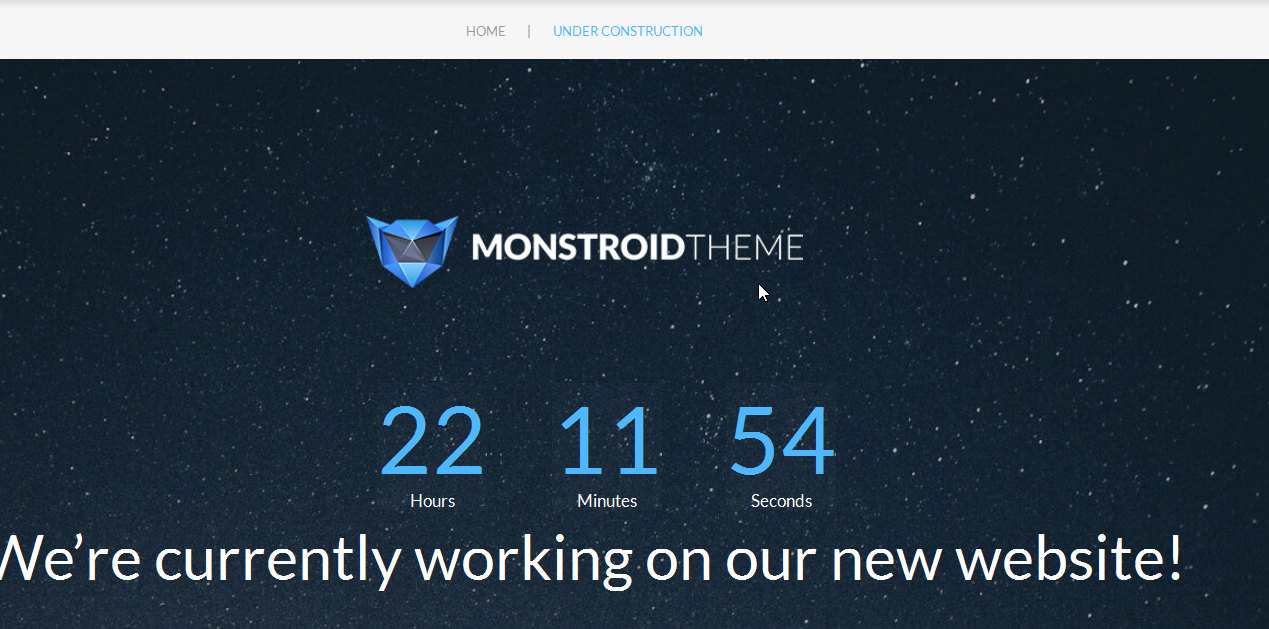
Open your Under Construction page frontend and make sure to refresh the page to see changes applied.
Feel free to check the detailed video tutorial below:
Monstroid. How to manage Countdown Timer on default Maintenance page