


- Web templates
- E-commerce Templates
- CMS & Blog Templates
- Facebook Templates
- Website Builders
FAQs
General Tutorials
Featured templates
MonsterONE Subscrioption


This tutorial shows how to work with MotoPress Slider Style Editor in Monstroid templates.
Monstroid. How to work with MotoPress Slider Style Editor.jpg)
The updated version of MotoPress Slider contains the Style Editor. That allows customizing slide layers, their styles and texts using preview area and avoiding any manual changes of code or CSS rules.
Navigate to MotoPress Slider tab in the Dashboard at first; select slider to edit and pick the actual slide to work with.
A tab with slide image and text opens. This is used to manage slide’s content. Choose a layer to modify and refer to the ‘Style’ section there. Click ‘Edit’ button to load the Style Editor:

Screen with advanced options loads. It allows controlling both normal and hover state of each slide layer:
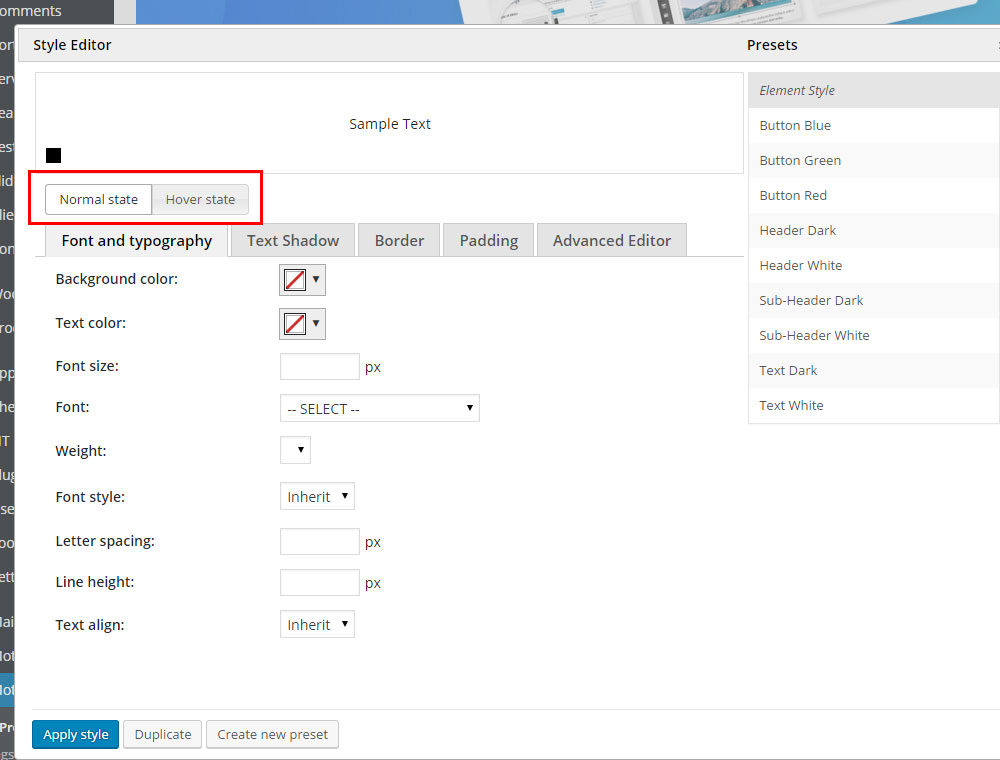
Use suggested areas to update slide layer:
Background: helps to define background area of any object;
Font and typography: sets text color, font and size, weight and style, letter spacing, line height and text align within a few clicks;
Text shadow: allows using a shadow for text, defining its color, radius, and horizontal and vertical lengths;
Border: sets border type, color and radius;
Padding: it allows setting padding for all 4 sides of the object;
Advanced Editor: this text field is used to input CSS-styles for developers.
Select if you’d like to enable Hover styles. If so, use the same tabs to control hover layout of the slide layer.
Use ‘Create new preset’ button if you’d like to keep current settings for future custom modifications.
Click ‘Apply Style’ button to save changes once all modifications are applied.
Feel free to check the detailed video tutorial below:
Monstroid. How to work with MotoPress Slider Style Editor