


- Web templates
- E-commerce Templates
- CMS & Blog Templates
- Facebook Templates
- Website Builders
FAQs
General Tutorials
Featured templates
MonsterONE Subscrioption


This tutorial will show you how to create categories and sub-categories in OpenCart 2.x.
OpenCart 2.x. How to create categories and subcategories
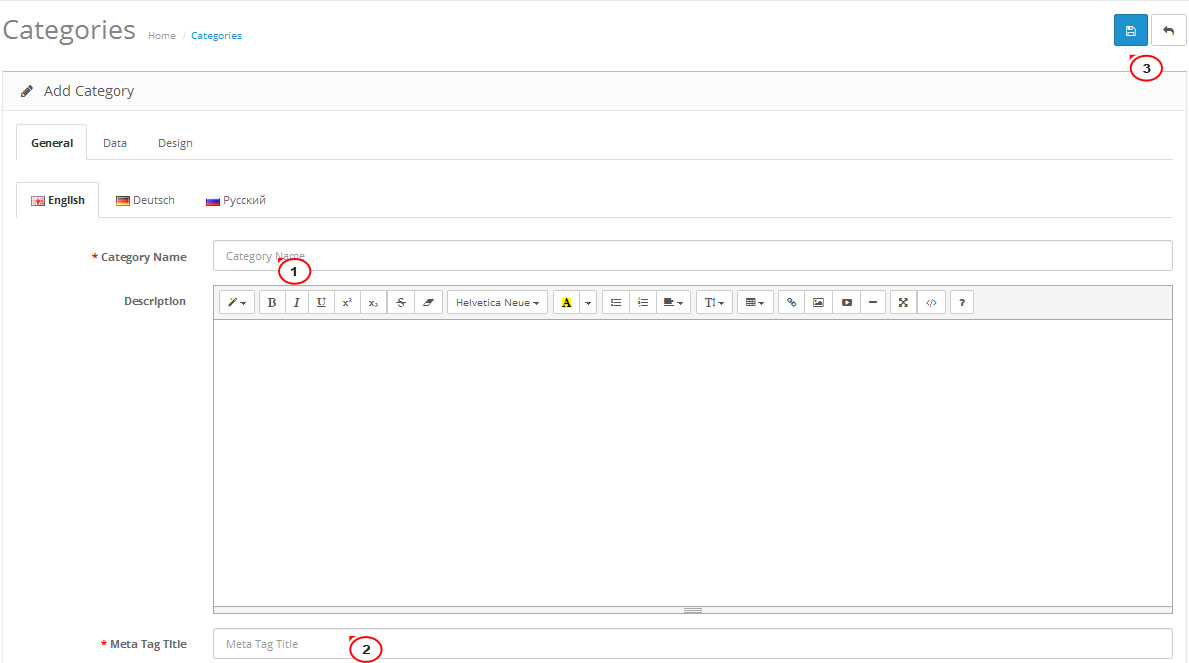
Log into your OpenCart admin panel and go to Catalog -> Categories, click Add new button:

Under Category -> General tab input your category name, category description, meta tag title, etc. (category name and meta tag title must be added in all languages available):
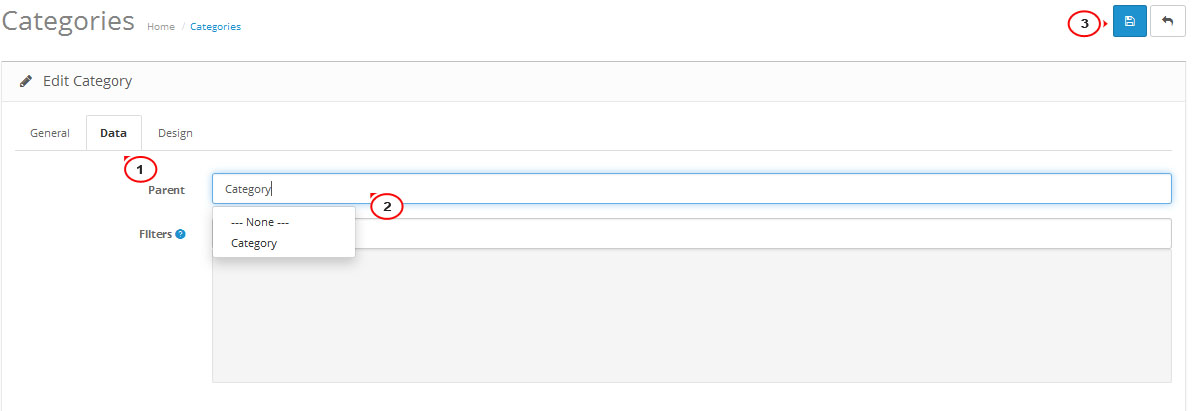
Now open Category -> Data tab. Select Parent Category only if it is a sub-category of a Category. Under Stores you can select the store that you want this category to appear. Select an Image (if you have a general image of this category). Top option will display the category in the top menu bar. Input 0 under Sort order if you want it to sort by alphabetical order. Once done – save the changes:

Creating sub-categories are the same with creating categories, except for the Data tab of Categories. For example, let’s create categories Category – Test. Create Test category and input all other data as usual. Open Data tab and select the parent category (which is ‘Category’ in this example), just start typing your category name and it will appear automatically:
That’s it! Now you know how to create categories and sub-categories.
Feel free to check the detailed video tutorial below:
