


- Web templates
- E-commerce Templates
- CMS & Blog Templates
- Facebook Templates
- Website Builders
FAQs
General Tutorials
Featured templates
MonsterONE Subscrioption


This tutorial is going to show you how to manage banners in Opencart 2.x templates.
OpenCart 2.x. How to manage banners positions
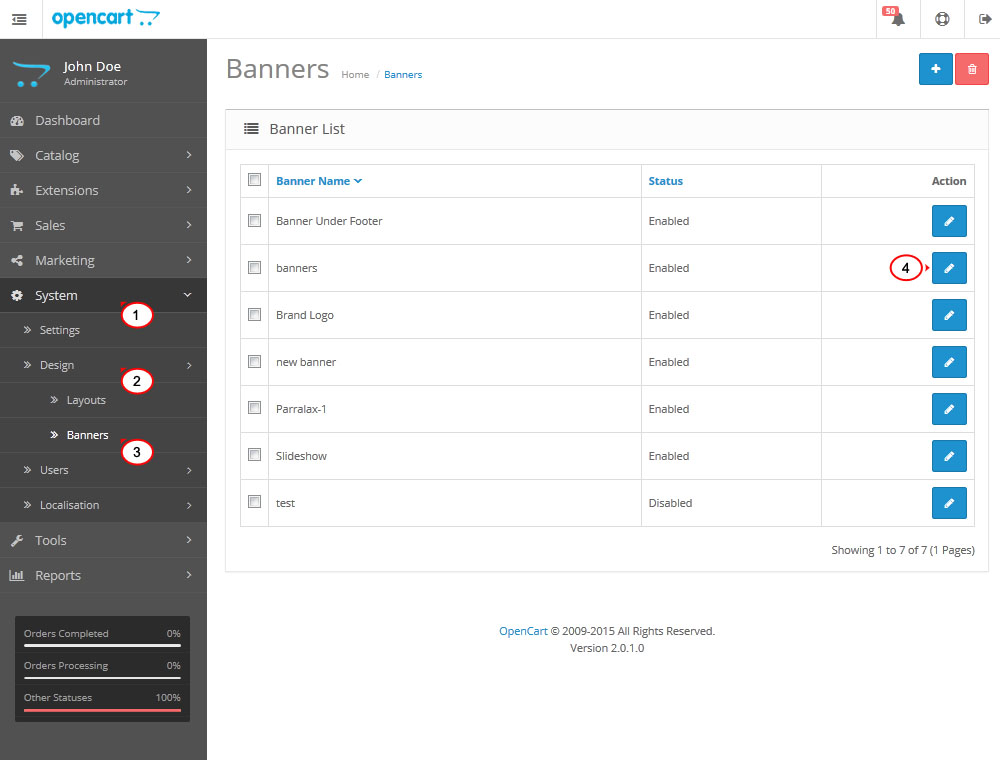
In order to edit already existing banners, please log into your Opencart admin panel, navigate to System > Design > Banners page.
You will see the list of banners that came with the template there. Click on Edit to edit the banner:
On the banner configuration page you will see images available for this particular banner section.
You can modify the banner section name by entering your title to the Banner Name field.
Change the status (enabled/disabled).
Modify the banner titles (if you are using more than one language for your store, you can use a different title for each language).
Enter your banner description to the Description field. You can use different descriptions for all languages installed on your site.
Edit the banner links:
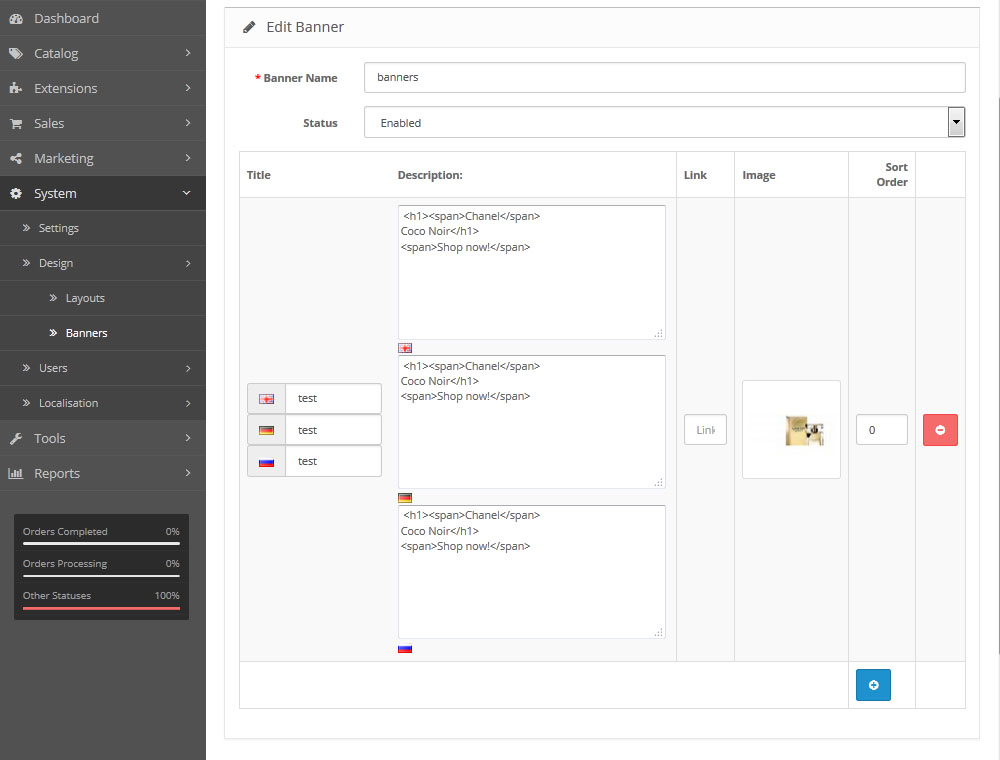
To change banner order, specify order under Sort Order column.
Upload your banner images by clicking the image > Edit button.
To remove banner image, click on the picture under the Image section and select Delete buttons:
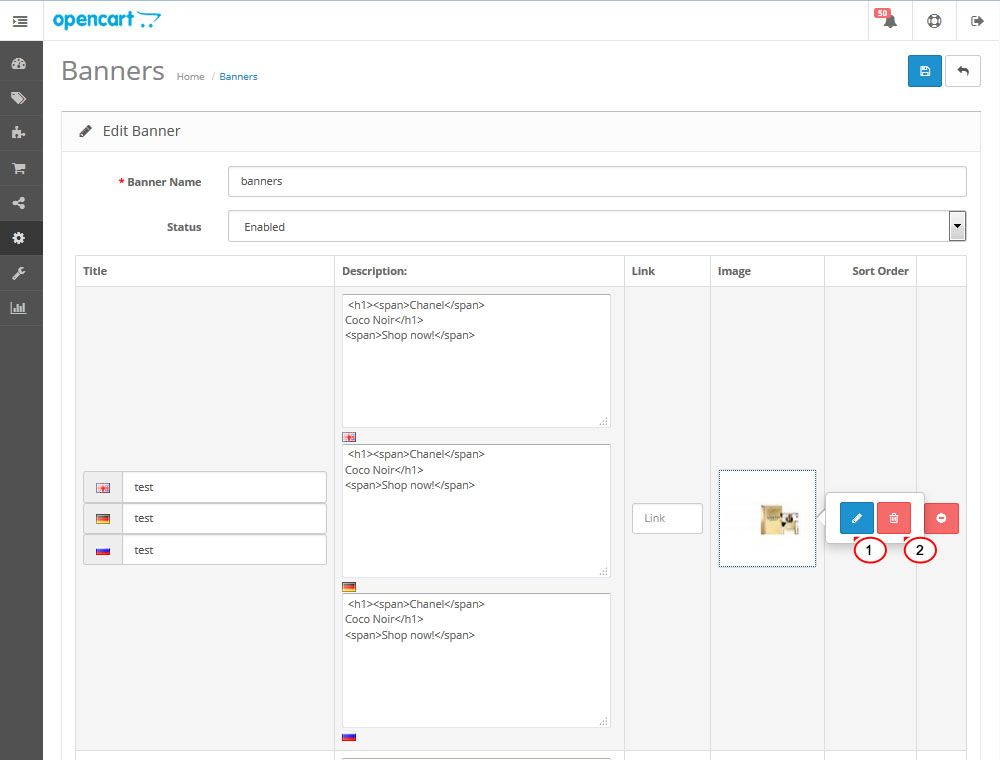
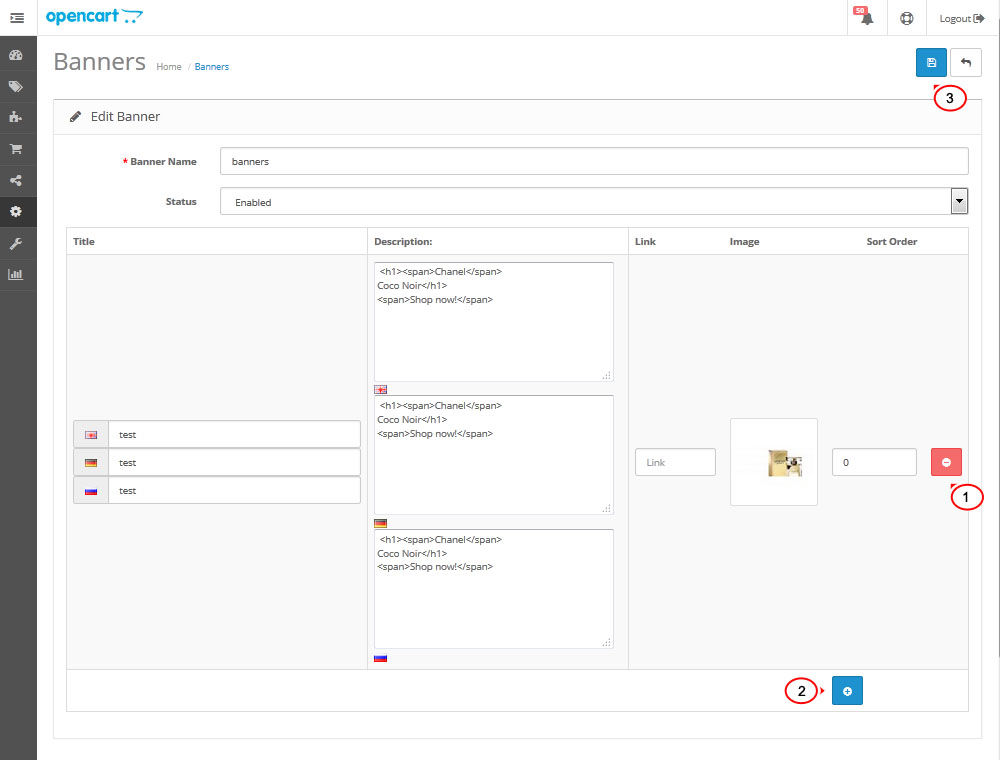
To remove particular banner, click on Remove next to it. To add more banners, click Add Banner at the top of the list.
Save the change by clicking Save button:
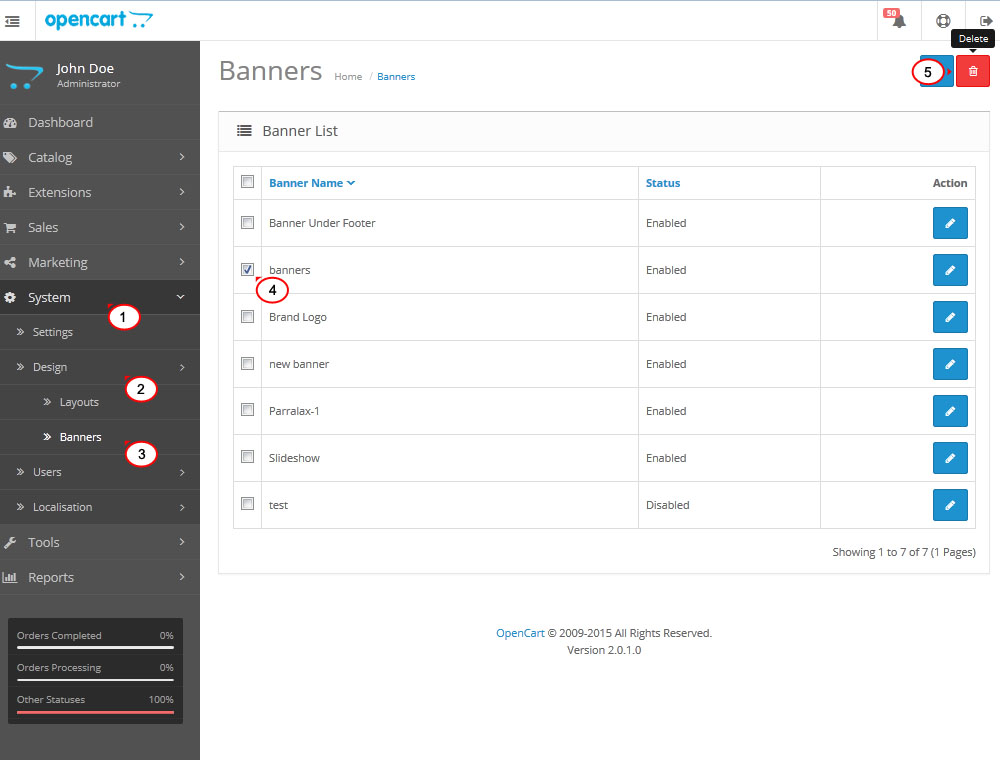
To delete particular banner section, check it under System > Design > Banners page, check banner you would like to remove and click Delete button in the top right corner:
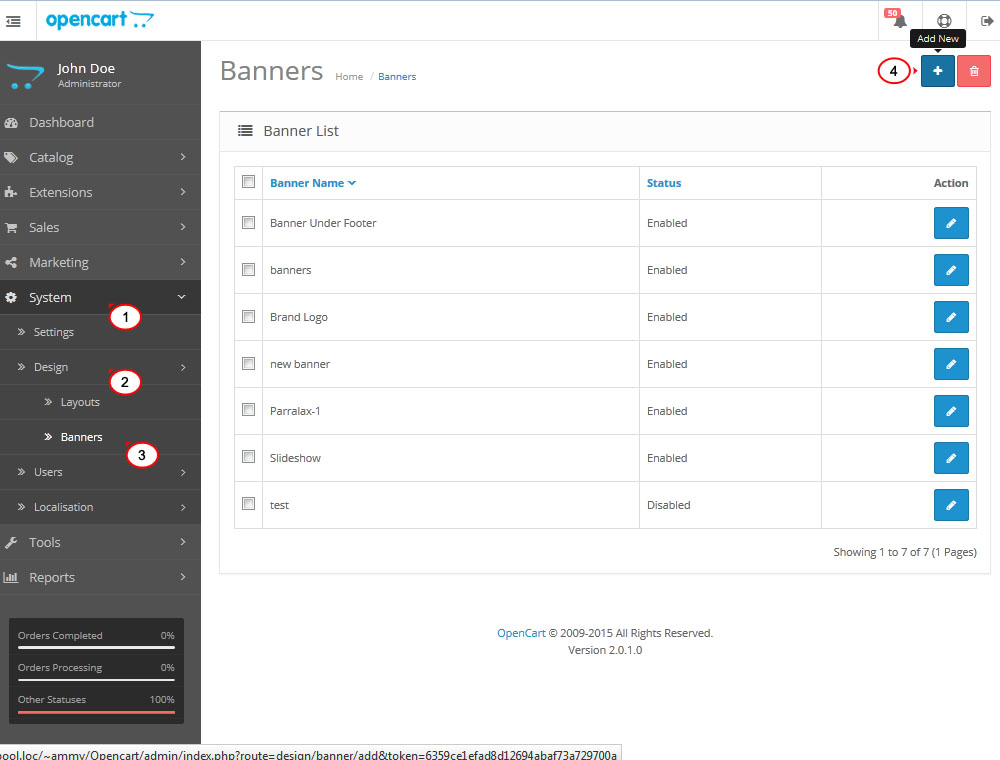
To add new banner section, follow the steps below:
Open System > Default > Banners page. Click Add New button:
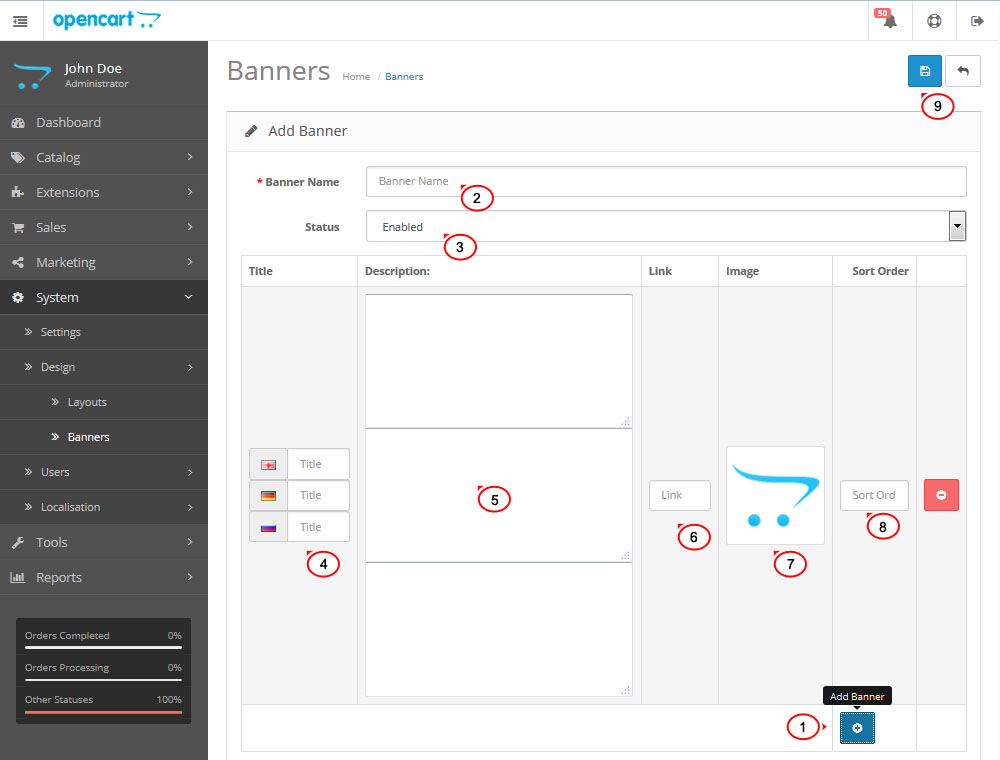
Add new banner section title.
Change new banner status to Enabled.
Click Add Banner to add new banner images.
Enter banner image name and specify link to which you would like to point your banner.
Upload your banner images by clicking on the image > Edit button.
Add more banner images by clicking Add Banner button and repeat the steps.
Click on Save to save the changes:
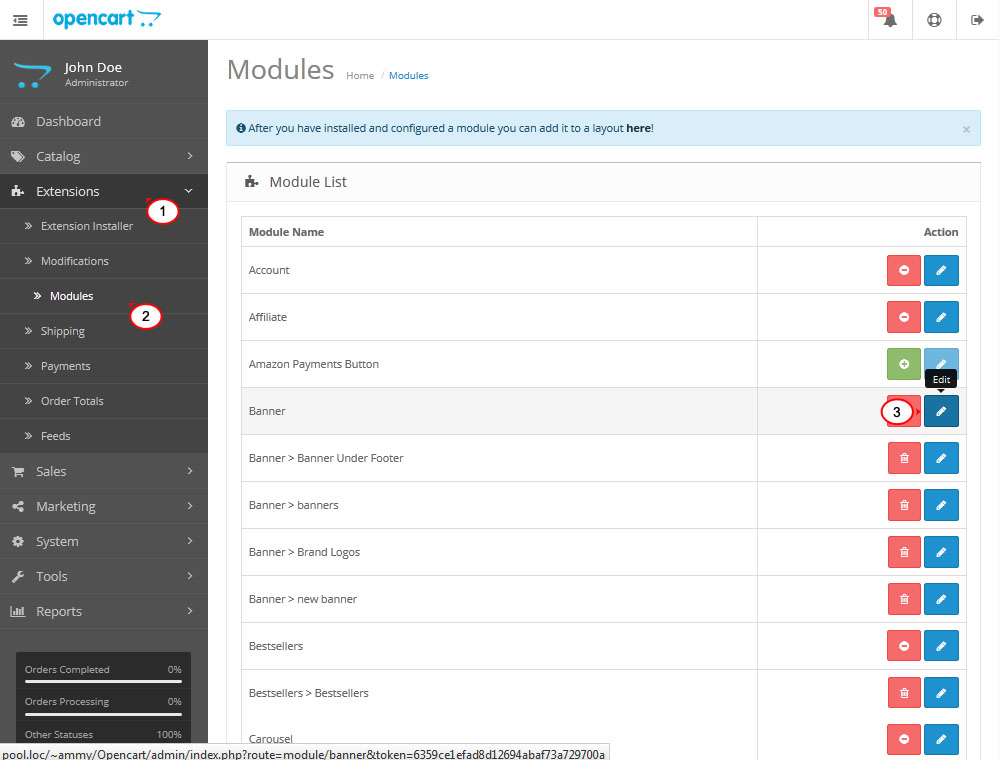
Now you will need to turn on the banners and set their position:
Open Extensions > Modules > Banners page in your admin panel. Click on Edit next to the Banner module:
Enter banner settings on the next screen:
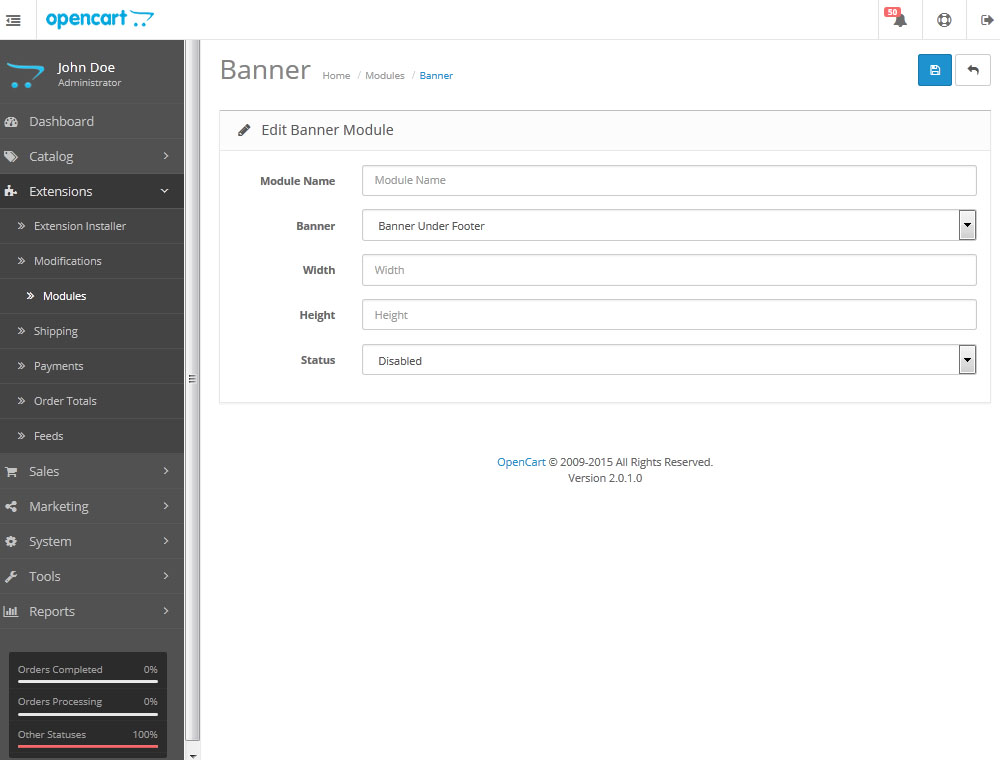
Enter module title to the Module Name field.
Select module position from Banner drop down.
Specify banner images dimensions, fill in Width and Height fields.
Change module status to Enabled.
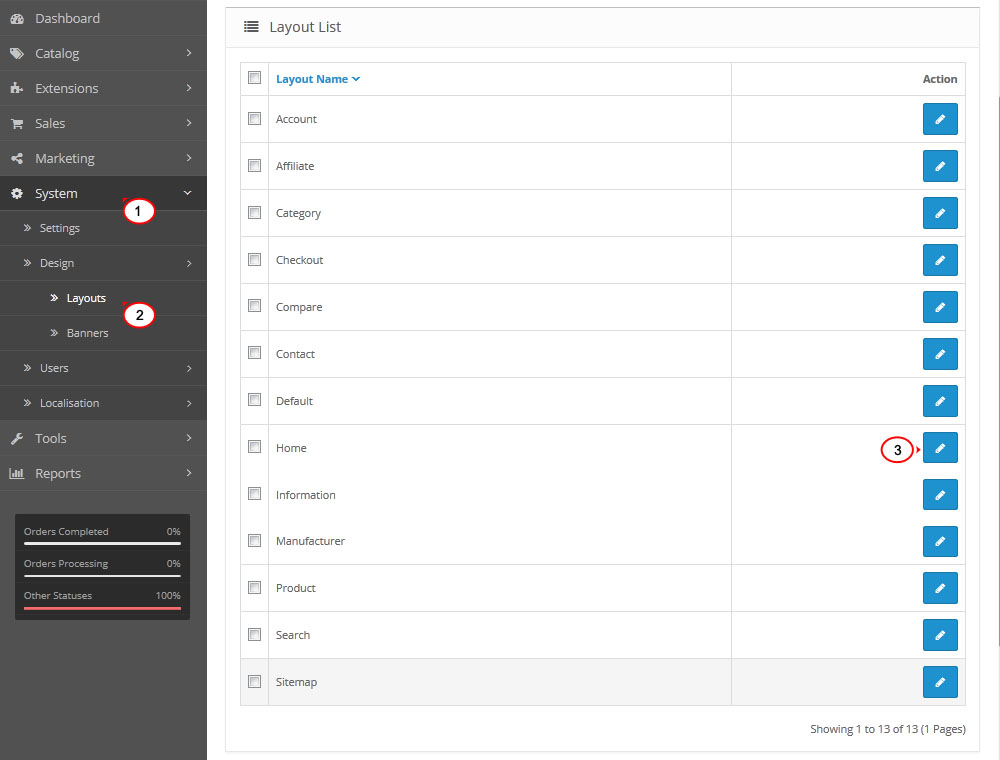
Open System > Layouts page. Click on Edit next to the page where you would like your new banner module to appear:
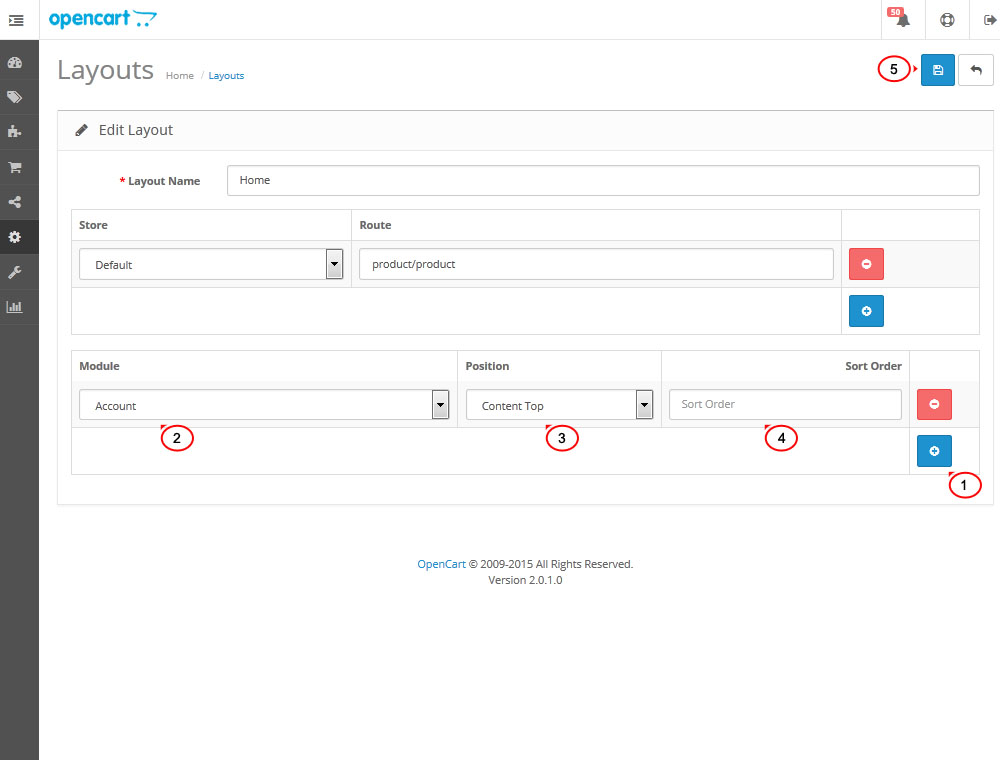
Set up your new banner module:
Select banner module from the Module section.
Choose module position from the Position drop down.
Set banner order in Sort Order field.
Click Save to save and check your site to see new banner:
Feel free to check the detailed video tutorial below:
