


- Web templates
- E-commerce Templates
- CMS & Blog Templates
- Facebook Templates
- Website Builders
FAQs
General Tutorials
Featured templates
MonsterONE Subscrioption


This tutorial shows how to edit Google map location in OpenCart 2.x templates 53552, 53398, 53325, 53279, 53122, 53499.
OpenCart 2.x. How to manage Google map in templates 53552, 53398, 53325, 53279, 53122, 53499
In order to update Google Map location on the site, you should perform the following steps:
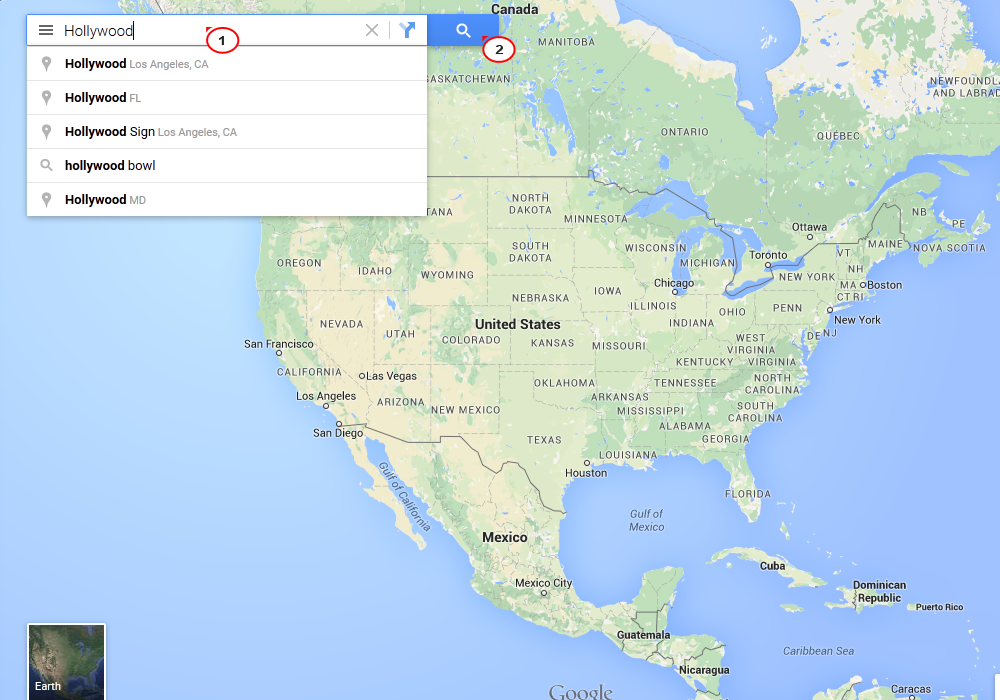
Open https://www.google.com/maps/ in your browser and insert your address into the Search bar and click the Search button:
When search is complete, right click the location and select What’s here? in the drop-down menu. The popup box with coordinates will appear:
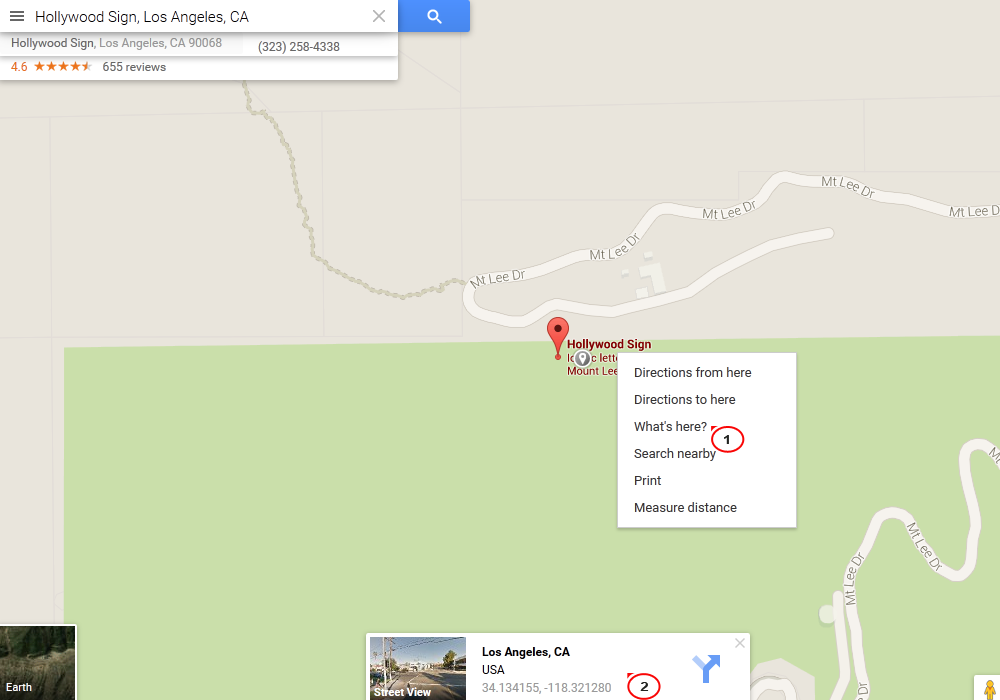
Click coordinates in the popup box, now you can see the Y and X values in the search bar. Let’s insert them into the map.
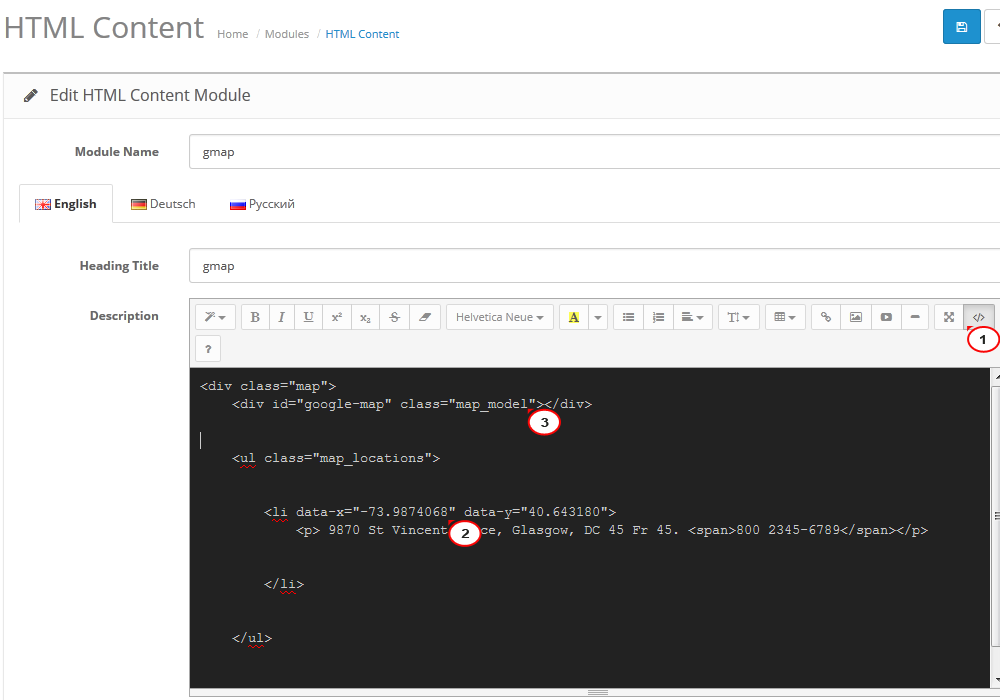
Navigate to OpenCart admin panel – Modules – HTML Content > gmap. Module can also be called “HTML Content > contacts”. Click the Source code button in the editor. In Code View window, you’ll see the map marker coordinates:
	<div id="google-map" class="map_model"></div>
    <ul class="map_locations">
    <li data-x="-73.9874068" data-y="40.643180">
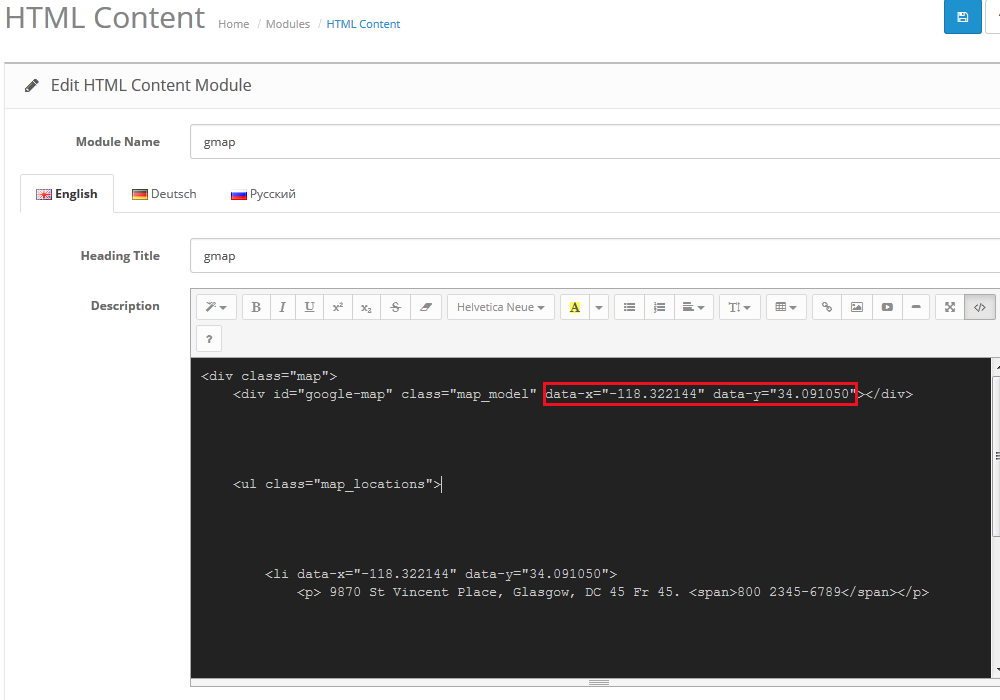
Replace Y and X values with new coordinates. Please note that the first parameter in Google Map search results stands for Y and the second one is for X:
When new coordinates are inserted, add them to the map div tags as well:
<div id="google-map" class="map_model"></div>
Line with new coordinates will look like the following:
<div id="google-map" class="map_model" data-x="-118.322144" data-y="34.091050"></div>
Save changes in the module and refresh front-end with Ctrl/Cmd+F5 to see changes.
Feel free to check the detailed video tutorial below:
OpenCart 2.x. How to manage Google map in templates 53552, 53398, 53325, 53279, 53122, 53499
