


- Web templates
- E-commerce Templates
- CMS & Blog Templates
- Facebook Templates
- Website Builders
FAQs
General Tutorials
Featured templates
MonsterONE Subscrioption


The following tutorial will show you how to manage TM Lookbook module in OpenCart 2.
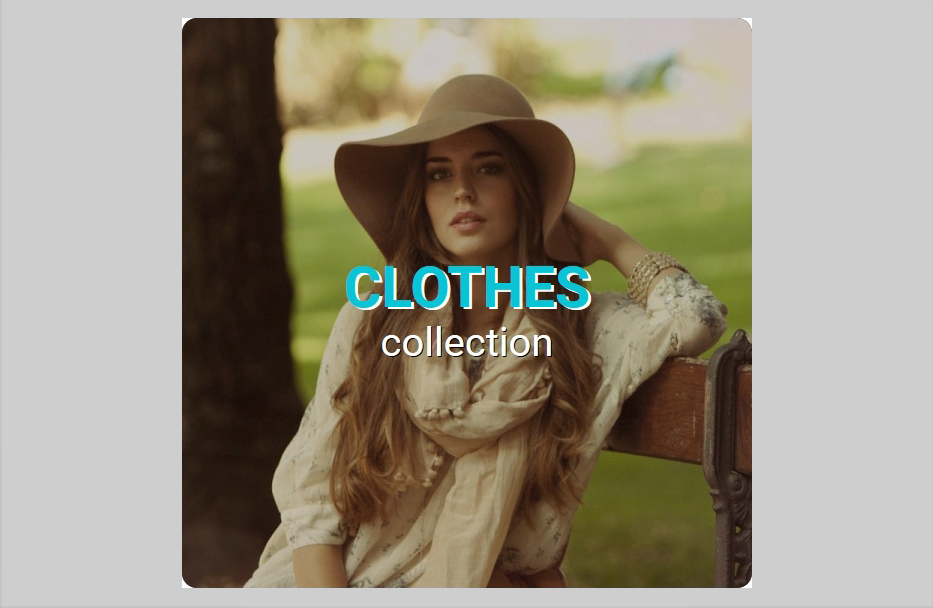
The lookbook is a set of photos, where you can mark any part of the image. This module serves for displaying the products of the one or several brands.
The module has two display modes for being displayed in the store position: in a form of a Banner (1) or in a form of a Collection (2).
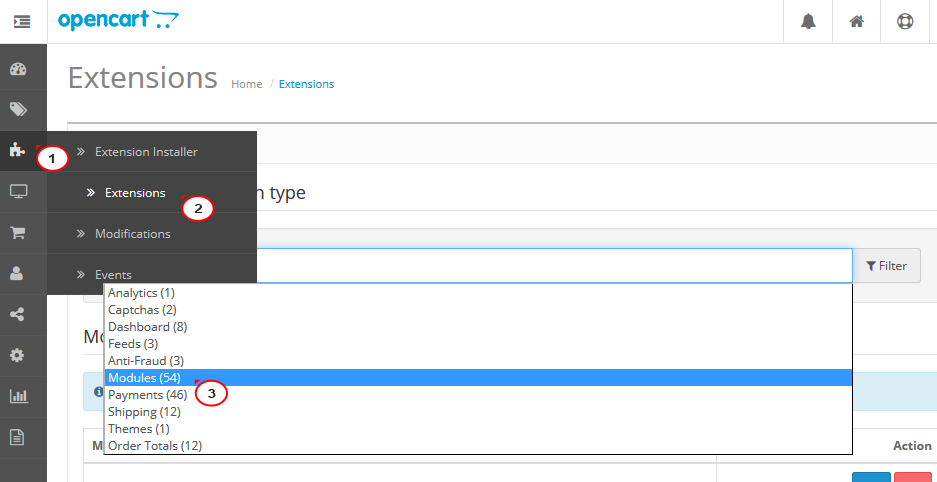
To manage it, open the Extensions > Extensions > Modules and scroll to TM Lookbook.
Click on Add new

Fill in the general info: Module Name, Collection Name, Display Content and Status. For Display Content you will have two options available:
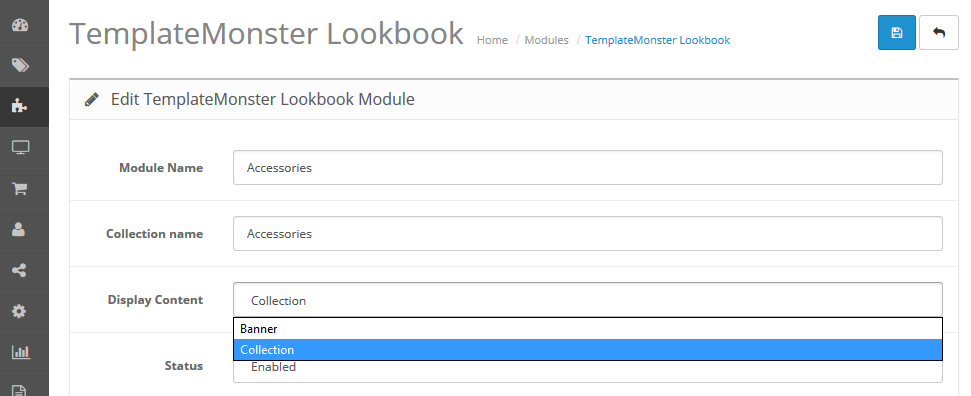
Banner display mode;
Collection display mode.
For the Banner content define the following settings:
Banner Wrapper Class: The class of the banner wrapper;
Banner Image: The image of the banner;
Banner Image Width: The width of the banner image;
Banner Image Height: The height of the banner image;
Banner Description: The description of the banner

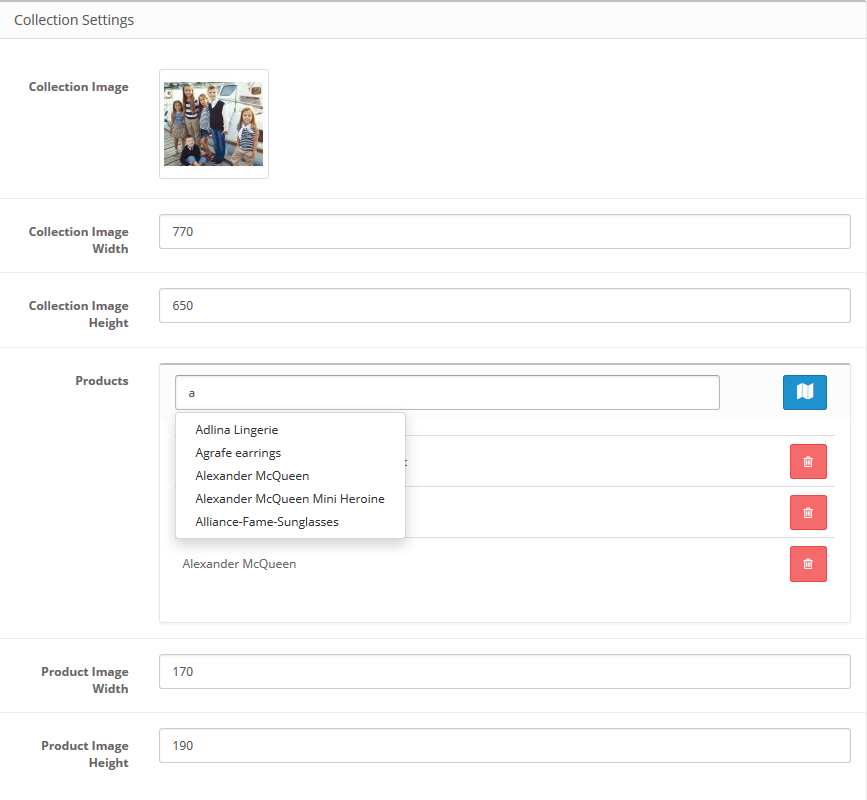
For the Collection lookbook content define the following settings:
Collection Image: The image of the collection;
Collection Image Width: The width of the collection image;
Collection Image Height: The height of the collection image;
Products: Collection products;
Product Image Width: The width of the product images;
Product Image Height: The height of the product images.
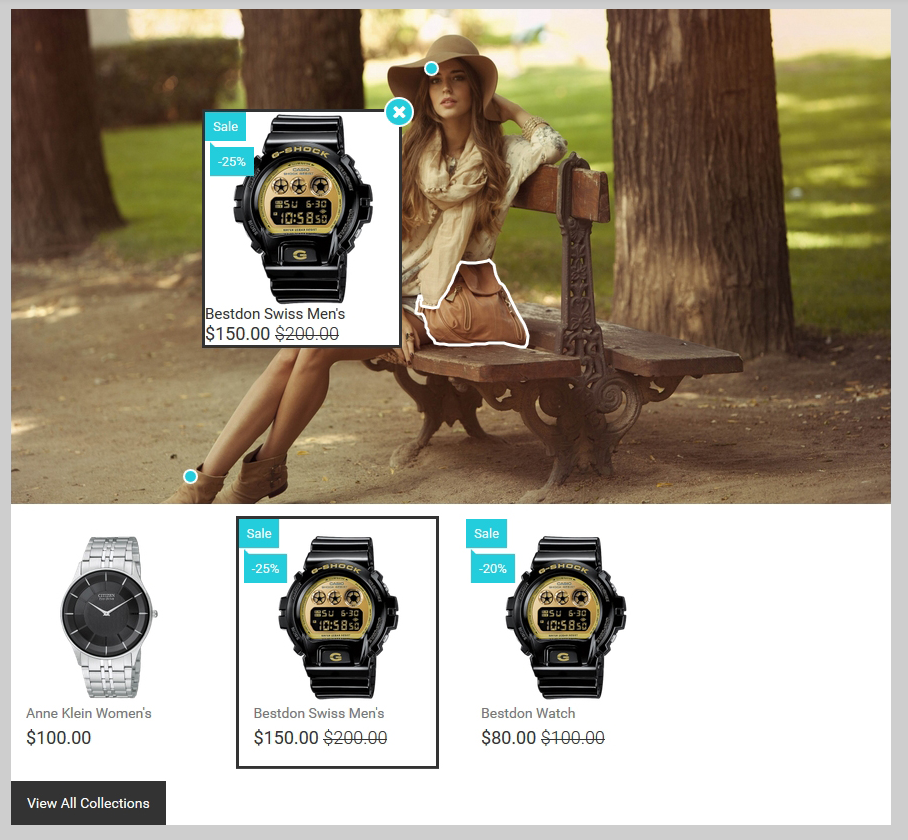
To mark the selected products on the image:
Press the “Add Image Map” button.
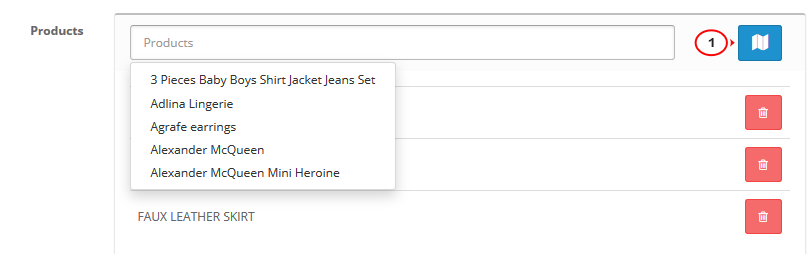
At the bottom, you’ll see a window, which allows creating selection areas and adding products to these areas.
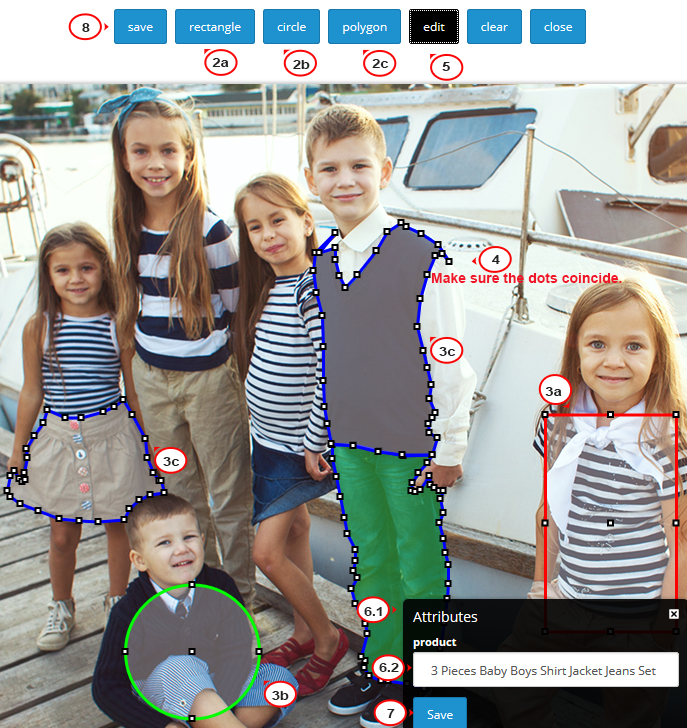
The areas that you create can be of 3 different forms: square, round, and complex (polygonal).
To create a selection area on the picture, press the button, the name of which corresponds to the necessary form of selection area.
After choosing the form, place it on the picture. Left-click the necessary part of the image, draw the area.
Note: Polygonal selection should always be closed, make the first and the last point coincide.
Press the “Edit” button.
Double-click the selected area and choose the needed product from the dropdown list.
Press the “Save” button.
After marking all the areas and mapping all the products, press the Save button at the top.
Save module settings when all is done.

Do you need more templates? Take a look at our selection of well-crafted OpenCart themes.
Feel free to check the detailed video tutorial below:
OpenCart 2.x. How to manage “TM Lookbook” moduleIf you need more premium templates to choose from, check out Best OpenCart Themes 2017.
