


- Web templates
- E-commerce Templates
- CMS & Blog Templates
- Facebook Templates
- Website Builders
FAQs
General Tutorials
Featured templates
MonsterONE Subscrioption


Our Support team is ready to present you a new tutorial that will become an indispensable guide on editing Opencart 2.x templates and make this process easy and effortless. One click on the button and the video will smoothly take you through this step by step.
We are going to provide you with short overview of “TM Layout Builder” module. This module serves for quick, simple and handy creation of different variants of the store main page.
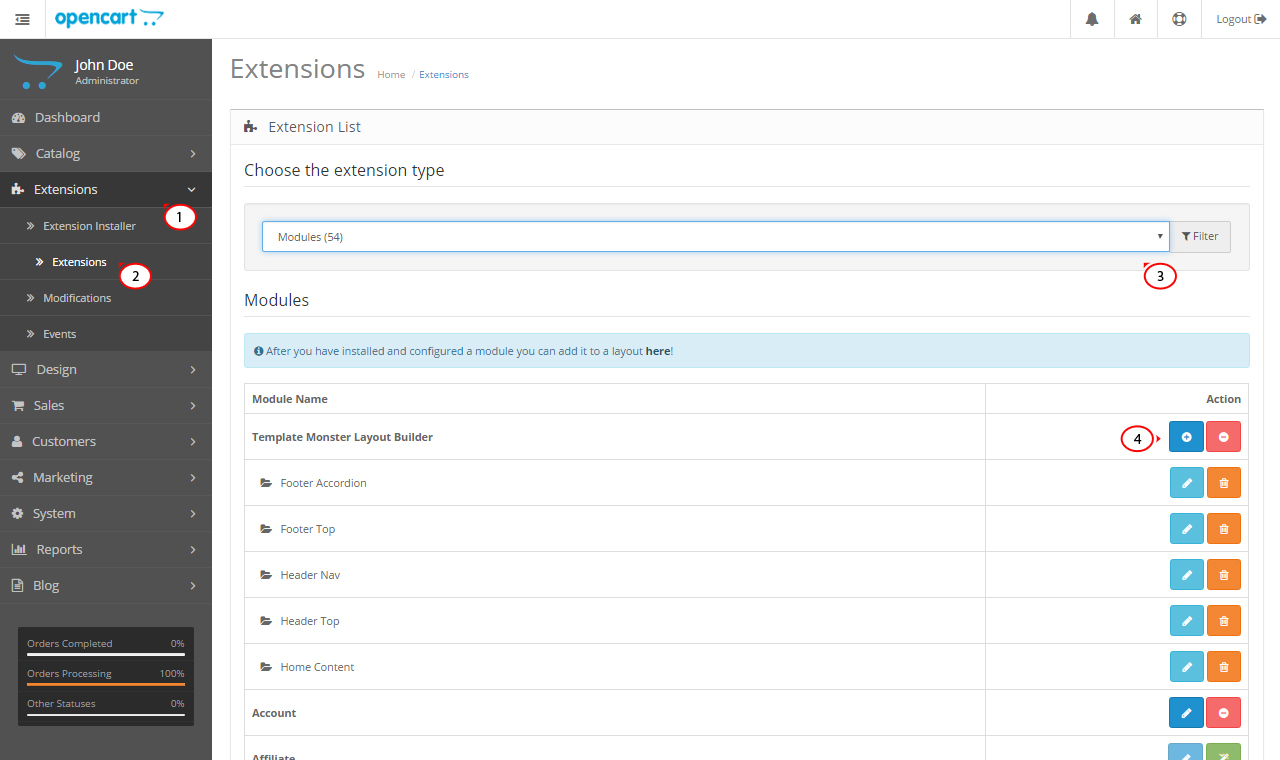
To configure this module, please, login to your site admin panel.
Navigate to the Extensions > Extensions page and choose the extension type. "TM Layout Builder" extension type is Modules.
Search for the Template Monster Layout Builder module.
You will see several layouts available here. Click on the Edit button to configure one of the layouts available.
Alternatively, you can add your layout by clicking Add New button next to the Template Monster Layout Builder.
On the next screenshot you can see the Template Monster Layout Builder module interference. We will check the basic module features further.
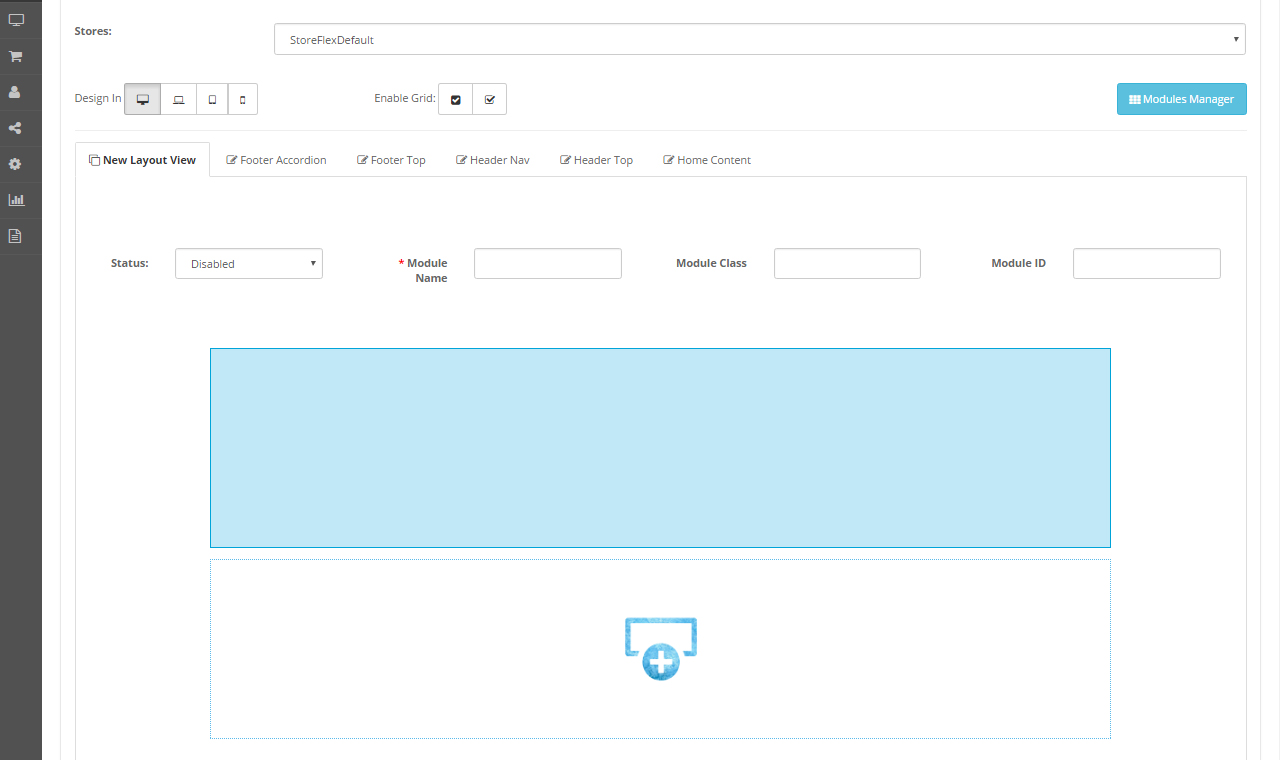
To create a new layout, press the New Layout View button.
Module has several buttons available. Those buttons make editing process much easier. Let’s take a closer look on them:
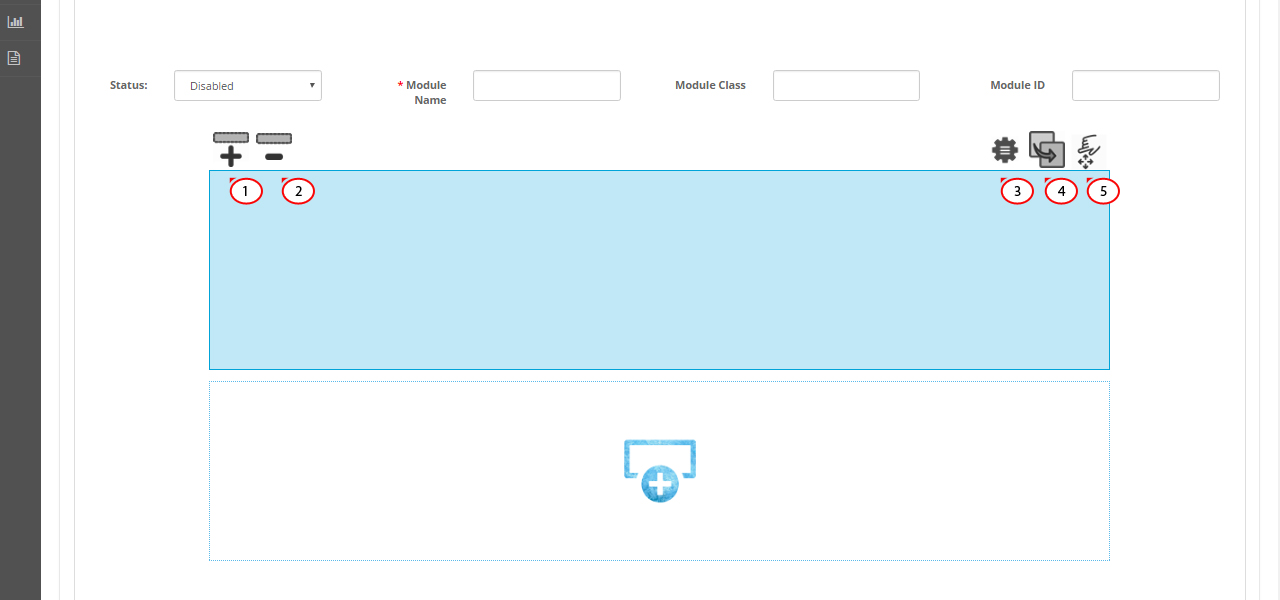
Press Add Column. After clicking this button you will be able to add rows. This option has several sections available:
After adding a column, insert a row. To add rows, press the Add Row button. The number of columns in the row is unlimited, and you can add as many columns as you need. The width of the columns can be set right after adding them with the help of the Drag and drop function by dragging the right border of the column.
Delete button allows you to remove unnecessary columns.
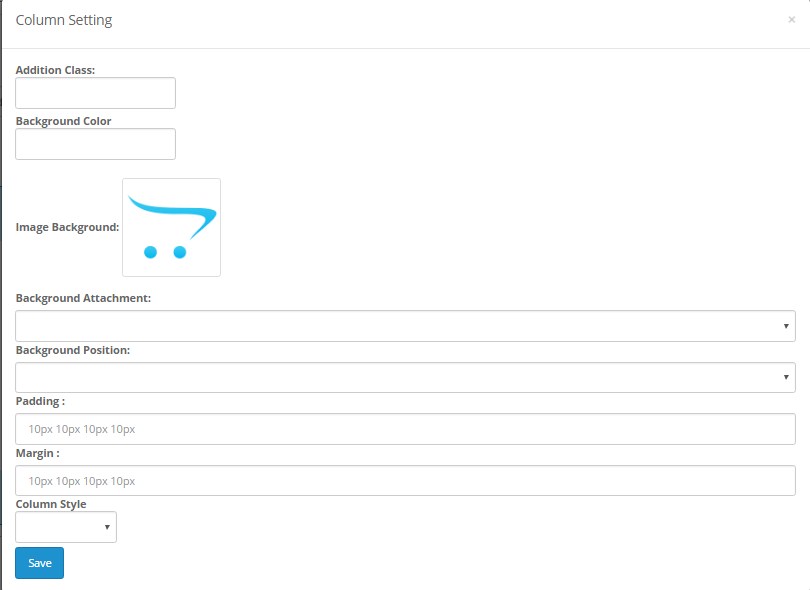
After clicking the Edit button opens pop-up window with a great customization tool which allows you to change column/row style. It allows you to set the background and change margin values for your blocks.
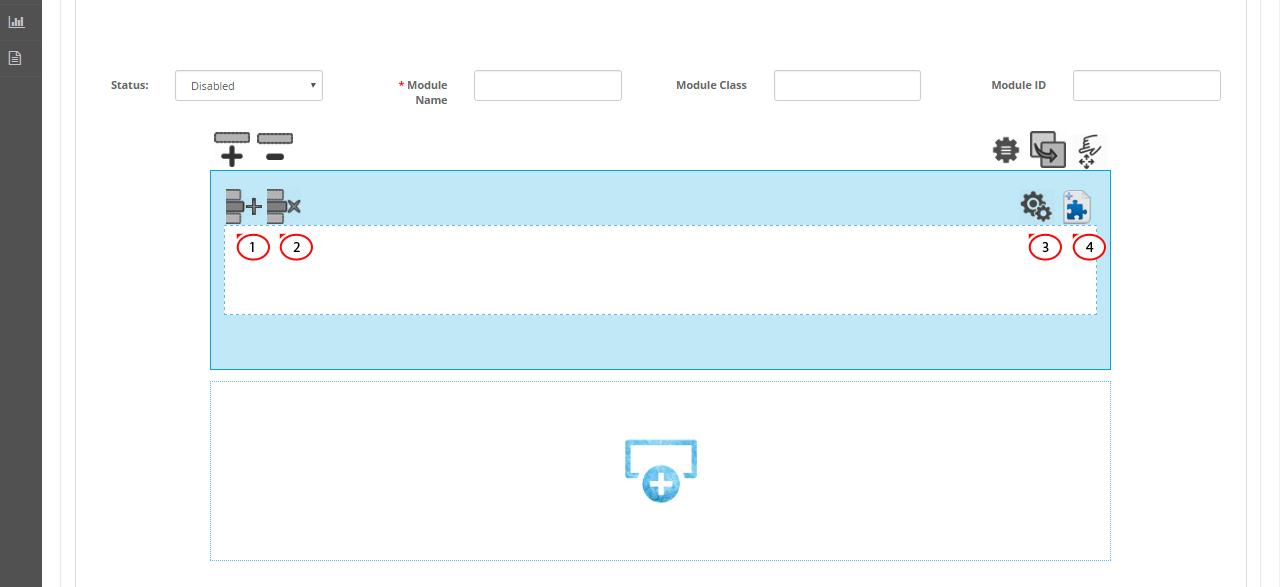
After adding the columns, you should fill them in with some content (modules). To add a module, press the Add Widget button and select the needed one among the dropdown.
Use the Delete button to remove column you don’t need.
Edit button allows you to adjust column style. We have mentioned it above.
Duplicate is a great tool that allows you to duplicate columns without coping them manually.
Sort option allows you to change columns order.
Check out a large array of top-quality OpenCart themes.
Feel free to check the detailed video tutorial below:
Opencart 2.x. “TM Layout Builder” module overviewIf you’re looking for a professional template to build a website, view Best OpenCart Themes 2017.
