- Web templates
- E-commerce Templates
- CMS & Blog Templates
- Facebook Templates
- Website Builders
osCommerce. How to assign a custom link to logo
March 30, 2015
Our Support team is ready to present a new tutorial that will show you how to assign a custom link to logo in OsCommerce.
osCommerce. How to assign a custom link to logoNavigate to includes folder on your server. Open header.php file for editing.
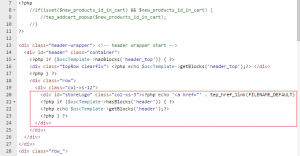
Use Ctrl+F to locate the following code:
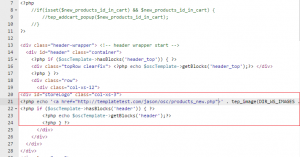
<div id="storeLogo" class="col-xs-3"><?php echo '<a href="' . tep_href_link(FILENAME_DEFAULT) . '">' . tep_image(DIR_WS_IMAGES . 'store_logo.png', STORE_NAME) . '</a>'; ?></div>

Replace ‘. tep_href_link(FILENAME_DEFAULT) .’ with your custom link:

Save the file when you are done.
Check the result on your site
Feel free to check the detailed video tutorial below:
osCommerce. How to assign a custom link to logo


