


- Web templates
- E-commerce Templates
- CMS & Blog Templates
- Facebook Templates
- Website Builders
FAQs
General Tutorials
Featured templates
MonsterONE Subscrioption


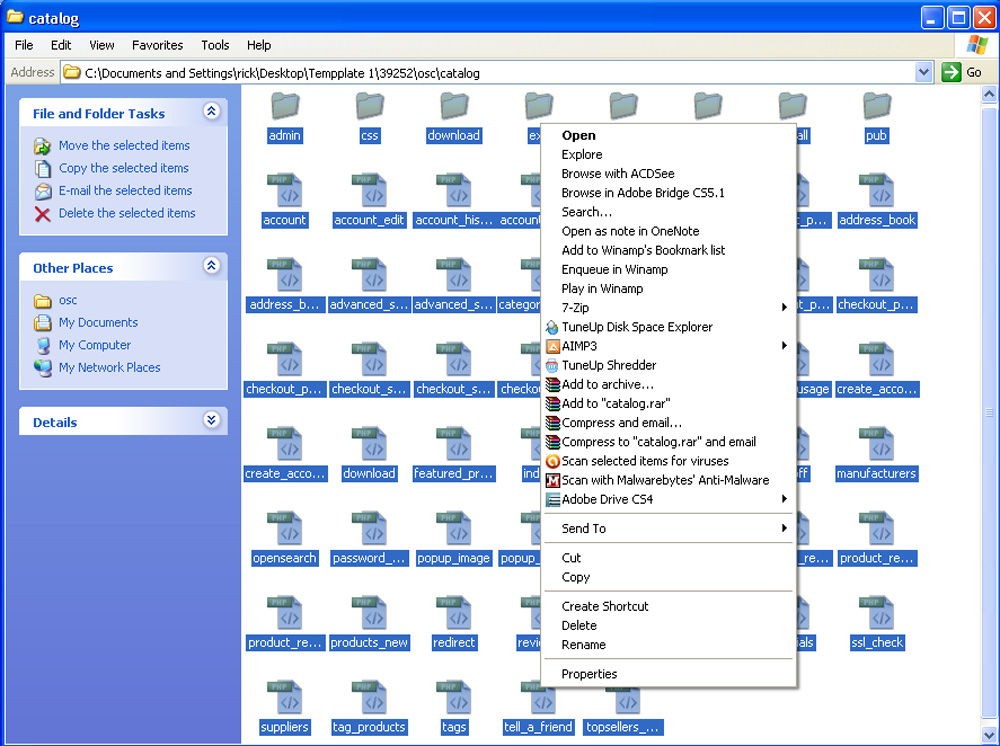
1. We should prepare files for upload. Please choose all the files you want to upload and add them to archive. Please be sure to create zip format that is the best variant for your CPanel.
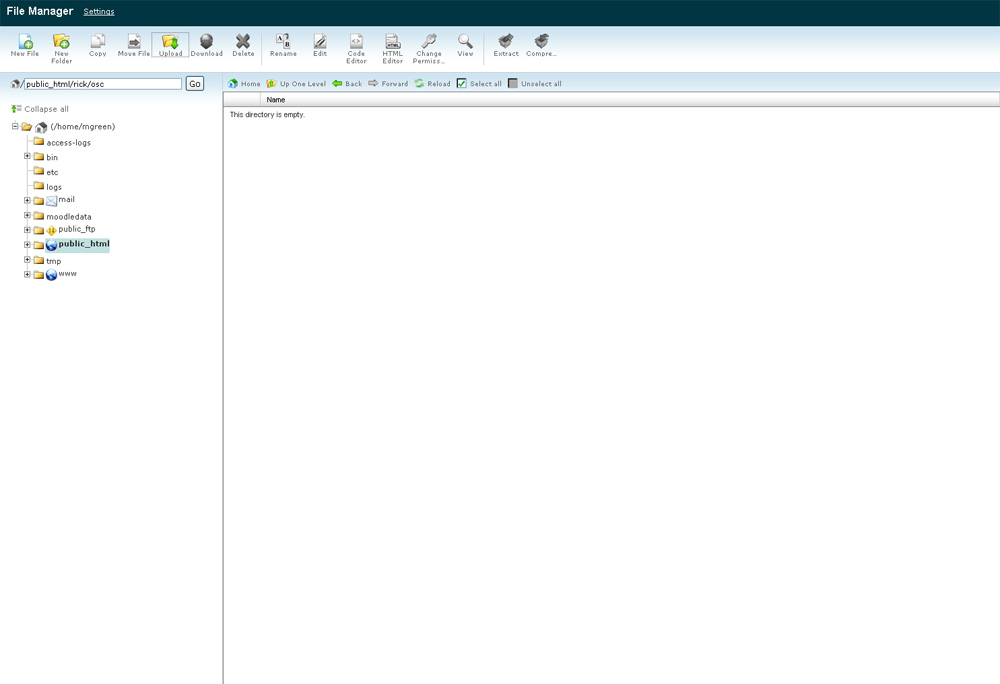
2. Files can be uploaded in several ways: via your Control Panel on your hosting account or via FTP client: Filezilla, Cyperduck or others. In the screenshots and video-tutorial you can see how to upload files through CPanel.
3. After you zipped the files, please open your CPanel on the directory you would like to upload in.
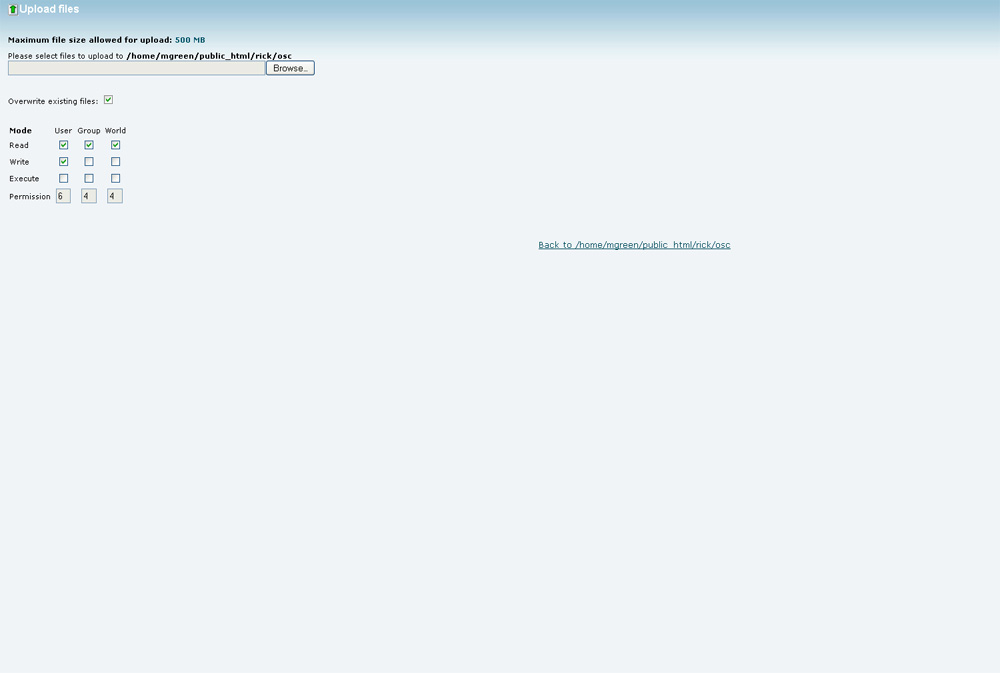
4. Press upload and choose the parameters you need (you can choose overwrite). After that click “Browse” and choose your zipped file you want to upload.
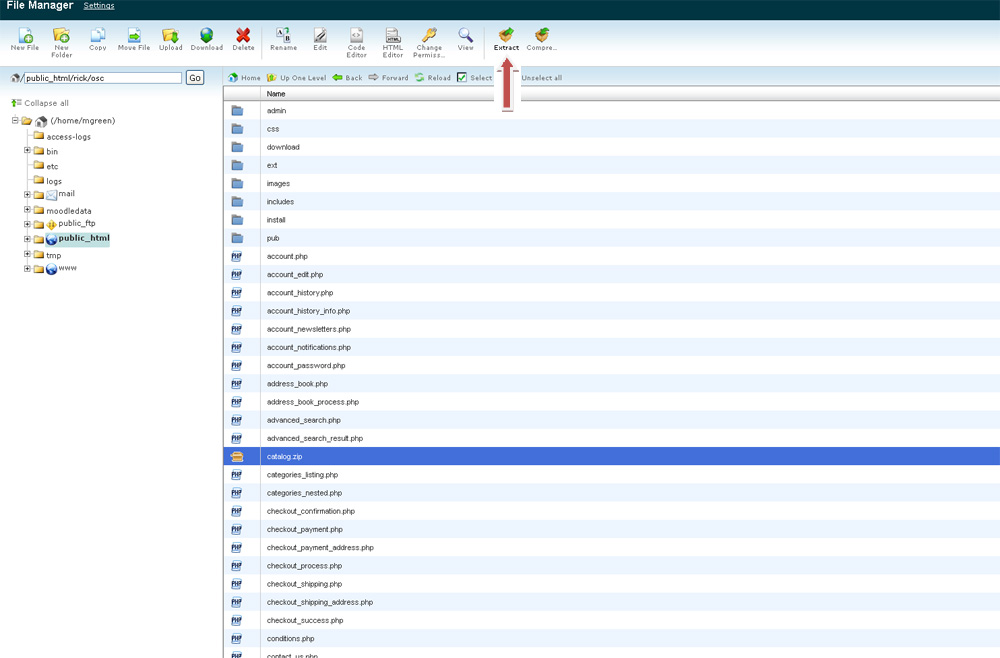
5. The files are already on the server, but need to be unzipped. Please choose your file and extract it.
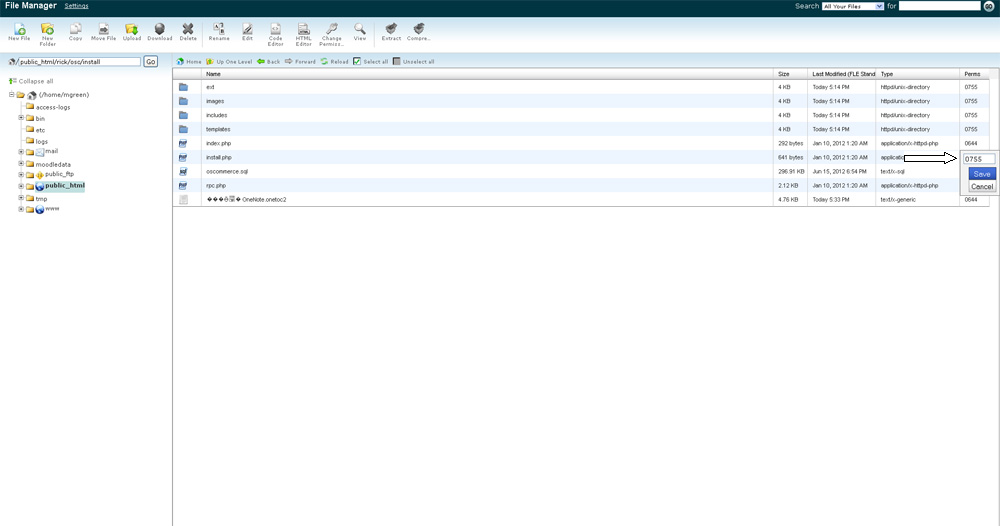
6. Now we can change the permissions of any file or folder. There are several ways you can change permissions in:


Feel free to check the detailed video tutorial below:
Uploading files and changing permissions