


- Web templates
- E-commerce Templates
- CMS & Blog Templates
- Facebook Templates
- Website Builders
FAQs
General Tutorials
Featured templates
MonsterONE Subscrioption


This tutorial shows how to change pre-defined images dimensions in PrestaShop 1.5 templates.
PrestaShop 1.5.x. How to change pre-defined images dimensions
When you upload an image to PrestaShop, PrestaShop automatically generates various sizes of this image. Therefore, you only have to upload one “master” version of your image, big enough to be resized into all the images sizes.
If you want to make sure your image is correctly resized, you should upload an image that fits the size ratio of the various image sizes. If your uploaded image does not have the same width-to-height ratio as the settings in place, you are risking to see white space on the resized image.
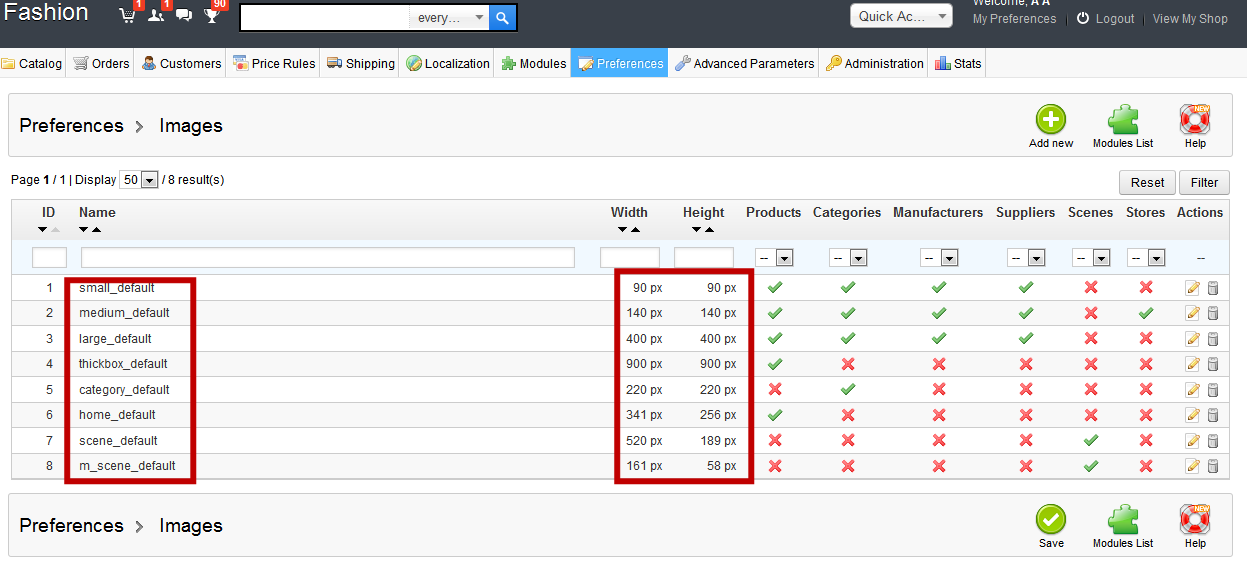
Go to Preferences –> Images in the admin section.

You can see images for different sections and their dimensions.
Click on an image name. Change Width and Height. Save the changes. Perform the same actions for other images.
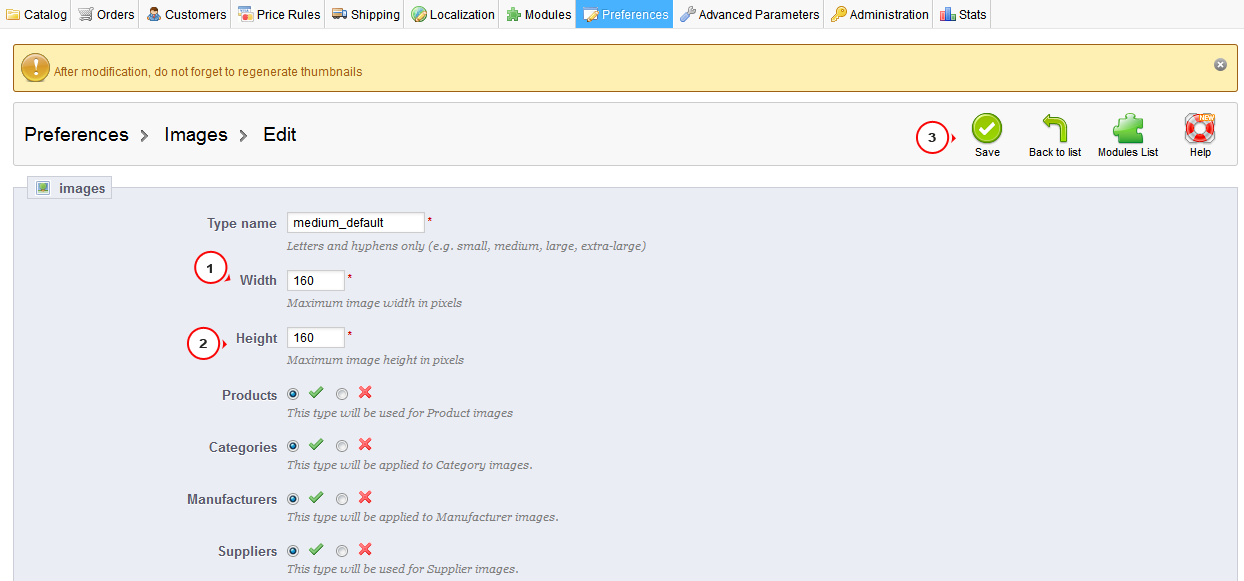
Click on Regenerate thumbnails in order to regenerate images.

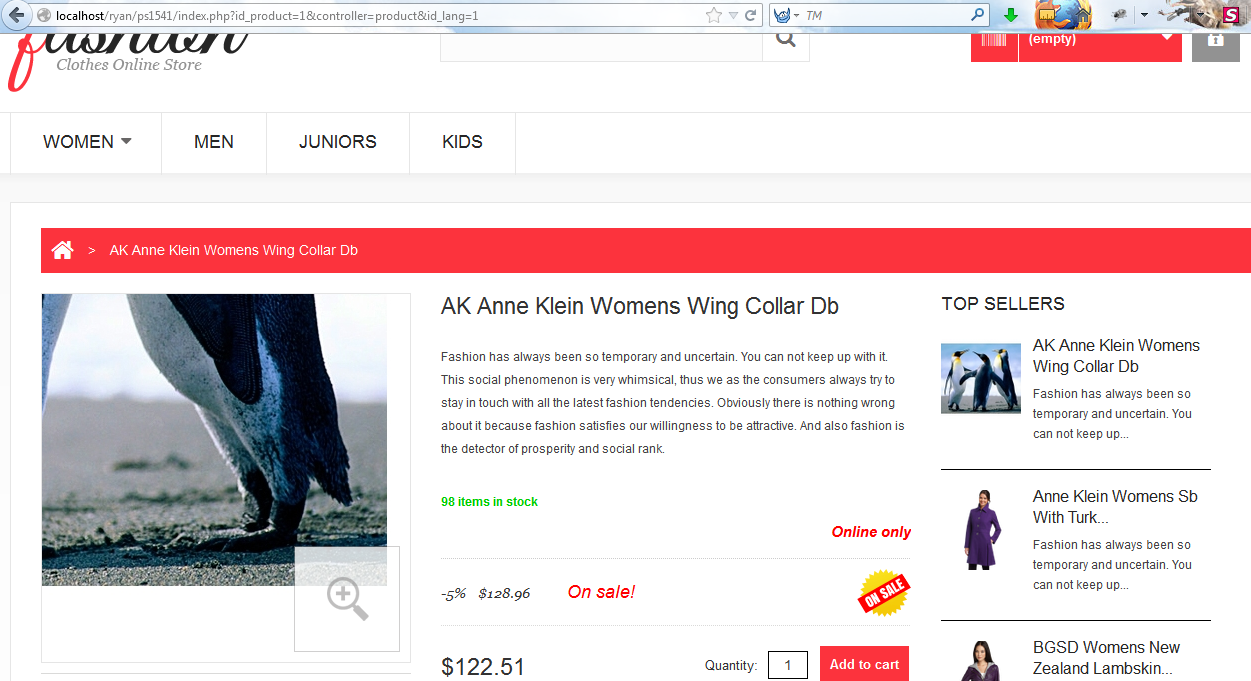
Clear browser cache and cookies, clear PrestaShop cache and refresh the page. We can see that the image size was changed in zoomed image. Please note that sometimes additional modification of CSS files and template files is required to make an image appear in the size you have specified.
Feel free to check the detailed video tutorial below:
PrestaShop 1.5.x. How to change pre-defined images dimensions
