


- Web templates
- E-commerce Templates
- CMS & Blog Templates
- Facebook Templates
- Website Builders
FAQs
General Tutorials
Featured templates
MonsterONE Subscrioption


This tutorial shows how to add a Shipping Carrier in PrestaShop 1.6.x.
Prestashop.1.6. How to add a Shipping Carrier
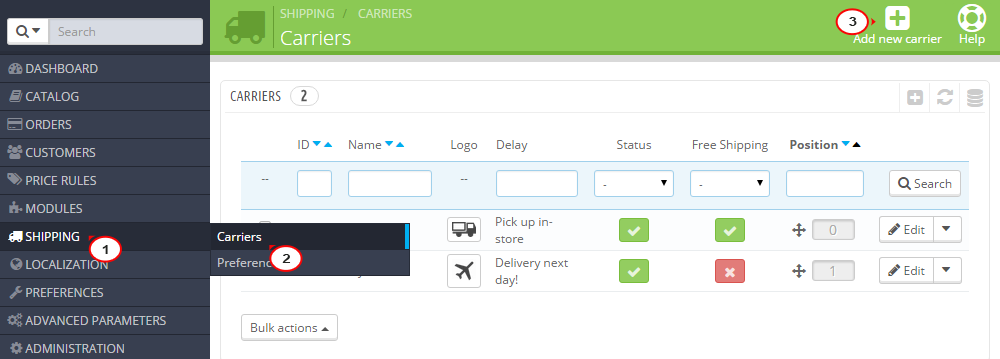
Log into the backend of your PrestaShop and go to Shipping -> Carriers -> Add new carrier:
Insert General settings for your new carrier and go to the Next step:
Carrier name – Enter the carrier’s title. For in-store pickup, enter 0 to replace the carrier name with your shop name.
Transit time – Estimated delivery time.
Speed grade – Speed class of carrier.
Logo – Click on Choose a file to upload the carrier company logo.
Tracking URL – Package delivery tracking:

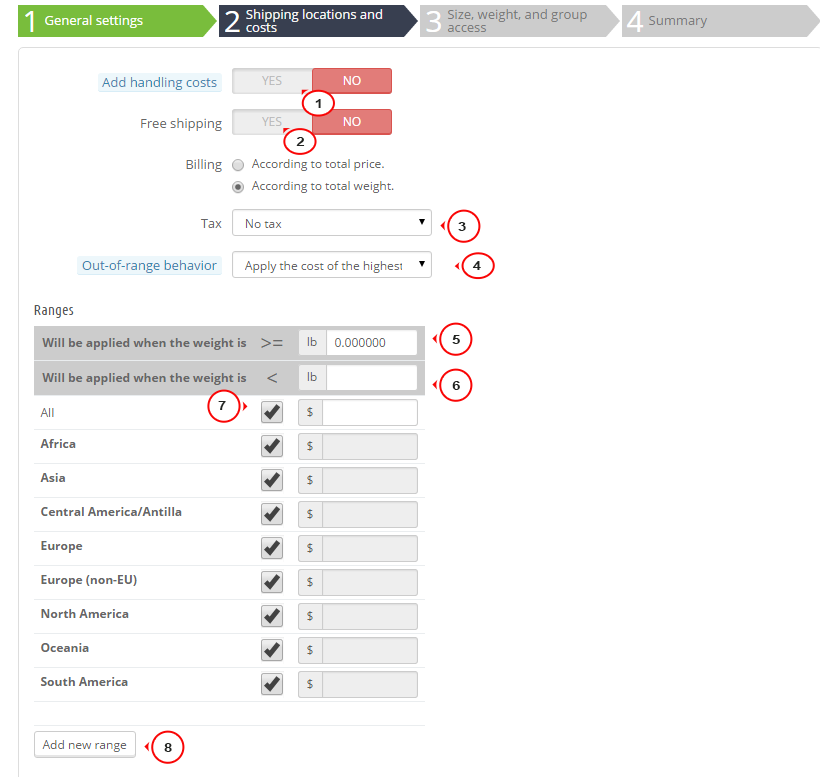
Set Shipping locations and costs to proceed to the next step:
Add handling costs – Include the handling costs (as set in Shipping > Preferences) in the final carrier price.
Free shipping – Enable/disable it.
Billing – Select either According to total price or According to total weight.
Tax – Choose the products tax type.
Out-of-range behavior – What to do with the carrier if a customer orders a product out of scope of the carrier.
Ranges – Select the geographical range for your carrier:
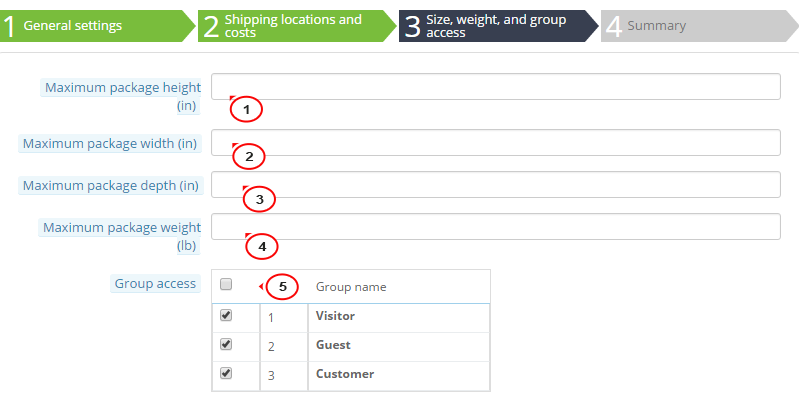
Set maximum values for Size, weight, and group access. These are not mandatory fields:
On the Summary step you can review and check the set carrier information and enable/disable it.
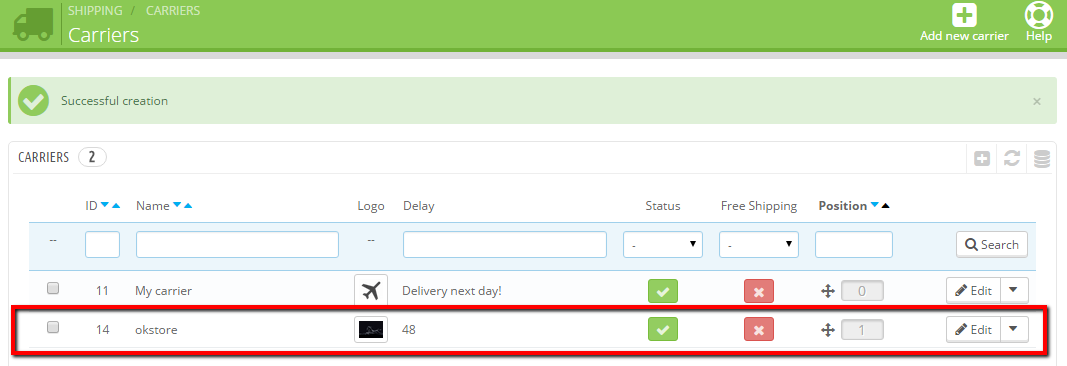
Click Finish to save the new carrier:

You should see the new carrier in the list now:
Feel free to check the detailed video tutorial below:
