


- Web templates
- E-commerce Templates
- CMS & Blog Templates
- Facebook Templates
- Website Builders
FAQs
General Tutorials
Featured templates
MonsterONE Subscrioption


In this tutorial you will learn the way to add a customizable product in PrestaShop 1.6.x.
PrestaShop 1.6.x. How to add a customizable productIn PrestaShop you can allow customers to customize your products. You can give them an opportunity to upload one or more images and to type some text, before adding the selected product to the cart. They can do this on the product’s page on the frontend. Product customizations can be enabled per product from the settings of the particular product.
To add customizable fields to your product, you should perform the following steps:
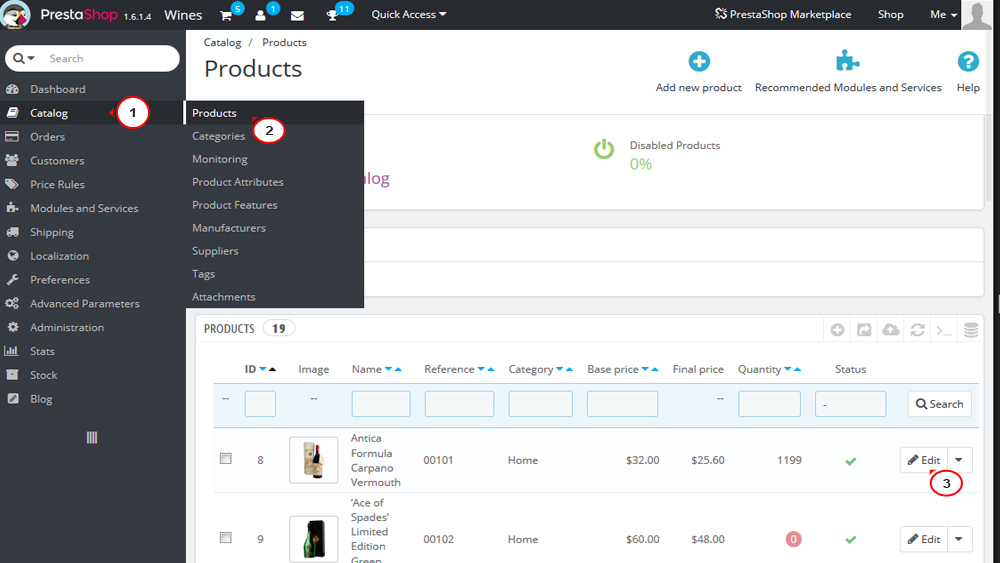
Log into your PrestaShop admin panel and navigate to Catalog -> Products menu.
Edit an existing required product or add a new one by clicking the Add new product button in the top right corner:
In the Customization tab in the product settings you can indicate what type of context can be personalized. There are 2 types of customizable fields:
File field puts a file upload button on the product page. With this option customers will be able to upload image files in JPEG/JPG, PNG and GIF formats. The number that you put here corresponds to the number of fields that will be shown on the product page on the frontend. Each field can be used to upload a single image.
By default, the allowed size of each image that customers can upload is around 8 megabytes. If the image is bigger, the customer will not be allowed to upload it and will receive an error message informing them that the image is too big and what the allowed size is. You can increase or decrease the allowed size of images uploaded by customers. To do this, go to Preferences -> Images menu in the admin panel and configure the option Maximum file size of product customization pictures.
Text field puts a text field on the product page. With this option customers will be able to type some text in this field, for example, add some comments to the product before ordering it:
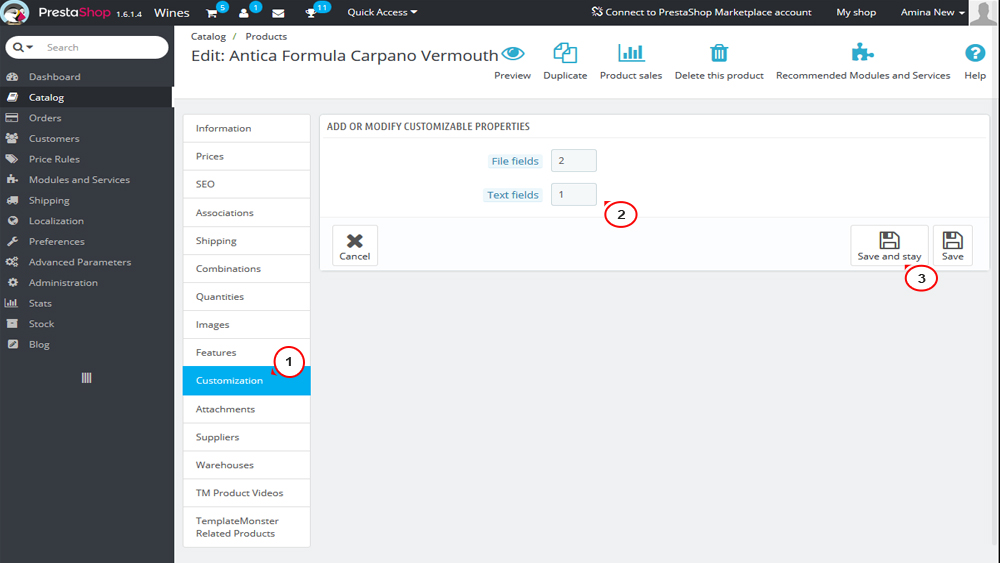
After you type numbers in one or both fields click the Save and stay button. This will display some additional options underneath. For each file and text field that you add you can specify a label to be shown on the frontend (you can use language switcher to specify labels for different languages, if you have a multilingual site), and you can make the field a required one:
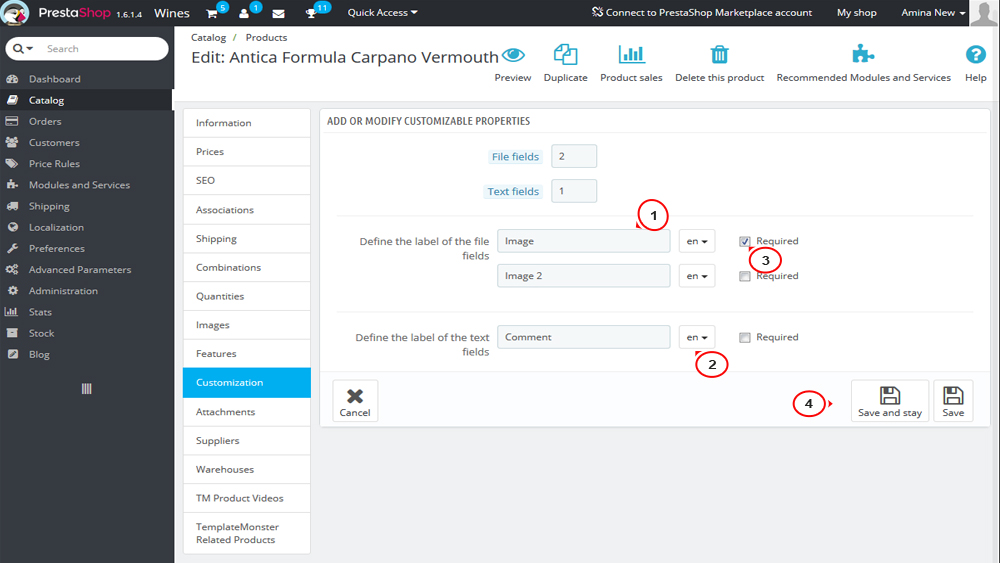
If you make any changes to these options, click the Save and stay or the Save button.
Now you can refresh your product on the frontend or preview it from the admin panel to check the changes:
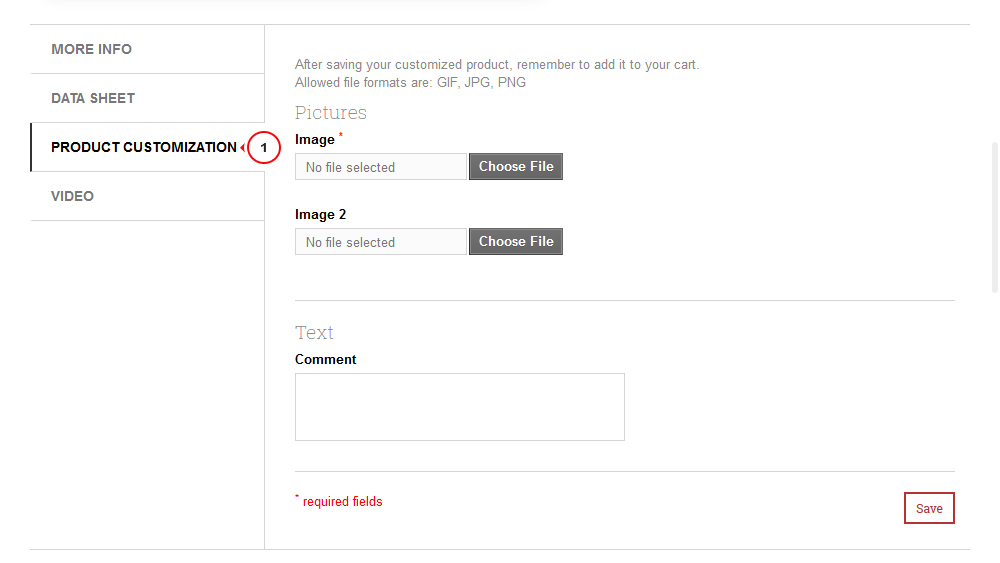
Any customer can use the added fields to upload an image(s) and/or type some text. These customizations are saved with the order and then they can be viewed and managed from the admin panel (Orders -> Orders -> View required order details).
Removing fields. If in the end you realize that you’ve added too many fields, simply change the number of required fields for each of the two types and click Save and stay. The page will reload with the right number of fields, with the first ones preserved.
This is the end of the tutorial. Now you know how to add a customizable product in PrestaShop 1.6.x.
Feel free to check the detailed video tutorial below:
PrestaShop 1.6.x. How to add a customizable product