


- Web templates
- E-commerce Templates
- CMS & Blog Templates
- Facebook Templates
- Website Builders
FAQs
General Tutorials
Featured templates
MonsterONE Subscrioption


The following tutorial is going to show you how to manage store languages in your PrestaShop 1.6 store.
PrestaShop 1.6.x. How to manage store languages
Adding / Updating an official Prestashop language pack
NOTE: You can find all current PrestaShop language packs by going to the following link.
Log into your admin panel.
Navigate to Localization -> Translations.
Select your language in the Add / Update a language section and click the Add or update a language button.

A new language was successfully added. You can also update the currently installed languages by selecting one in the Update a language list and clicking the Add or update a language button.
NOTE: Please, keep in mind that while updating, all the changes you might have made to your own translations will be overwritten by PrestaShop official translations.
Manual language pack installation
In case you do not want to use an official PrestaShop translation pack, but rather a custom one, you need to create a language and import the required language pack manually.
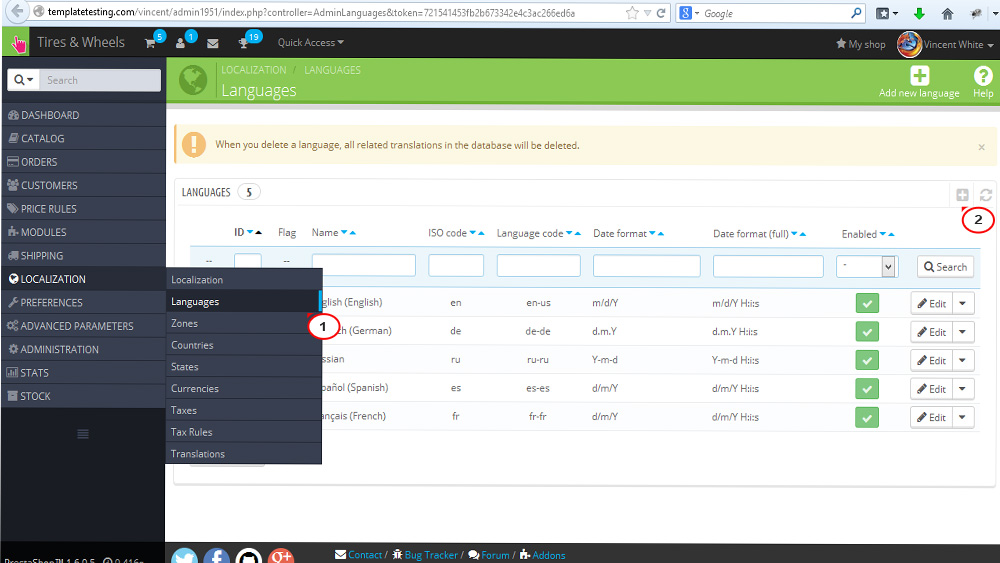
Go to Localization -> Languages and click the Add new button.
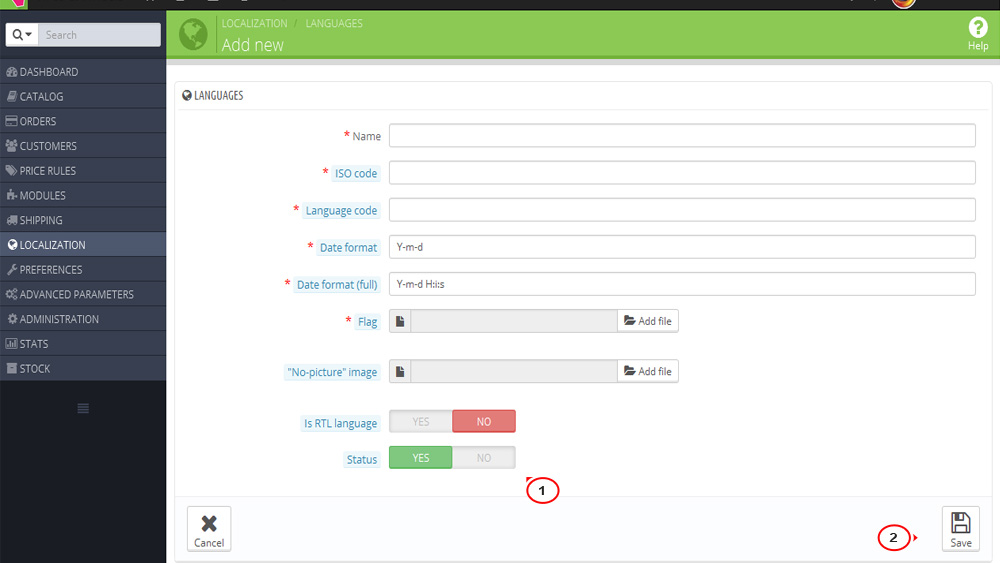
Fill in the language settings form with your data:
Name – the public title of your language.
ISO code – enter the required 2-letter ISO 639-1 code. You can check that at http://en.wikipedia.org/wiki/List_of_ISO_639-1_codes.
Language code – enter the required 4-letter language code, in the form xx-yy, xx being the language ISO code (same as above), and yy the country ISO code, using ISO 3166-1 alpha-2 (http://en.wikipedia.org/wiki/ISO_3166-1_alpha-2). See http://en.wikipedia.org/wiki/IETF_language_tag for more information.
Date format – indicate the date format tied to your language (See http://en.wikipedia.org/wiki/Date_format_by_country).
Date format (full) – same as the date format above, but including the hour-minute format.
Flag – upload an image of the flag which best matches the language you want to add. It should be 16*11 pixels. You may use the free FamFamFam Flags image set: http://www.famfamfam.com/lab/icons/flags/.
“No-picture” image – upload an image which will be displayed when a product does not yet have a picture.
Is RTL language – you can enable or disable the right to left option if your language requires that.
Status – enable or disable a new language
Click the Save button to confirm adding.
NOTE: If you need to make some changes in the languages you have, click the Edit button for the required language, change the data you need and click Save.
Navigate to Localization ->Translations.
Click the Add file button in the Import a language pack manually section and browse the language file on your hard drive.
Press the Import button to confirm the language pack import.
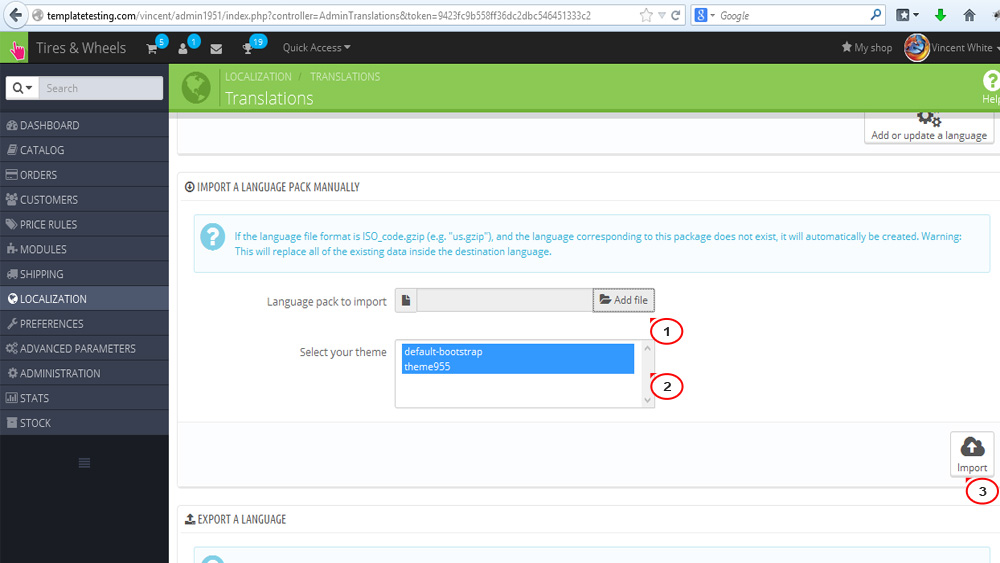
The language pack has been successfully installed manually.
Export a Language
You can create your own language pack to make a backup of your customizations or in order to share your translations with another PrestaShop installation.
Navigate to Localization->Translations.
Select the language you need in the Export a language section and click the Export button.

Save the language file on your PC.
Copy a Language
You can copy the content of one language to another when you need to replace a theme’s language with the same language from another theme.
Go to Localization->Translations.
In the Copy section, choose the source language and theme, then the destination language and theme, then click the Copy button.
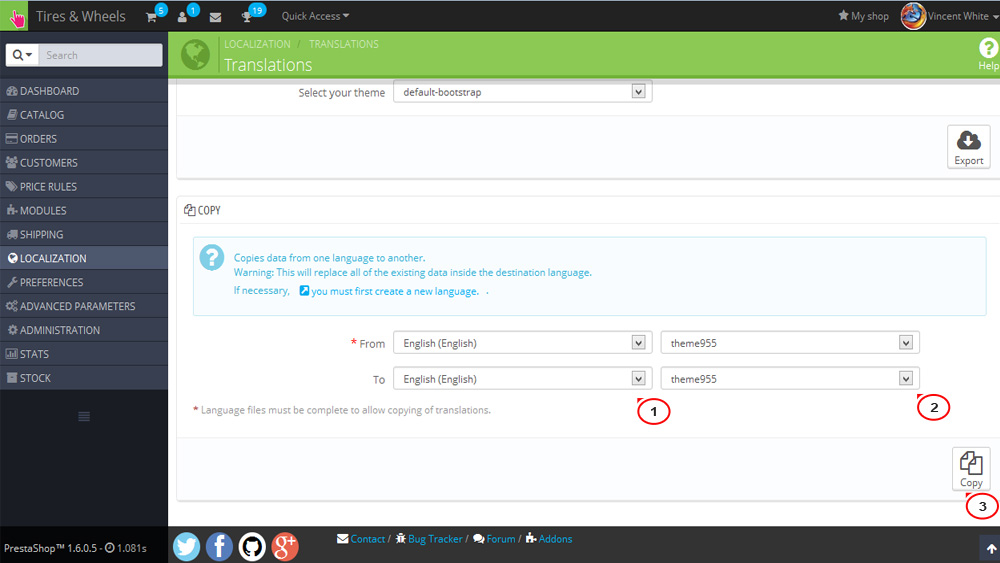
The language content will be copied to the selected theme.
Disable/Delete a language
Navigate to Localization -> Languages.
If you want to disable a language, click the green button for the required language under the Enabled column.
If you need to delete a language completely, open the dropdown with the options for the language you need to remove and click Delete.

Confirm deleting.
Check your webstore front end. Now we know how to manage languages in Prestashop 1.6 templates.
Feel free to check the detailed video tutorial below:
