


- Web templates
- E-commerce Templates
- CMS & Blog Templates
- Facebook Templates
- Website Builders
FAQs
General Tutorials
Featured templates
MonsterONE Subscrioption


Our Support team is ready to present you a new tutorial that will show you how is it easy for you to work with “TM Product Zoomer” module in our PrestaShop templates.
“TM Product Zoomer” allows you to choose among the three available options (window/lens/inner) for image zoom with the advanced plugin settings and is available in Fashion, Electronics, Spare Parts, Furniture, One Product themes.
The module has been installed simultaneously with template so the standard product zoom effect is automatically disabled.
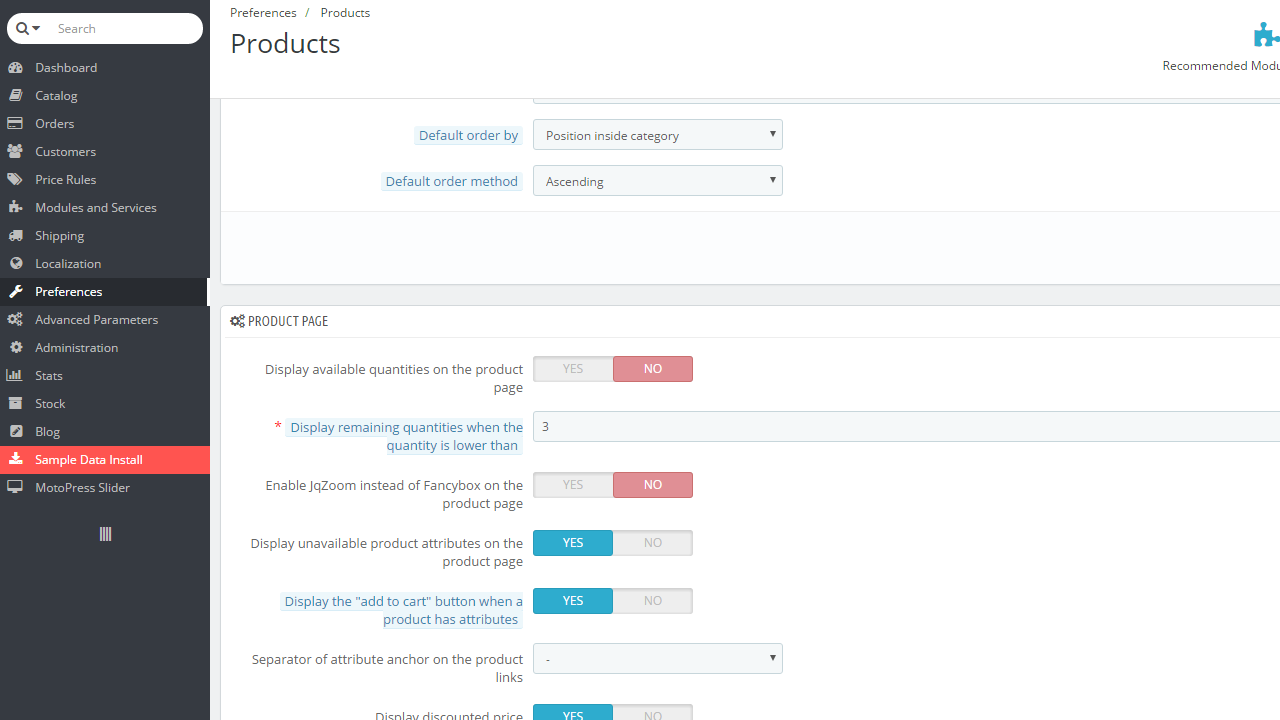
The standard effect can be enabled back manually (if needed) in the Preferences > Products > Enable JqZoom instead of Fancybox on the product page section.
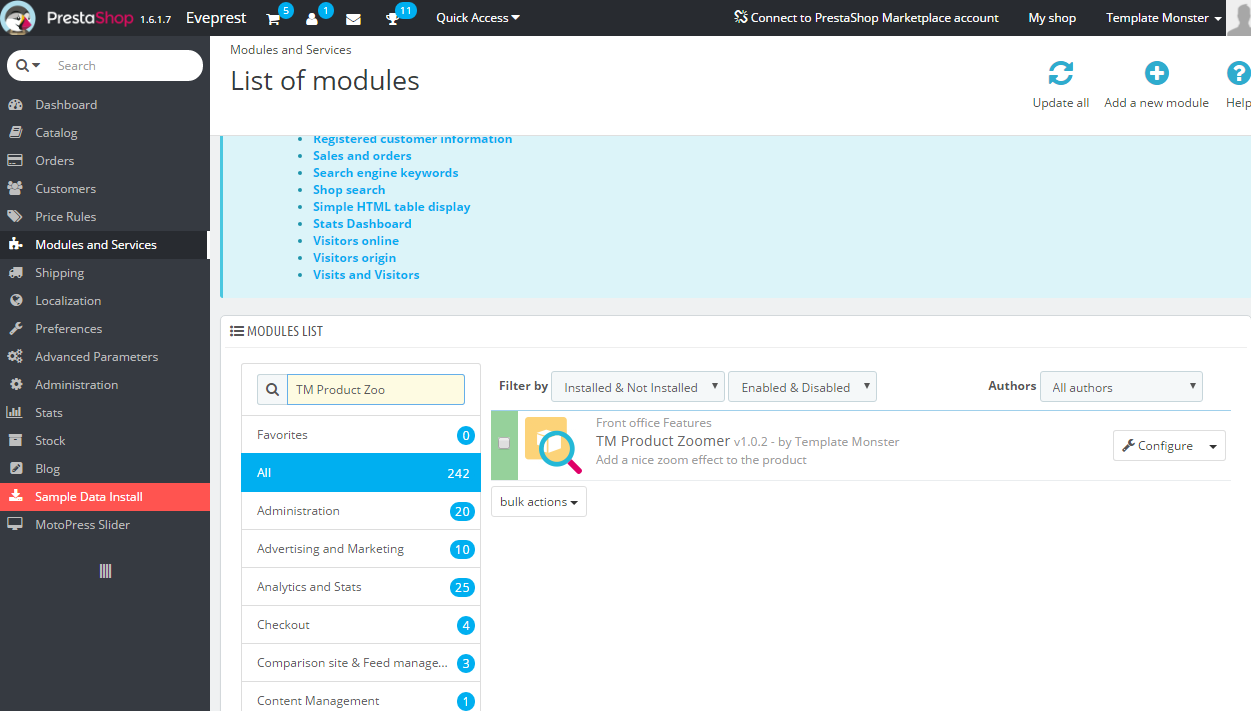
In order to manage TM Product Zoomer settings on the configuration page, navigate to Admin panel > Modules > Modules > and enter TM Product Zoomer to the search. Click on the Configure button
By default the configuration page shows the simplifiedset of options:
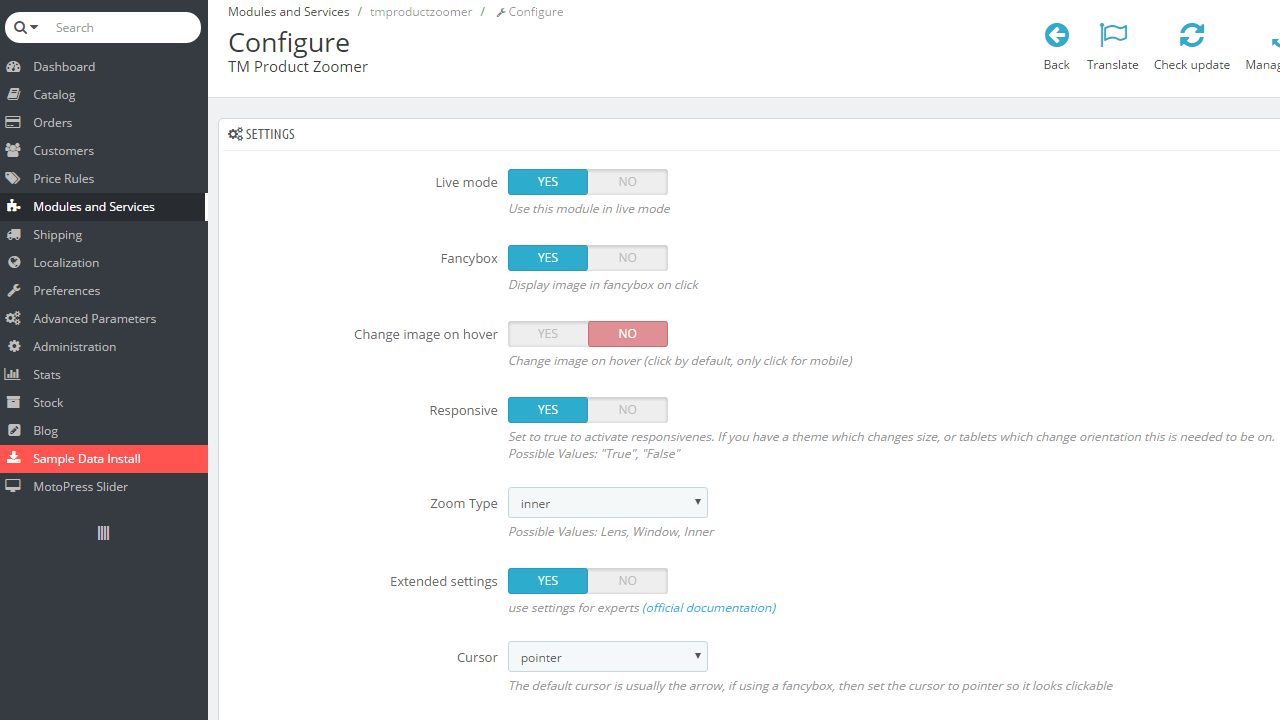
Live mode – module is on/off.
Fancybox – whether to show the enlarged image in the Fancybox on click.
Change image on hover – switch the main image on thumbnail hover (by default is set to switch on click).
Responsive – allows to the use adaptive functionality for plugin display on the mobile devices.
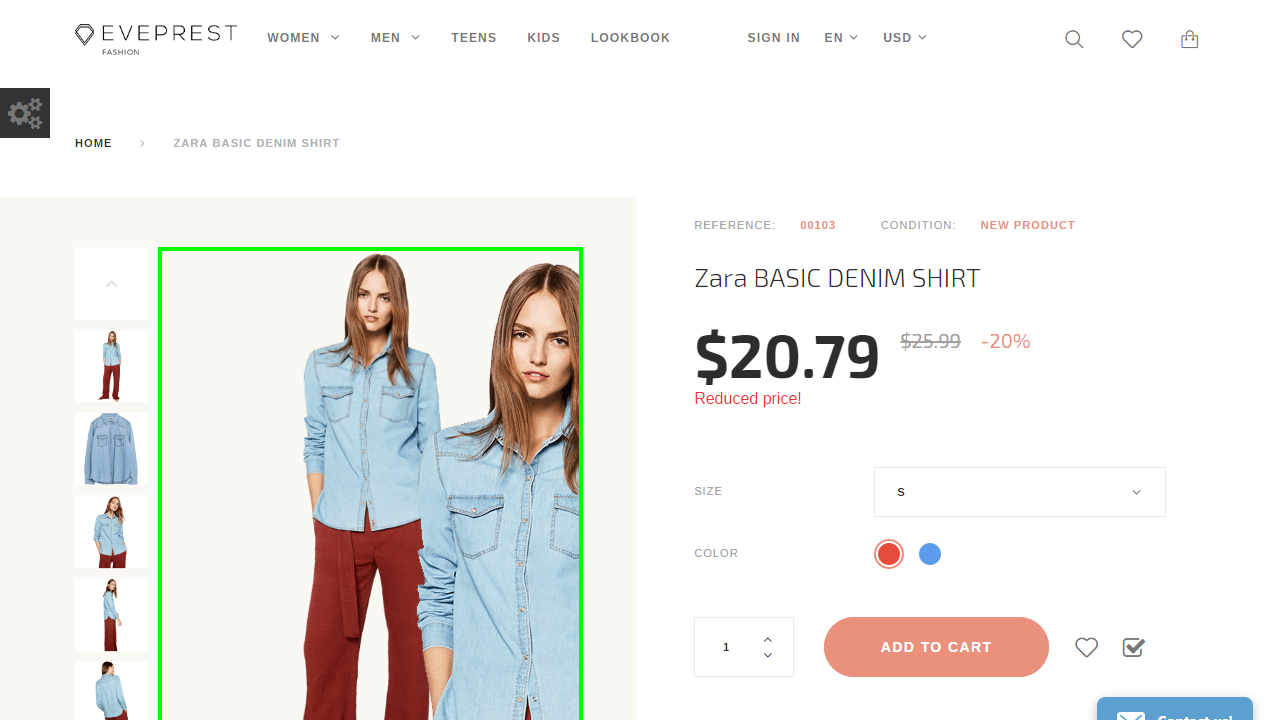
Zoom Type – choose the type of the enlarged image display mode
window – the enlarged image shows up next to the main image in one of the available (16) positions
lens – the image is zoomed in the lens container, on top of it
The mobile devices (< 768) have “lens” mode activated instantly.
inner – the image is zoomed inside of the main image container, fully covering it.
Extended settings – enables advanced settings for the experienced users. You can see the link to the official documentation for more details next to it.
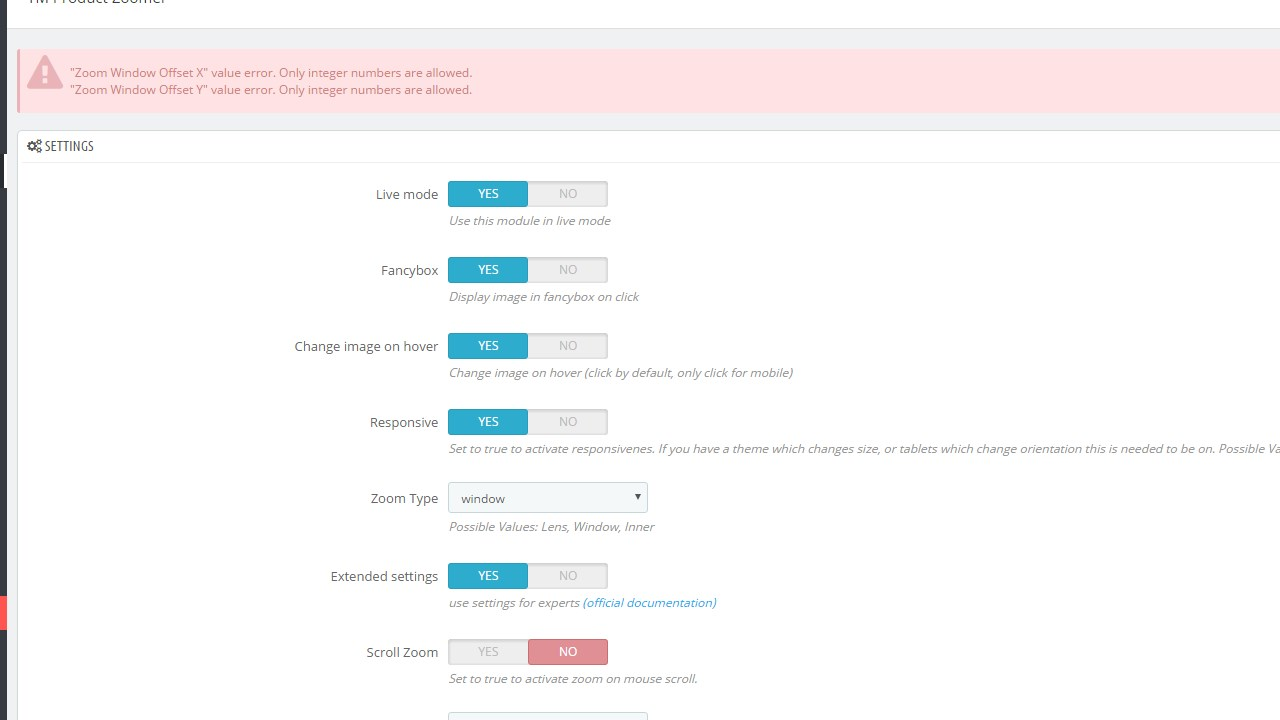
In the second part of the module configuration page you can set up Extended module configuration:

Scroll Zoom – zoom ratio change on the mousewheel scroll (available for all types).
Cursor – cursor type on the magnified image hover. The following options are available: default, cursor, crosshair (available for all types).
Zoom settings – available for all types, if the ‘Scroll Zoom’ is enabled.
Zoom Level – the zoom level on the initial hover
Min Zoom Level – a minimum zoom level
Max Zoom Level – a maximum zoom level
Scroll Zoom Increment – magnifying scroll increment
Easing – the magnified image appearance effect (available for all types).
Zoom Easing – effect on/off
Easing Amount – effect delay value
Image Crossfade – main image blur outside the hover area (the lens) – available for window, lens.
Magnified image window settings – available for window:
Zoom Window Width– window width in px
Zoom Window Height – window height in px
Zoom Window Offset X – window offset on the X axis
Zoom Window Offset Y – window offset on the Y axis
Zoom Window Position – window position choice relatively to the main image (the positions available are presented on the image below this field)
Zoom Window Bg Color – window background image (for transparent images only)
Zoom Window Fade In – the effect of slowing the window appearance
Zoom Window Fade Out – the effect of slowing the window disappearance
Border Size – window border width in px
Border Color – window border color
Please, notice that only integer numbers are allowed:
Zoom Lens – zoom lens (available for window, lens).
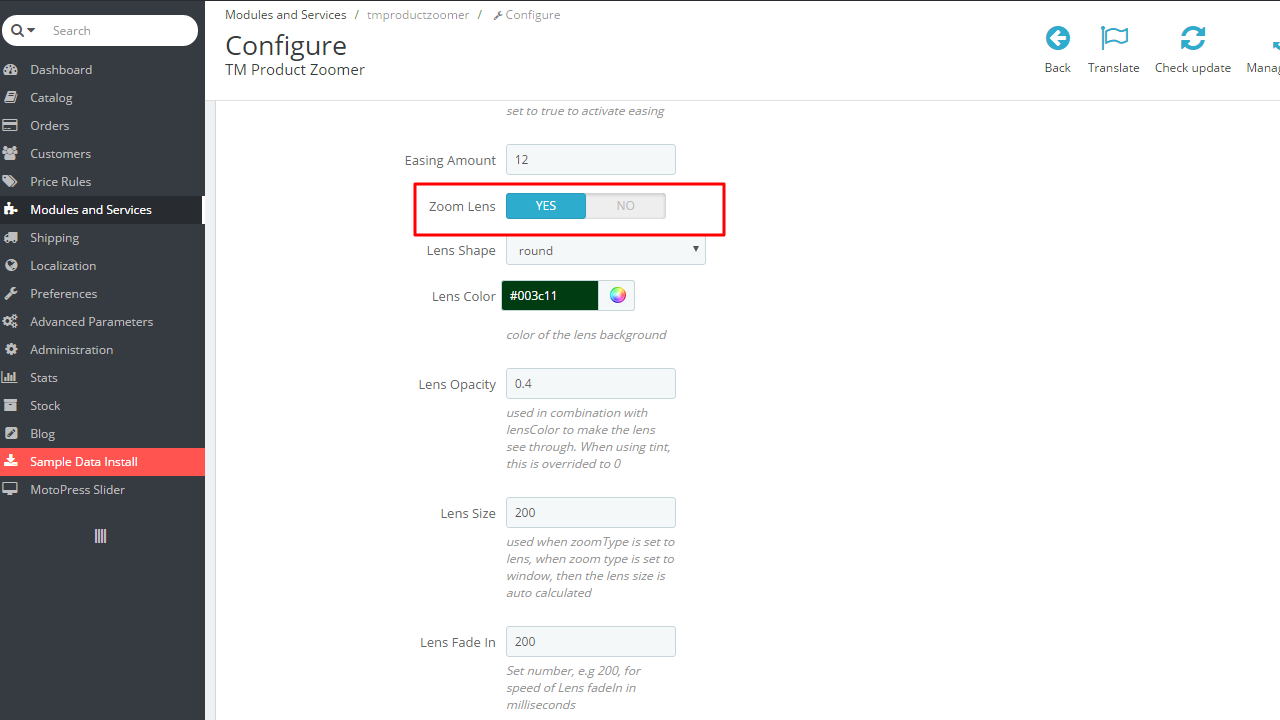
Zoom Lens – on/off
Lens Shape – lens type. It can take the following values: circular/rounded or squared/rectangular
Lens Color – lens inner background color
Lens Opacity – lens inner background opacity
Lens Size – lens size in px
Lens Fade In – the speed of lens appearance effect
Lens Fade Out – the speed of lens disappearance effect
Lens Border – lens border width
Lens Border Color – lens border color
Contain Lens Zoom – the restriction of the lens overflow outwards the main image container
Tint – the shade effect on the area outside the lens (available for window).
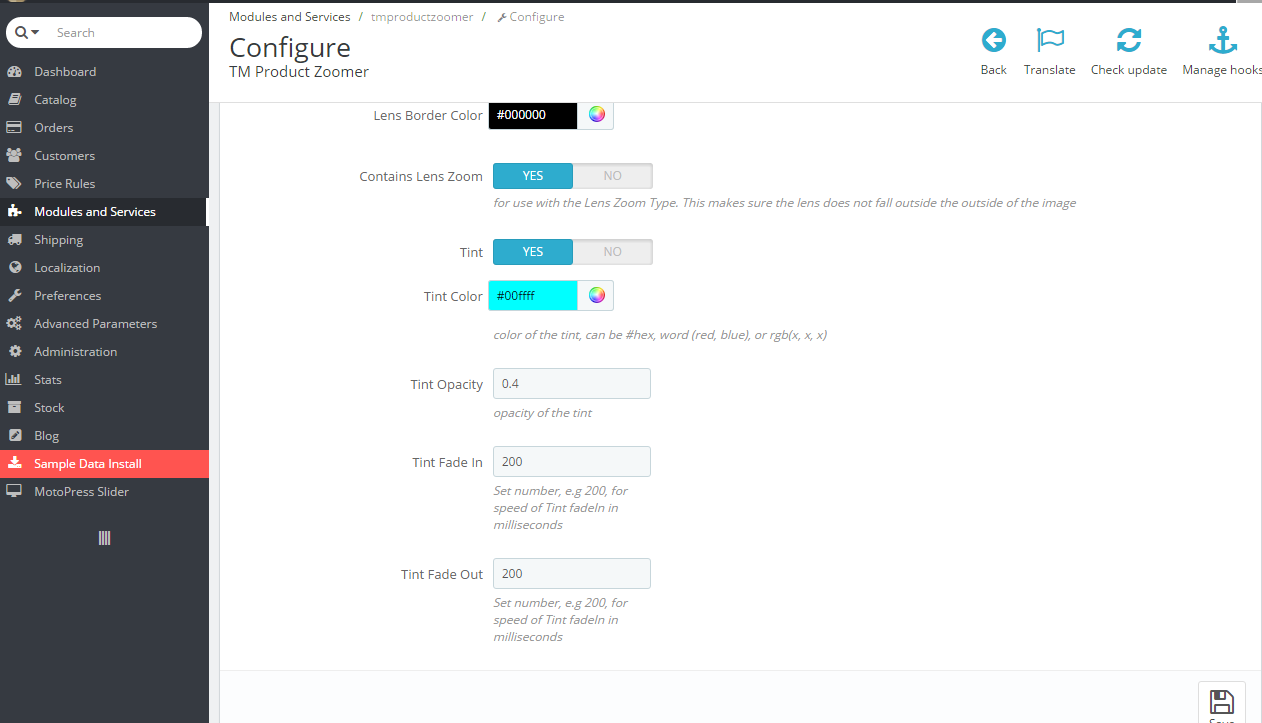
Tint – effect on/off
Tint Color – the lens outer area background
Tint Opacity – the lens outer area opacity
Tint Fade In – the appearance effect speed
Tint Fade Out – the disappearance effect speed
If you switch the zoom type, advanced options set is changed accordingly to show only the available parameters for the type selected.
Be careful when editing the extended settings. If the settings are set incorrectly, the effect can be ugly.
Please, do not forget to Save your updates and Refresh the site to be able to the changes at the site frontend.
Now you’ve got the hang of “TM Product Zoomer” module!
Feel free to check the detailed video tutorial below:
PrestaShop 1.6.x. How to manage “TM Product Zoomer” module