


- Web templates
- E-commerce Templates
- CMS & Blog Templates
- Facebook Templates
- Website Builders
FAQs
General Tutorials
Featured templates
MonsterONE Subscrioption


In this tutorial we will show you how to move a module from one hook to another in Prestashop.
PrestaShop 1.6.x. How to move the module from one hook to another
Hooks are specific positions which determine the location of your modules on the site front end. One module can be assigned to two or more hooks at the same time. Some of the hooks are empty by default.
The modules are displayed on the site in the order in which they appear in the hook. The most important positions which predefine how your site front end looks are the following:
Top of Pages;
Homepage content;
Left column blocks;
Right column blocks;
Footer and other hooks.
Note: the hook Header contains the modules which are not visible on the site front end. Sometimes it may be wrongly taken for the “Top of Pages” hook.
To move the module from one hook to another, you need to do the next steps:
Log into your PrestaShop admin panel.
Navigate to Modules-> Positions menu:
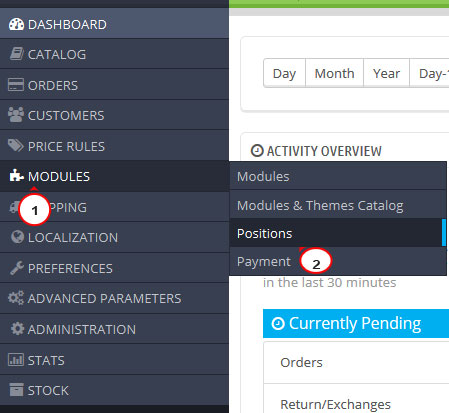
Here you can see a list of all hooks and modules assigned to them.
Locate the necessary module and click on the Edit button next to it:
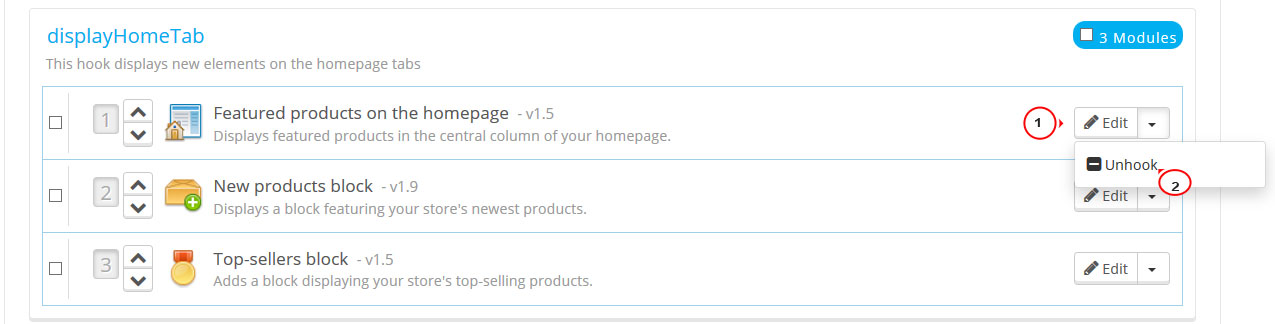
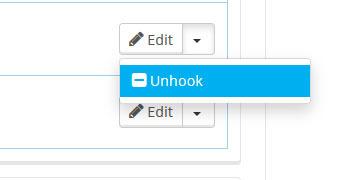
Select the Unhook option to remove the module from the position:
Attach the module to the desired hook:
Press the Transplant a module button from the top right menu:
![]()
In the “Module” drop-down list, select the module you want to transplant:
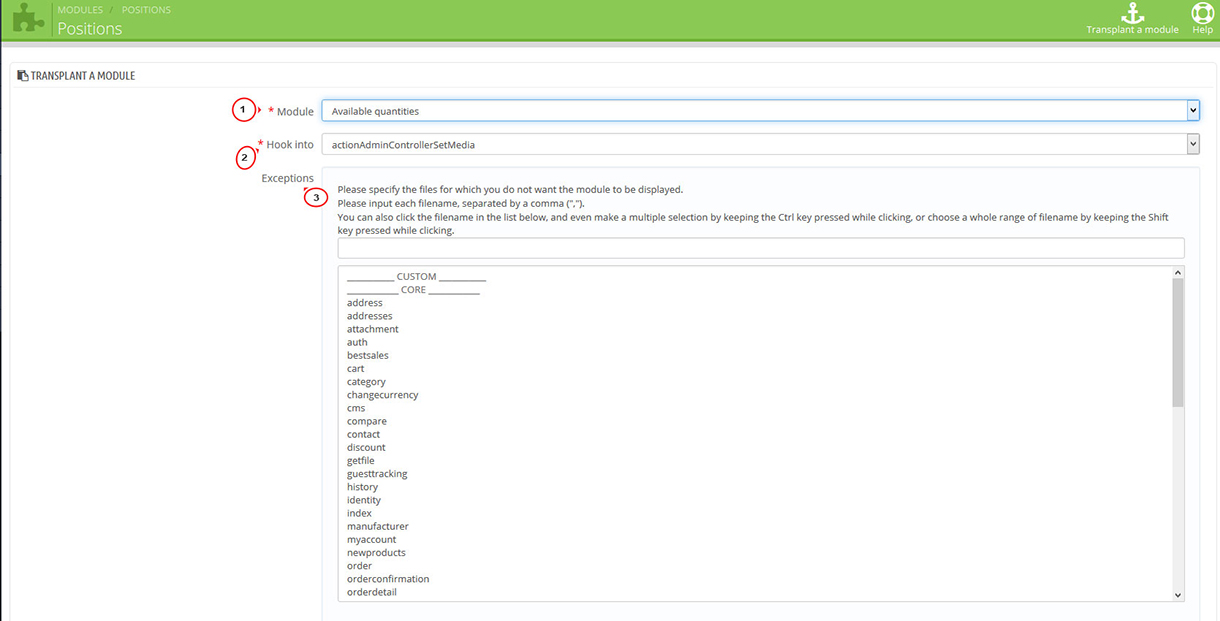
In the “Hook into” drop-down list, select the position you want to transplant your module to. You can change your setting later if needed.
Note that you cannot always transplant any module to any hook, as some modules are written to only be attached to a given set of hooks. In case you are attaching the module to a wrong hook, you will get the next error: “This module cannot be transplanted to this hook.”
![]()
In the “Exceptions” field, select the name of the page on which you do not want the module to appear. You can select more than one option by holding the “Ctrl” button on your keyboard and clicking with the left mouse button on the names of the pages. If you click on a selected page, it will be unmarked.
Save the changes by pressing “Save” button.
After successful transplanting, the module will appear in the list of modules attached to this hook.
Change the position of the module within a hook with the help of the arrows or just drag-and-drop to the necessary position:
Return to the front end of your site to make sure your module shows up where you intended it to be.
We hope the tutorial was useful for you.
Feel free to check the detailed video tutorial below:
PrestaShop 1.6.x. How to move the module from one hook to another
