


- Web templates
- E-commerce Templates
- CMS & Blog Templates
- Facebook Templates
- Website Builders
FAQs
General Tutorials
Featured templates
MonsterONE Subscrioption


The following tutorial is going to show how to protect images with watermarks in PrestaShop 1.6.
PrestaShop 1.6.x. How to protect images with watermarks
If you take your own product images for your PrestaShop website, you can place a watermark on each image you have displayed on your site to prevent people from stealing your images.
NOTE: In PrestaShop the watermark files can be uploaded only in .gif format. You can place the watermark in a number of positions so that you can place it just the way you like.
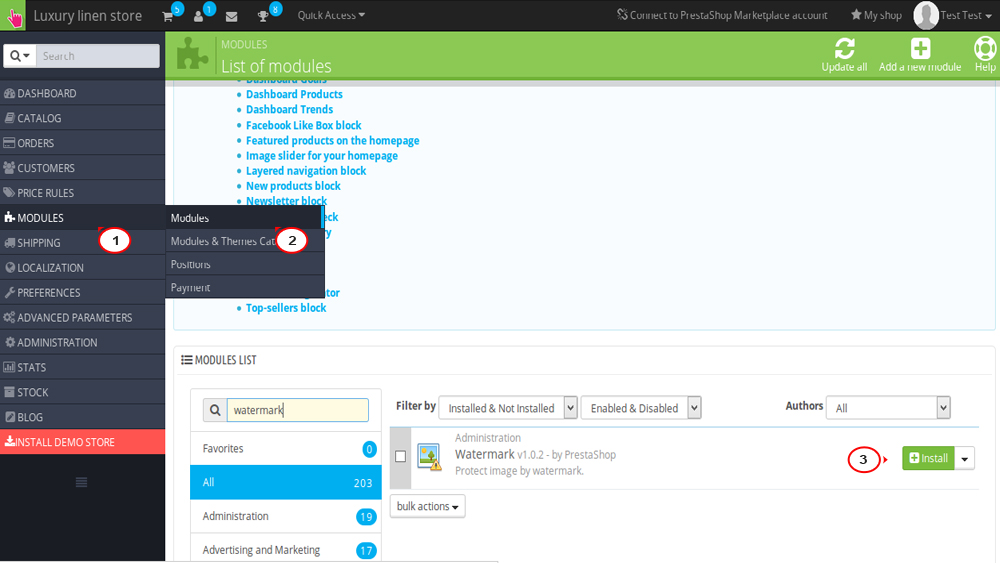
Log into your PrestaShop 1.6 dashboard.
Navigate to Modules->Modules.
Find the module named Watermarks in the list of the modules. Click on the Install button located to the right of the module row:
Click on the Configure button to enter the module configuration.
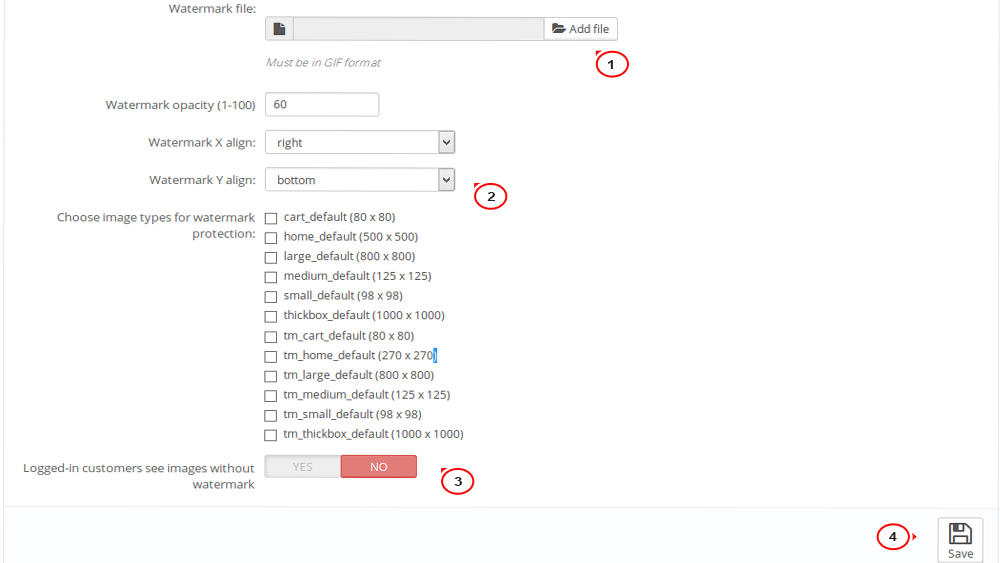
There are several fields to help you customize your watermark.
Watermark File – Select the file to be used as your watermark.
Watermark Transparency (0-100) – Specify the level of transparency for the watermark. The lower the number, the more transparent the image.
Watermark X align – Select the horizontal alignment for the watermark.
Watermark Y align – Select the vertical alignment for the watermark.
Choose image types for watermark protection – Select image types to which you want the watermark to apply.
Logged-in customers can see images without watermark – Decide whether to show the original images to the registered customers.
Once you have configured the settings for your watermark, click the Save button at the bottom of the screen to confirm the configuration:
Navigate to Preferences -> Images.
Scroll down the Regenerate Thumbnails section. Unless you specifically wish to add watermarks to only one type, leave the Select Image dropdown set to All. Leave the Erase previous images option on Yes and click the Regenerate Thumbnails button:

NOTE: If you get a blank page/timeout error while regenerating images, please check the following tutorial for the detailed guidance.
Go back to your website frontend and refresh the page. Now the images should be displayed with watermarks.
That is the end of the tutorial. Now you know how to protect images with watermarks in PrestaShop 1.6.
Feel free to check the detailed video tutorial below:
