


- Web templates
- E-commerce Templates
- CMS & Blog Templates
- Facebook Templates
- Website Builders
FAQs
General Tutorials
Featured templates
MonsterONE Subscrioption


Using the instructions below you will learn the basics of TM Mega Layout module management, e.g. changing in-built presets and adding new in Eveprest based template.
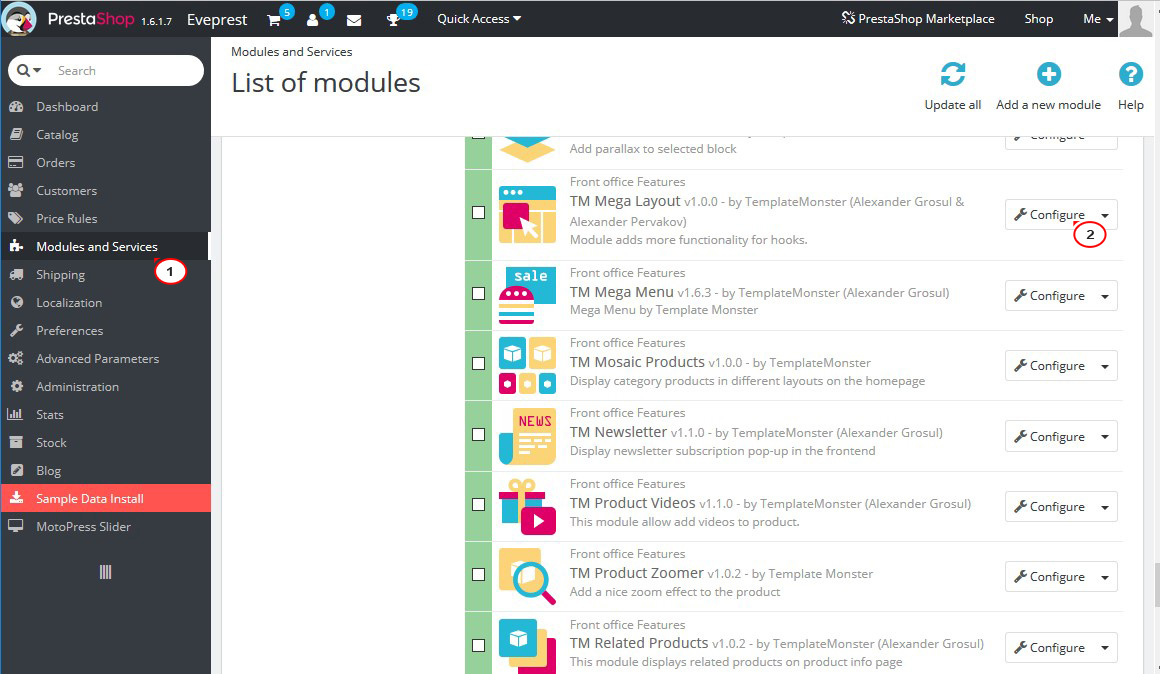
Navigate to Modules and Services, locate TM Mega Layout module and tap configure;
The module includes Main Layouts management and Product Page layout management.
Main Layouts include the following pages’ areas:
Header-located in the main top area of the website;
Top Column-located underneath the header area;
Home-home page body/main content area;
Footer-located at very bottom of the pages;

Product Page layout will allow you to create custom layout for the single product page footer;
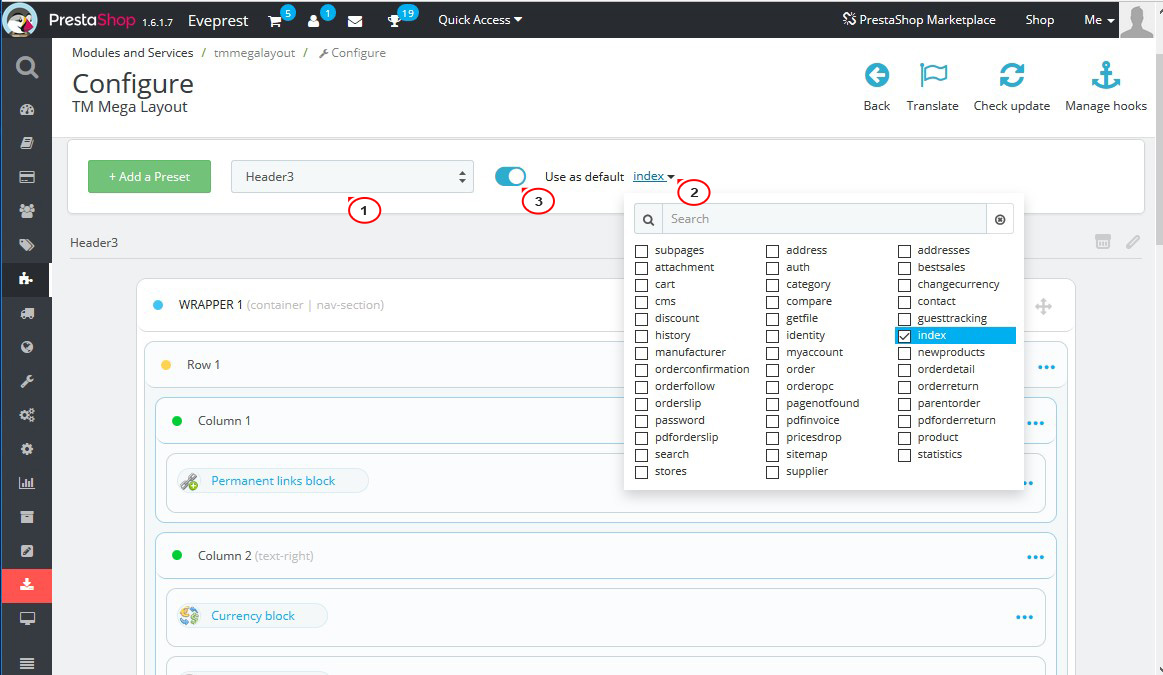
Select either Main Layouts or Product Page option, on top right, pick the area/position;
Next to Add a Preset button, select any of the available presets, and enable Use as Default option;
You will see black rating star icon appearing next to a preset which means that the preset has been activated;
The presets can be applied individually to different pages. Next to Use as default tab, click All pages link and pick the page you would like to apply preset to from drop-down list. The half-black rating star icon will come up next to a preset, which means the preset has been applied to a specific page;
This block of the tutorial will show you how to create custom layout presets.
Select the position for your preset, and click green Add a Preset button;
The window will prompt you to enter the name for your preset, put any name you prefer;
Pick either Add wrapper or Add row. Wrapper might take in rows, columns and modules. It is a box which can give you additional control over your layout;
You will see a tab with several icons on the right:
Trash Icon - removes block;
Blocks Icon - allows you to add custom Selector which can be later used for custom CSS or JavaScript;
Pencil Icon - in-built style editor allows you to add background images, colors, border styles as well as box shadows;
Drag Icon allows you to change block position relative to other blocks inside a wrapper by dragging and dropping;

Click the Add row button;
Tap Ellipsis icon on the right:
Select Edit Row option to add custom CSS/JavaScript selector;
Select Stylize to add custom styles to your row;
Click Delete to remove row;

Choose Add col option. Add a specific selector and pick bootstrap classes for the column in a prompt;

Click on the Ellipsis in the column tab, and select Add Module.
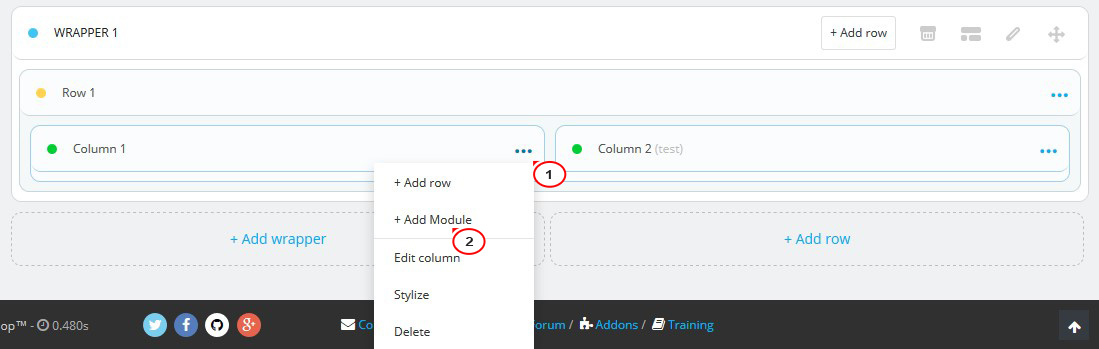
Pick the module you would like to display in a column from Select a module dropdown list and tap the Confirm button;

NOTE! The module will not appear among available on the list until it is hooked to corresponding position.
NOTE! TM Mega Layout saves changes using AJAX. It is recommended to clear smarty cache once the modifications have been implemented.
NOTE! In case TM Mega Layout module is deactivated, the default presets will be disabled. The modules will return to their default appearance.
Browse the wide collection of high-quality PrestaShop templates if you need more!
Feel free to check the detailed video tutorial below:
PrestaShop 1.6.x. How to switch template skins and create a new one (based on Eveprest)