Categories

Featured templates

PrestaShop 1.6.x. How to transplant a modules using Live Edit

Alice Weasley January 16, 2015
Rating: 5.0/5. From 1 vote.
Please wait...

This tutorial shows how to transplant modules using Live Edit in PrestaShop 1.6.x.

PrestaShop 1.6.x. How to transplant a modules using Live Edit

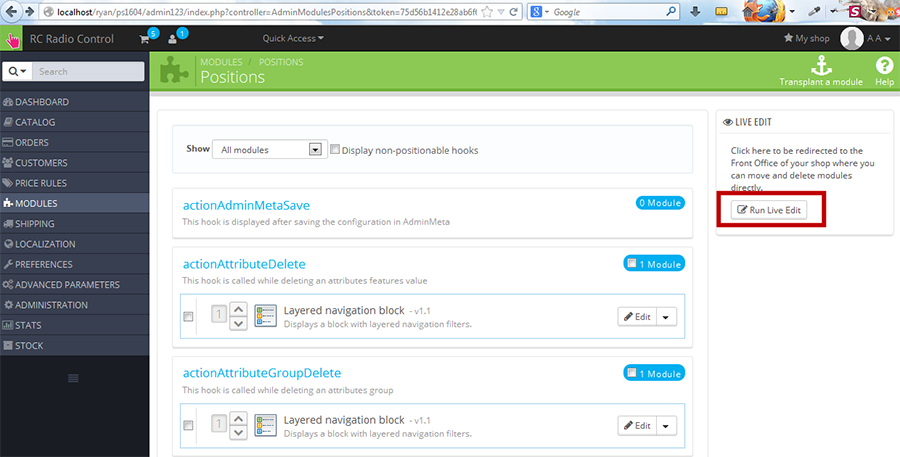
  1. Open admin section and go to Modules -> Positions. You will see hooks (positions) there:

    PrestaShop_1.6.x._How_to_transplant_modules_using_Live__Edit_1

  2. To move modules around on the store pages using Live Edit mode, click the “Run LiveEdit” button on the right:

    PrestaShop_1.6.x._How_to_transplant_modules_using_Live _Edit_2

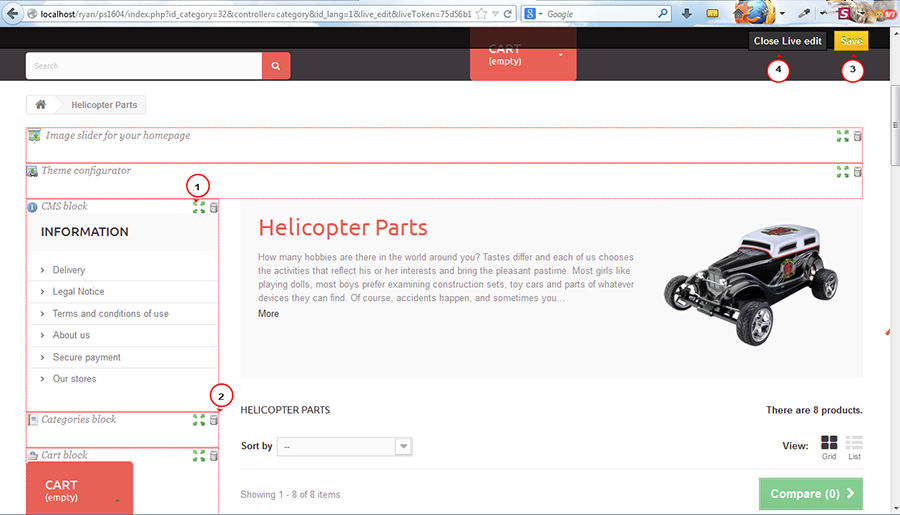
  3. All module blocks have a dotted red border, enabling you to see which blocks you can move.

  4. On their top left side a block-specific icon appears, along with the block name, enabling you to always find your way among blocks.
  5. On their top right side, they have two icons:

    • A “move” icon: click it to start moving the module around.
    • A “trash” icon: click it to remove the block from the home.
  6. Save the changes and close Live edit:

    PrestaShop_1.6.x._How_to_transplant_modules_using_Live _Edit_3

  7. Let us remove the Categories block and change the position of Viewed Products block.

  8. Here is how the page looks after modifications:

    PrestaShop_1.6.x._How_to_transplant_modules_using_Live__Edit_4

Feel free to check the detailed video tutorial below:

PrestaShop 1.6.x. How to transplant a modules using Live Edit

Best Prestashop Themes
This entry was posted in PrestaShop Tutorials and tagged edit, live, module, Prestashop, transplant. Bookmark the permalink.

Submit a ticket

If you are still unable to find a sufficient tutorial regarding your issue please use the following link to submit a request to our technical support team. We'll provide you with our help and assistance within next 24 hours: Submit a ticket