


- Web templates
- E-commerce Templates
- CMS & Blog Templates
- Facebook Templates
- Website Builders
FAQs
General Tutorials
Featured templates
MonsterONE Subscrioption


The following tutorial shows how to work with transparent image background in PrestaShop 1.6.x templates.
PrestaShop 1.6.x. How to use transparent images
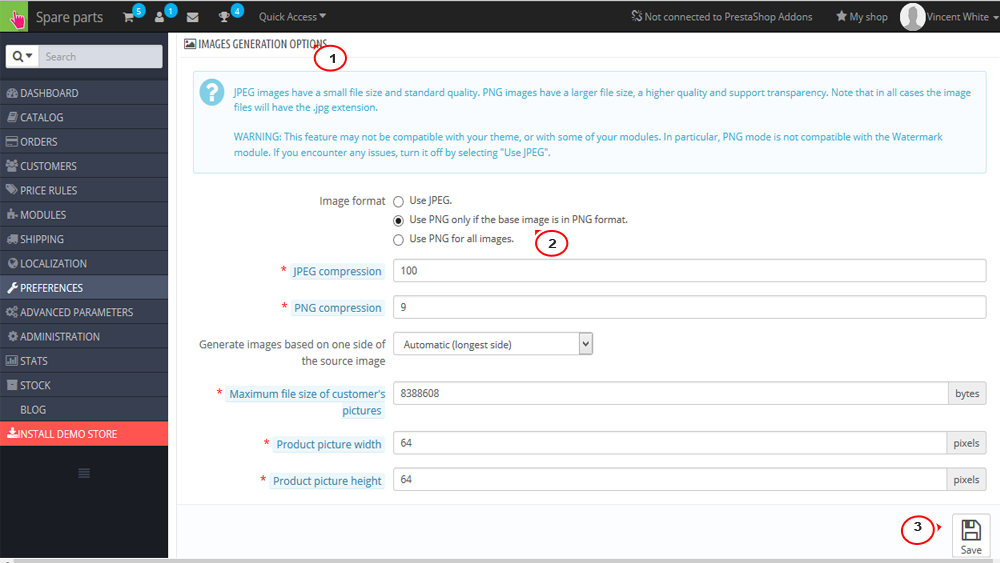
Log into the admin panel, navigate to Preferences -> Images.

In the Image quality section, select Use PNG only if the base image is in PNG format.
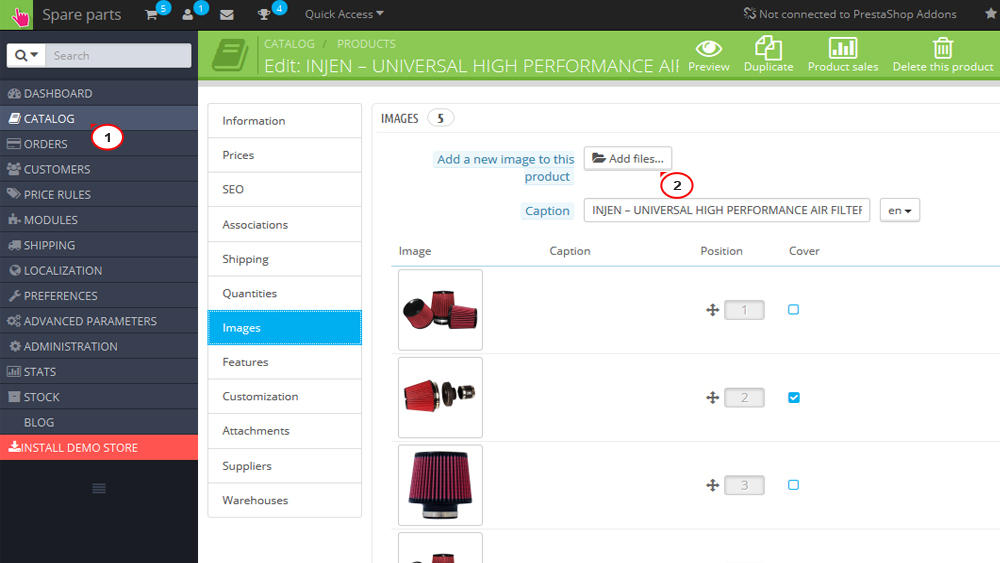
Open the product where you need to upload an image with transparent background. We are going to upload the image with the transparent background. Be sure to use .png format for images that should have transparent background. We have opened Firebug. Mozilla Firefox plugin in order to show the source of the image. The image has transparent background. However, the css background color still shows up.
In order to get rid of the background, we need to find the source file for white color. If you cannot see the source css files, you need to turn off cache and CCC options to find out in which files customization should be performed. Go to Advanced Parameters -> Performance, turn off cache and select Keep CSS as original option. Refresh the page.
Now we can see the file where the changes should be made. We have located the white background. In our case, we need to edit \themes\themeXXXX\css\product.css file on our FTP, line 43. You can get that via File Manager in you CPanel or some FTP-client software like Total Commander or Filezilla. You need to modify the background rule:
	.pb-left-column #image-block {
		background: linear-gradient(to bottom, #ffffff 15%, #dadada 100%) repeat scroll 0 0 rgba(0, 0, 0, 0);
		border: 1px solid #565555;
		padding: 5px;
		position: relative;
		z-index: 1;
	}
Change it like the following:
	.pb-left-column #image-block {
		background: transparent;
		border: 1px solid #565555;
		padding: 5px;
		position: relative;
		z-index: 1;
	}
Save changes.
We have refreshed the page. There is no more image background.
Now we need to remove the border. In this case, your code should look like the following:
	.pb-left-column #image-block {
		background: transparent;
		border: none;
		padding: 5px;
		position: relative;
		z-index: 1;
	}
Refresh the page. We have removed the gradient background in the product image. We have also removed the border around the image.
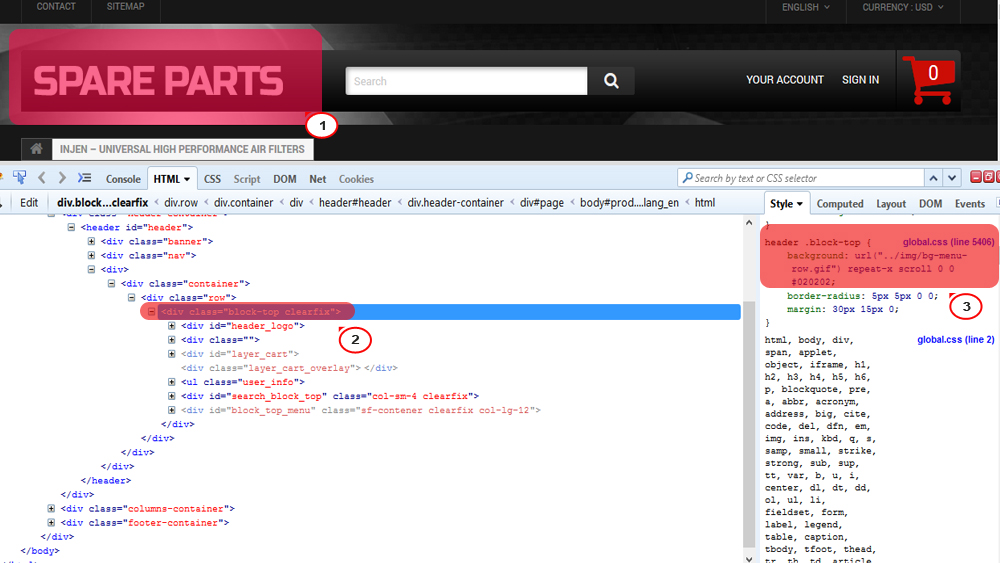
The same way you can make the transparent logo. Just upload the new .png logo in Preferences->Themes->Header logo section and inspect it on the frontend with Firebug:

In our case we need to edit /themes/themeXXXX/css/global.css file on line 5406. Look at the following code:
    header .block-top {
		background: url("../img/bg-menu-row.gif") repeat-x scroll 0 0 #020202;
		border-radius: 5px 5px 0 0;
		margin: 30px 15px 0;
    }
That set the black background for the whole top section. Let’s edit that like the following:
    header .block-top {
		background: transparent;
		border-radius: 5px 5px 0 0;
		margin: 30px 15px 0;
    }
Now our logo as well as the search, user info and cart blocks have got the transparent background.
That is the end of the tutorial. Now you know how to manage transparent image background in PrestaShop 1.6.x templates.
Feel free to check the detailed video tutorial below:
