


- Web templates
- E-commerce Templates
- CMS & Blog Templates
- Facebook Templates
- Website Builders
FAQs
General Tutorials
Featured templates
MonsterONE Subscrioption


This tutorial will guide you on how to work with TM Social Feeds module in Prestashop 1.6.x.
PrestaShop 1.6.x. How to work with “TM Social Feeds” module
This module loads the social networks feeds on your website. It enables the site visitors to be aware of the latest news and posts shared on the social networks.
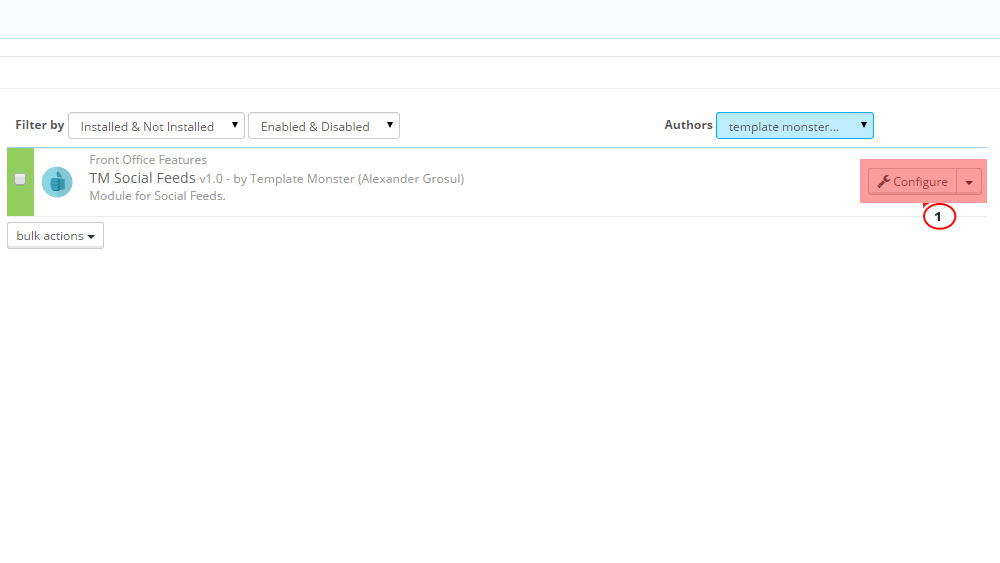
You can change its settings on the module configuration page, open Admin panel -> Modules -> Modules -> TM Social Feeds. Click Configure button:
You should add global settings for each social network. Different social networks have different settings:
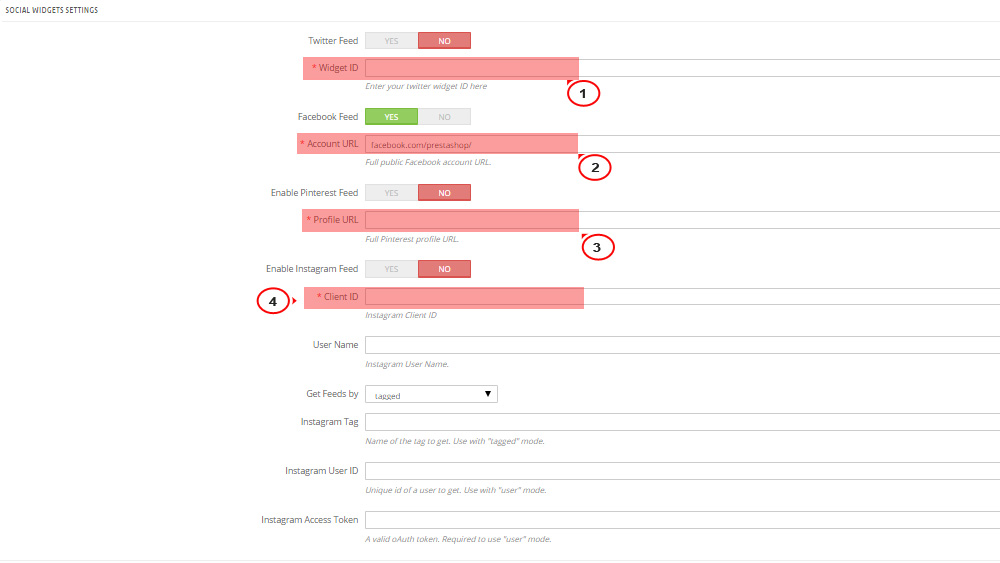
Twitter – It is enough to add a Widget ID which can be taken from your Twitter account.
Facebook – Paste the full path to the Facebook page which feeds will be loaded. The page should be public.
Pinterest – For Pinterest paste the full path to the page which feeds will be loaded.
Instagram – Client ID – a unique ID assigned during widget registration on Instagram.
User Name – username used to link the owner’s page.
Selection type: you can set whether the images are loaded from specific user or by tag.
Tag by which images are loaded.
ID of the user whose images will be loaded.
Instagram access token – access token of the user whom the page belongs.
In the second part of the module configuration page you can add the required module to the position you want. There are 4 positions. You can add the block settings for each position. The only global setting is the data of social networks which feeds will be loaded. Each social network has its own settings:
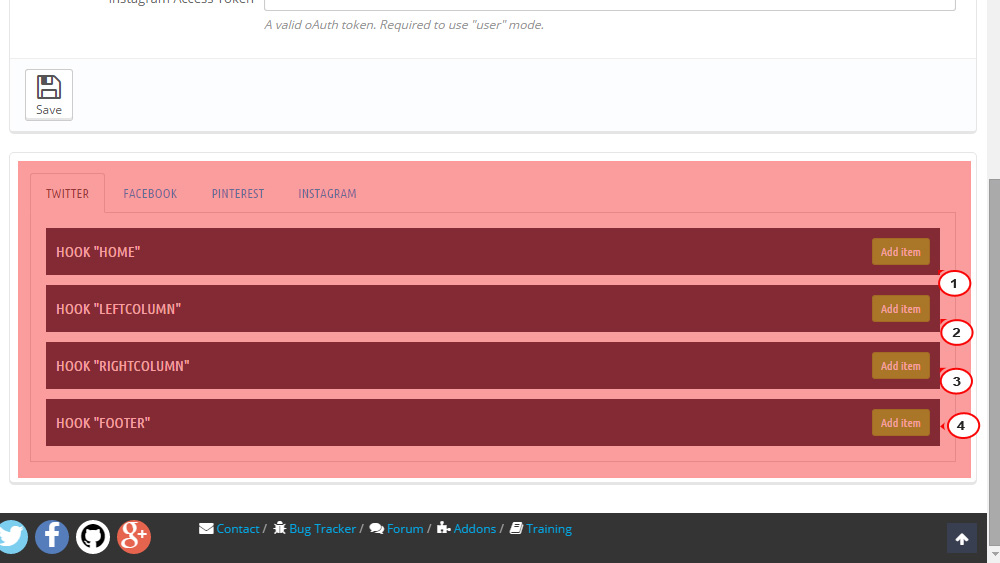
Each social network has its own settings.
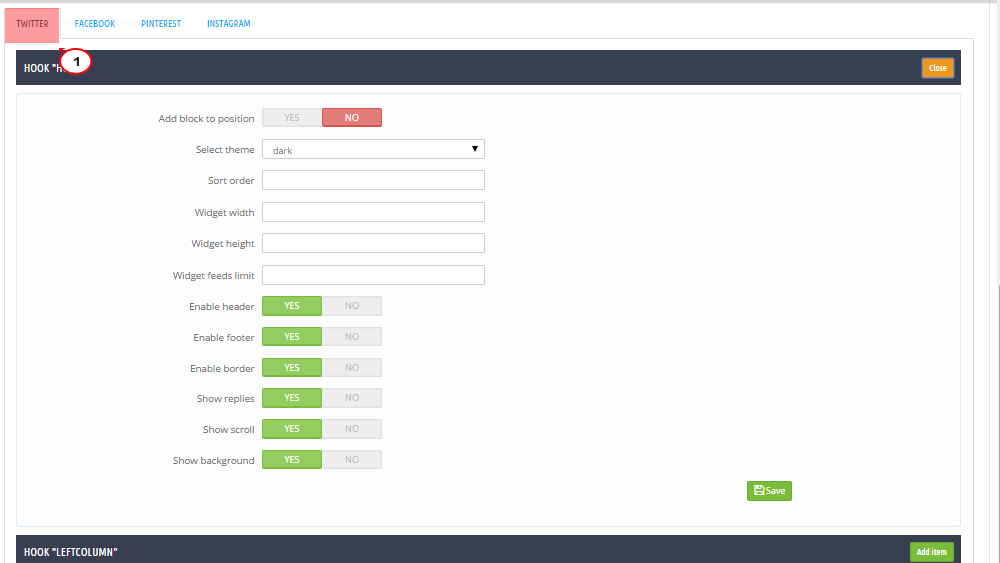
Add block to position – display block in specific position.
Select theme – color scheme of the block for this position.
Sort order – sort order (order number of the block in this position).
Widget width – block width in this position.
Widget height – block height in this position.
Widget feeds limit – number of feeds in the block.
Enable header – show block title.
Enable footer – show footer of the block.
Enable border – show border of the block.
Show replies – display replies to the posts.
Show scroll – show block scroll.
Show background – add block background or leave it transparent.
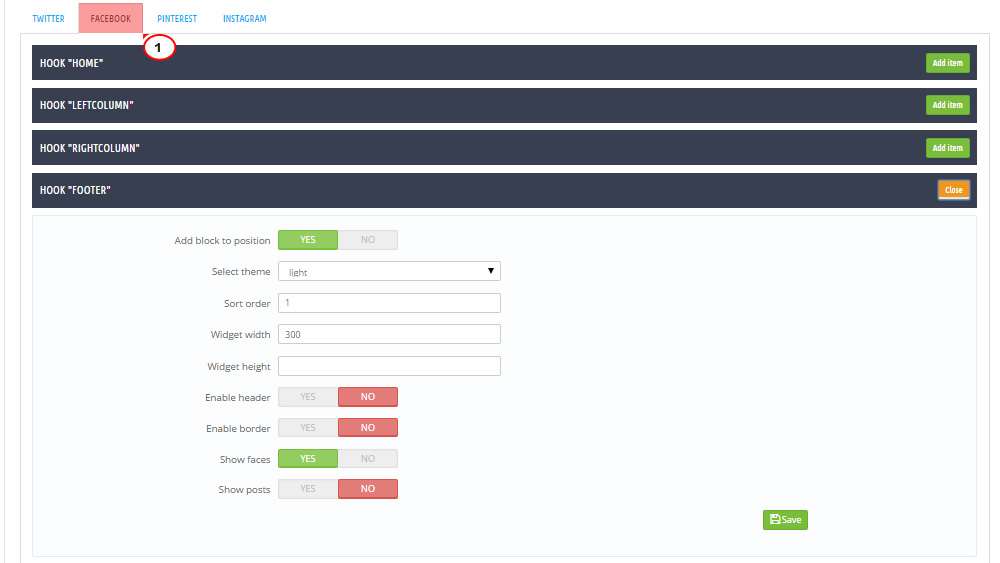
Add block to position – display block in specific position.
Select theme – color scheme of the block for this position.
Sort order – sort order (order number of the block in this position).
Widget width – block width in this position.
Widget height – block height in this position.
Enable header – show block title.
Enable border – show footer of the block.
Show faces – show photos of users who liked the page.
Show posts – show posts from the page.

Add block to position – display block in specific position.
Sort order – sort order (order number of the block in this position).
Widget width – block width in this position.
Widget height – block height in this position.
Widget column width – width of the block column.
Add block to position – display block in specific position.
Sort order – sort order (order number of the block in this position).
Widget feeds limit – number of feeds displayed in the block.
The module supports multi-stores.
Feel free to check the detailed video tutorial below:
