


- Web templates
- E-commerce Templates
- CMS & Blog Templates
- Facebook Templates
- Website Builders
FAQs
General Tutorials
Featured templates
MonsterONE Subscrioption


This tutorial shows how to set pricing for your products in PrestaShop 1.6.x.
In order to set pricing, you should perform the following steps:
Log into PrestaSop admin panel using your access credentials.
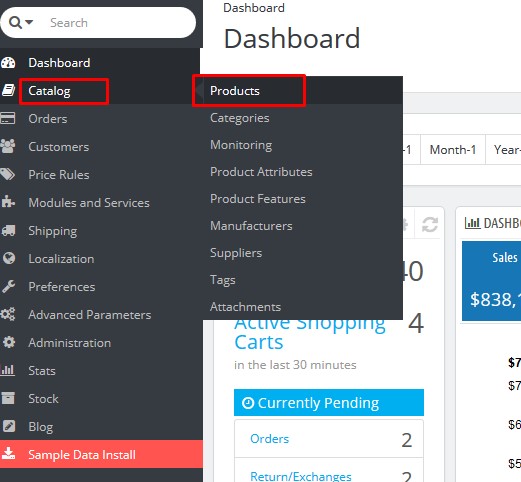
Click on the Catalog link on the left hand menu. Next, click on the Products option.
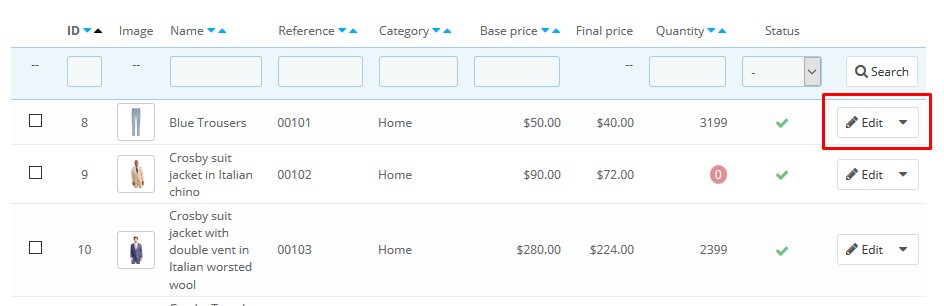
This is the Products list screen. Locate the product you want to work with and click on the Edit button, located on the right side of the product row.
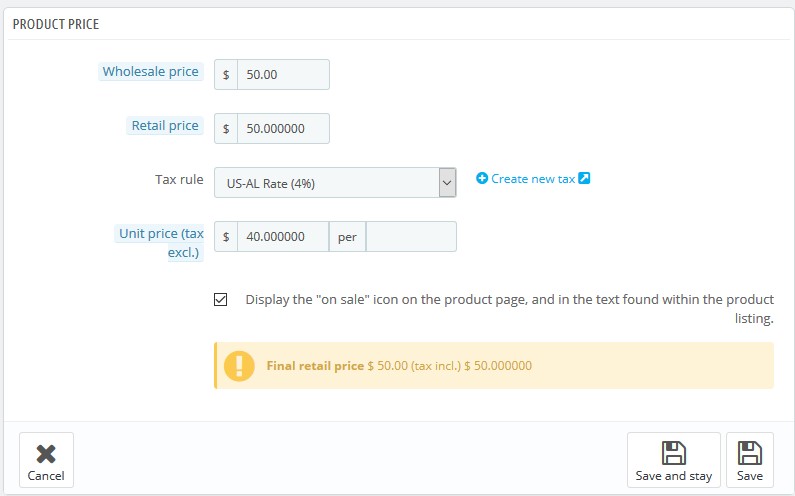
Now that you are in the Product Information section, click on the Prices tab on the left side of the screen.
Product Price: This information is the basic pricing. Although all products will use this area, you will not necessarily use all the fields for every product. The different fields may apply to different pricing situations.
Pre-tax wholesale price – the price that you paid to the supplier.
Pre-tax retail price – the price that you want to charge customers.
Tax rule – If you are going to charge taxes for this item, select which rule you’ll use among the dropdown. If you need to create a new tax rule, first, click on the Create New Tax link to the right.
Unit Price – is used if you are selling products either by weight or in groups. For example, items by the pound, or items by the dozen.
Display the “on sale” icon on the product page, and in the text found within the product listing. – Selecting this checkbox will display an “On Sale” icon for the product.
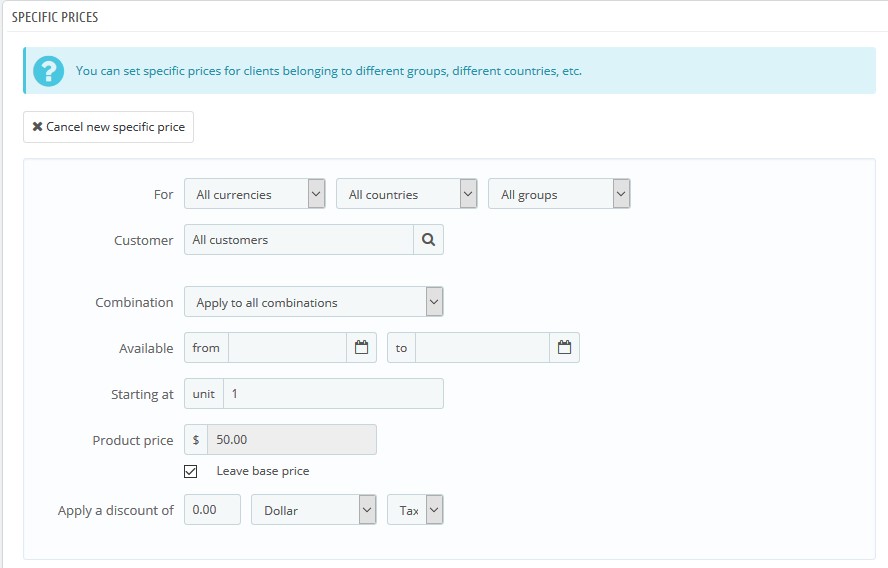
Specific Pricing: this area is designed to set special pricing. Special pricing allows you to create prices that are not available to everyone.
For – These three dropdowns allow you to select different currency types, countries, or groups to which you want to set the special pricing.
Customer – If you want to limit the pricing to specific customers, you can enter them here.
Available – here you set the dates that the pricing will take effect, such as Apr 1 – Apr 30.
Starting at – here you can set a discount for a certain number of units. The default setting is 1. This means that any product purchased will get the special price. You can set it so the customer must buy more than one to get the discount, for instance, 5 or 10.
Product Price – This field can be set to either a special price you want to offer the item for, or the existing base price. You can use the base price to give a discount on by either percentage or dollar amount.
Apply a discount of – Using the price above, you can set this field to apply a discount. This can be either a dollar amount, such as $5 off, or a percentage amount such as 10% off.
This is the end of the tutorial.
Pay attention to the large scale of well-crafted PrestaShop templates if you are looking for something more!
Feel free to check the detailed video tutorial below:
PrestaShop 1.6.x. Setting pricing for your products