Joomla 3.x Documentation
SP Page Builder
SP Page Builder is a Drag & Drop builder for Joomla websites. You can build and configure your website right from Admin Panel or Front-end using the Live Editor.
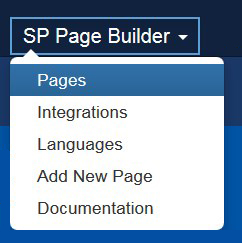
How to Access
Backend Editor
Create your page layouts, add addons and arrange them in any way you like.
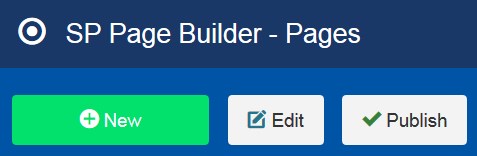
Select SP Page Builder > Pages.
You can add new page. Click the New button.
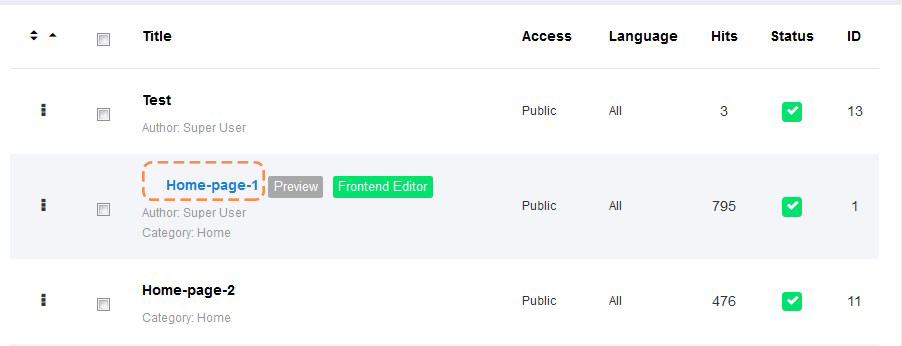
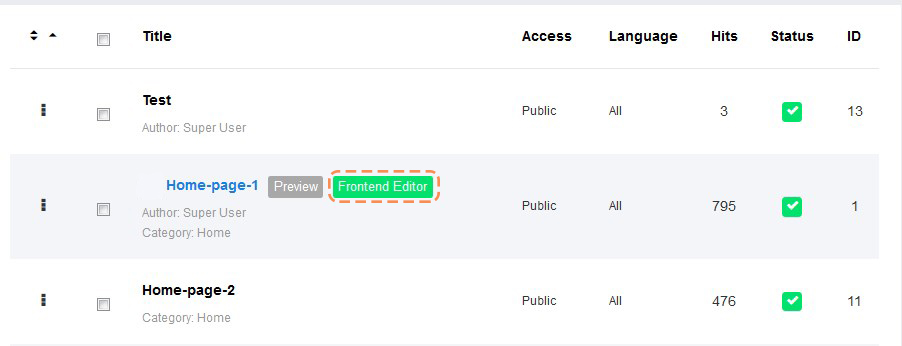
In order to edit the existing page, tap the page title.
Frontend Editor
There are several ways to open the Frontend Editor:
1. Press on the Frontend Editor button at the page you want to edit.
2. Open the page you want to edit.
Tab the Frontend Editor button at the top.
Enter the Username and Password you use to access your website admin > click LOG IN.
Now you can edit the page.
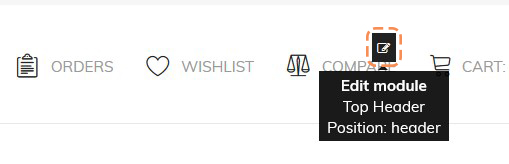
Edit Header or Footer
Hover on the element you want to change and click the Edit button.
Edit the Main Content
Press the Edit Page and move to the section you want to modify.

Then click the Edit Addon button.

Add New Row
Backend Editor
Open the Page you want to add the row to and scroll down to the bottom of the page.
There you'll see the Add New Row button.
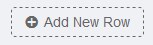
Click the button and select column structure.
Press the Generate button.
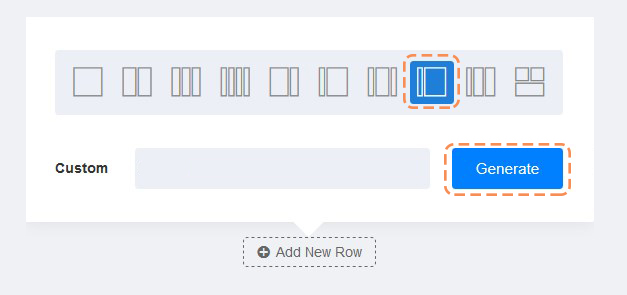
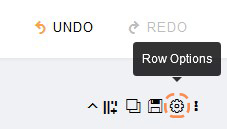
To add the new row, click the "Column Options" button and tab Add New Row.
Select Row Options to configure the row. Add the Section Title, set the Padding, Text Color and Background Image.
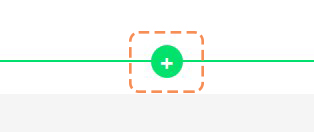
Frontend Editor
Open the page in the Frontent Editor.
Move to the bottom of the page.
Press the "+" button.
Add New Column
Backend Editor
The rows and addons can be organized in columns.
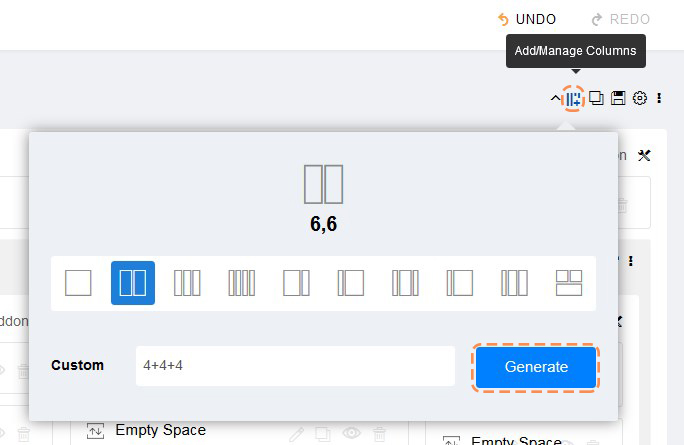
Click Add/Manage Columns.
To add 3 columns, type 4+4+4 and press Generate.
The screen width equals to 14, so if you want to add 2 columns, you need to enter 6+6.
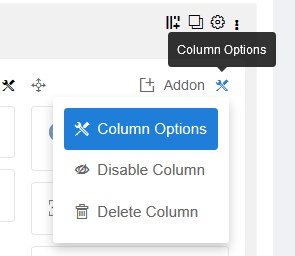
Open the column settings (click the Column Options).
Add New Addon
Backend Editor
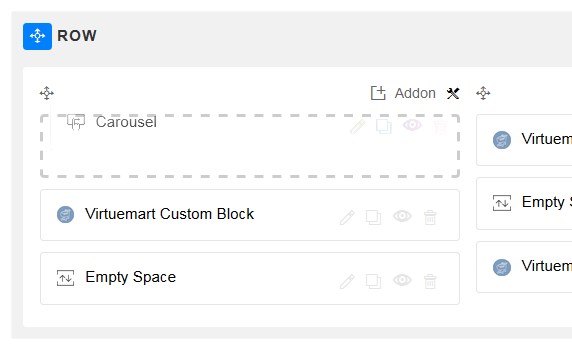
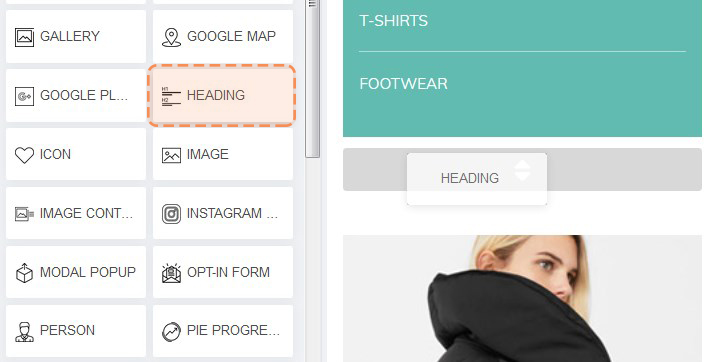
You can add Addons to each row.
Press the Addon button.
Choose the extension you want to add.
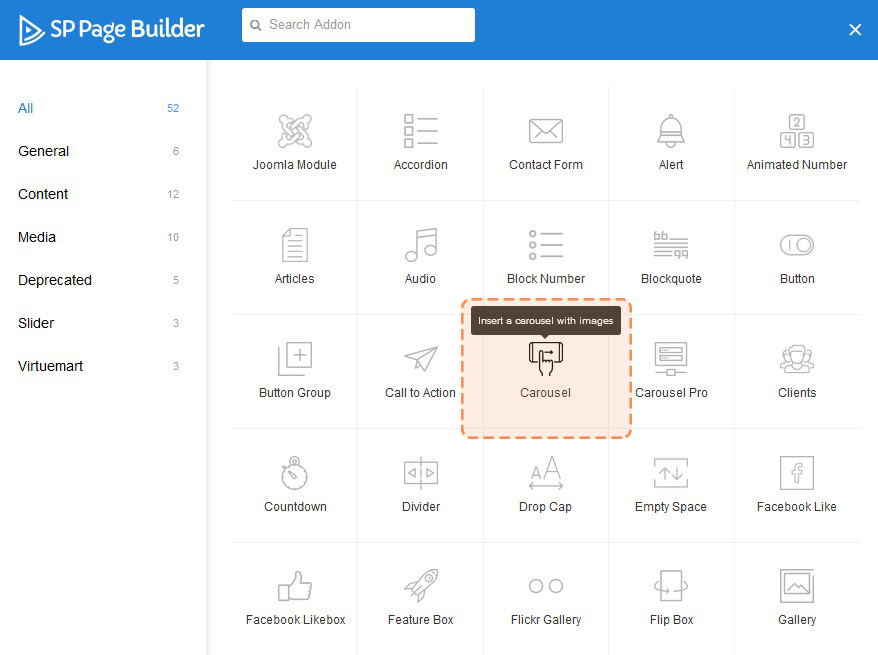
Configure the selected addon as you want it to display and save the setting.

Change the Addon position.
To access the addon display setting tap Edit Addon.

Frontend Editor
To add the new addon just select the extension you want to display and pit it into the right position on the page using the Drag&Drop functionality of the Frontend Editor.
Then set the addon display settings.
To edit the addon tap the extension area (the addon area will be highlighted) or click the "Edit Addon" button.
Virtumart Addons
Content:
1. Virtuemart Custom Block.
2. VirtueMart Products.
3. Virtuemart Custom Brand.
Virtuemart Custom Block
You can use this addon to display Banners with all the essential information on it. You can add the link to any page or category, you can set the custom link, as well.

Let's see the addon settings:
General tab
- Admin Label - enter the addon title (for internal reference only).
- Title - add some description to the addon (for internal reference only).
- Select Layout - choose the layout for the addon.
- Choice column custom block - set the number of columns to display in the addon area.
- Header Text - specify the text you want to display as the heading.
- Footer Text - enter the text to display at the bottom of the addon area.
- CSS Class - you can apply a particular CSS style to the addon. You need to add the CSS class name.
Addon Options
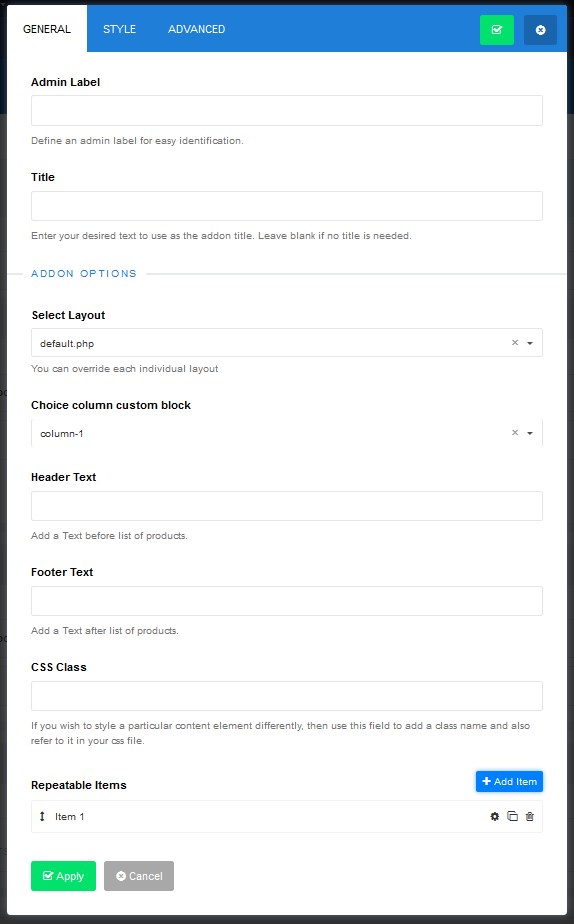
Repeatable Items
To add new item press the Add Item button.
Access the item settings by clicking the "Gears" button.

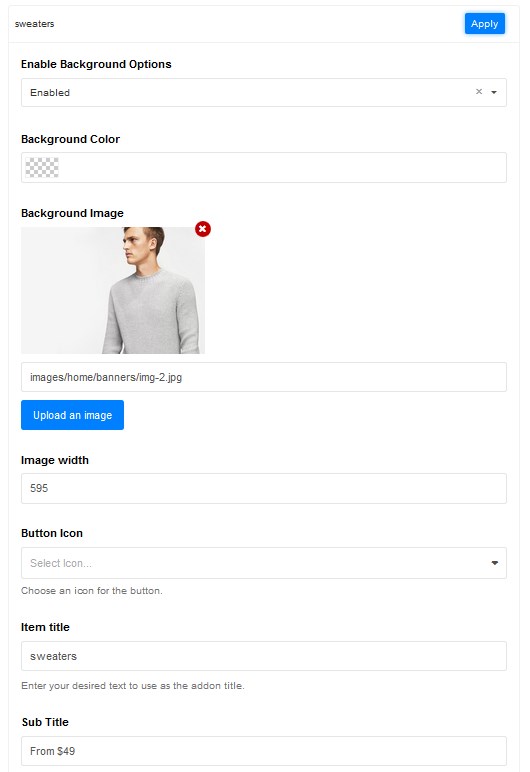
- Enable Background Options - customize the background of your addon with various styling options. You can add the background color and background image, text content and button.
- Background Color - choose the color you want to use as a background color for the addon.
- Background Image - you can add a background image.
- Image width - set the image width (e.g. 695, 400).
- Button Icon - select the icon for the button.
- Item title, Sub Title, Content - specify the text you want do show with the help of this addon.
- Btn Link - you can add the button with the link to a specific category or page. In case you do not wan to use the button (the option set to disabled) the whole addon area will be linkable.
- Select Link Type - choose the link type. You can add the link to the joomla pages, virtuemart categories or any custom link.
- Select menu item, Select Category - select the page or products category you want to link to.
- Button Link - enter the URL for the button.
- Button Text - enter the text for the button. Leave the field empty if no button is required.
- Button position - choose the button position.
- Button Style - select the button style.
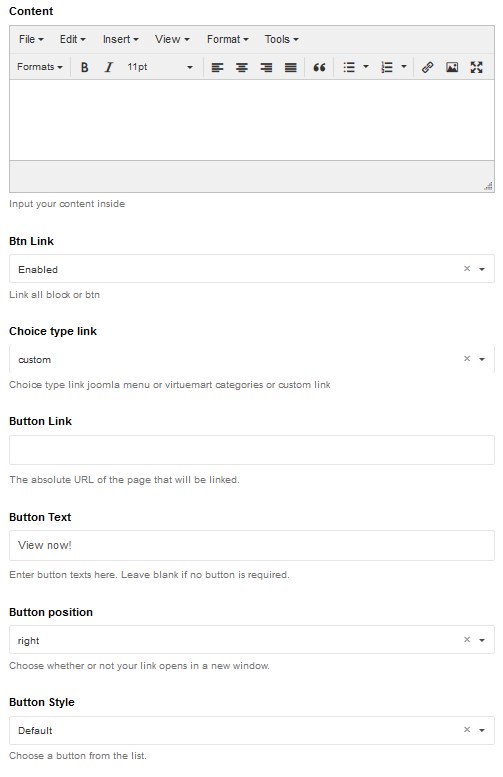
Remember to save the settings.
VirtueMart Products
You can use this addon to display featured, discounted, latest, best-sellers, recently viewed products block.

Let's see the addon settings:
General tab
- Admin Label - enter the addon title (for internal reference only).
- Title - add some description to the addon (for internal reference only).
- Display - select the type of product you would like to display.
- Select Layout - choose the layout for the addon.
- Number of displayed products — specify the overall number of products to show in the addon.
- Products per row - set the number of rows.
- Header Text - specify the text you want to display as the heading.
- Footer Text - enter the text to display at the bottom of the addon area.
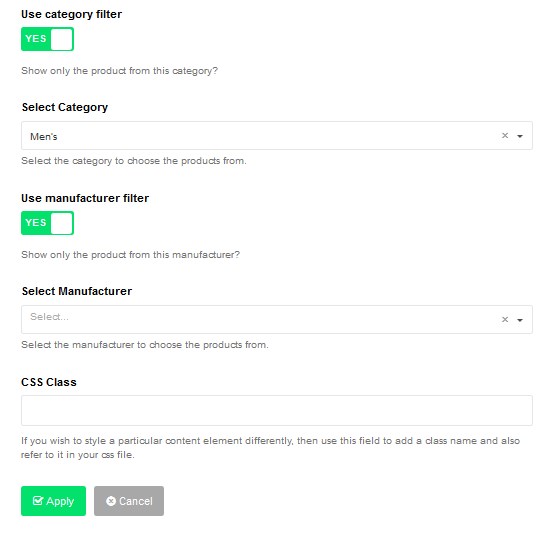
- Use category filter - enable the category filter.
- Select Category - select the category you display products from.
- Select Category - enable the manufecturer filter. This option allows to display the products from one manufecturer.
- Select Manufacturer - select the manufectrer.
- CSS Class - you can apply a particular CSS style to the addon. You need to add the CSS class name.
Addon Options

Options tab
- Use Carousel -enable the carousel mode.
- Loop - enable the loop mode for the carousel.
- Nav - you can use the navigation arrows for your carousel.
- Dots - enable to show the navigation dots.
- Autoplay - sets whether you want the carousel to start automatically when the page loads.
- Autoplay Timeout - allows to set the autoplay timeout.
- Rewind - set to "Yes" to make the carousel to go backwards.
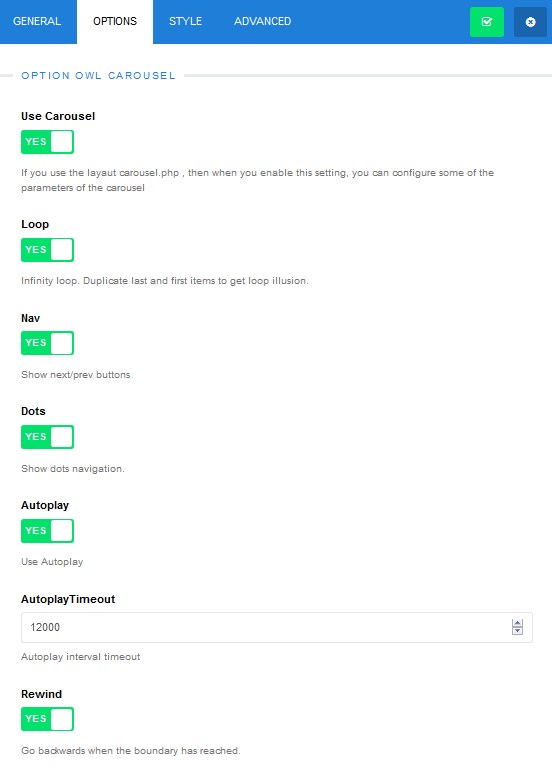
Remember to save the setting.
Virtuemart Custom Brand
You can use this addon to display Brands block with link and the title.
Let's see the addon settings:
General tab
- Admin Label - enter the addon title (for internal reference only).
- Title - add some description to the addon (for internal reference only).
- Select Layout - choose the layout for the addon.
- Choice column custom block - set the number of columns to display in the addon area.
- Header Text - specify the text you want to display as the heading.
- Footer Text - enter the text to display at the bottom of the addon area.
- CSS Class - you can apply a particular CSS style to the addon. You need to add the CSS class name.
Addon Options

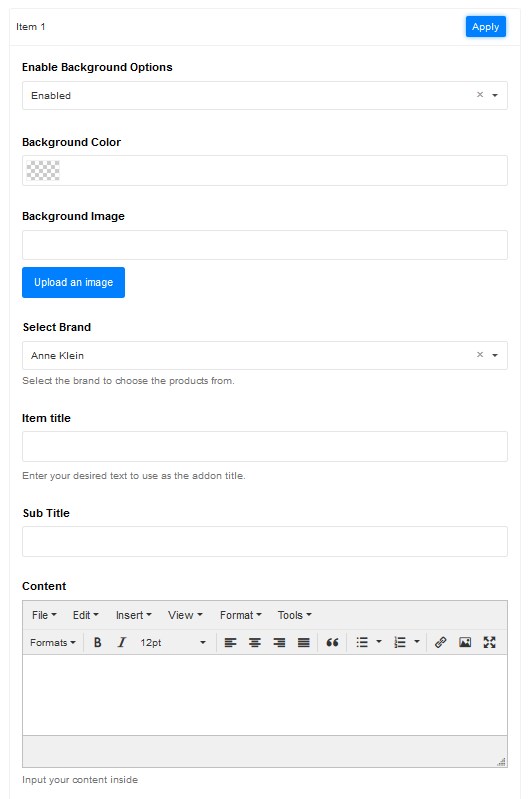
Repeatable Items
To add new item press the Add Item button.
Access the item settings by clicking the "Gears" button.
- Enable Background Options - customize the background of your addon with various styling options. You can add the background image.
- Background Image - you can add a background image. Note, the brand logo will be replaced with the background image.
- Select Brand - select the brand you want to display.
- Item title, Sub Title, Content - specify the text you want do show with the help of this addon.
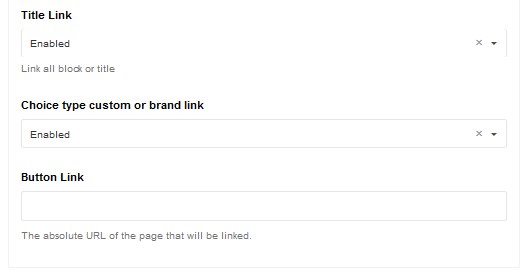
- Title Link - in case you do not want to use the title as the link, set the option to "Enabled".
- Choice type custom or brand link - choose the link type. You can add the link to the brand pages or any custom link.
- Select menu item, Select Category - select the page or products category you want to link to.
- Button Link - enter the custom URL.
Remember to save the settings.
You can find the official documentation here.
To receive further updates and use SP Page builder functionality to its full potential you should purchase its license here.