osCommerce Documentation
Template Features
In the process of development our templates have been customized and improved. New tools to improve functionality, convenience and appearance have been added. Among them there are the following: SEO URLs, Related products, Product tags, Nivo Slider, etc. You can check the details below.
Featured Products
This feature allows to select store products that will show up on the website as recommended products.
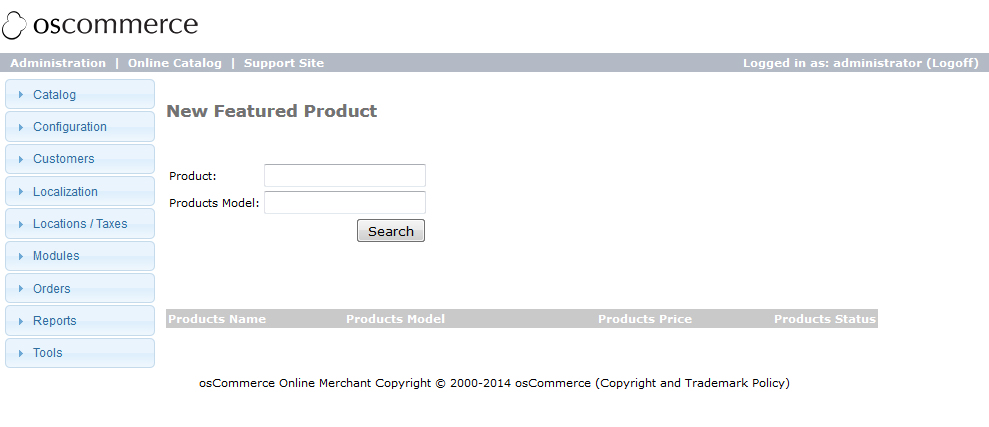
You can navigate to Catalog>Featured Products to add featured products:
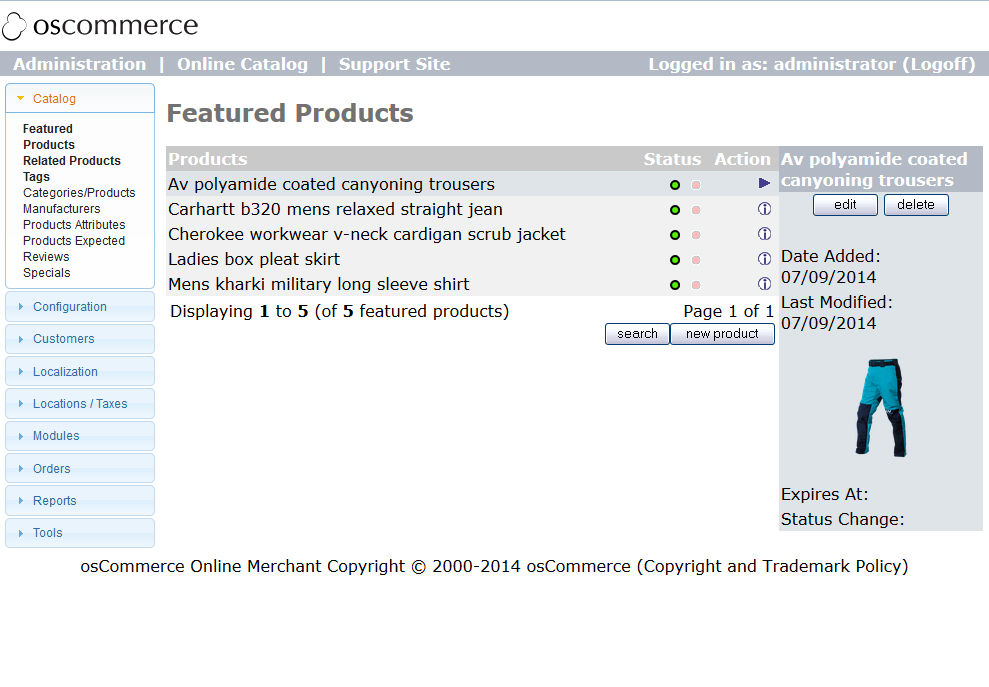
You can see the list of Featured Products there.
In "Status" field you can show/hide the product in Featured Products section (it will stay in the list of featured products but it will not show up on the site).
In "Actions" field you can check, change or delete product details.
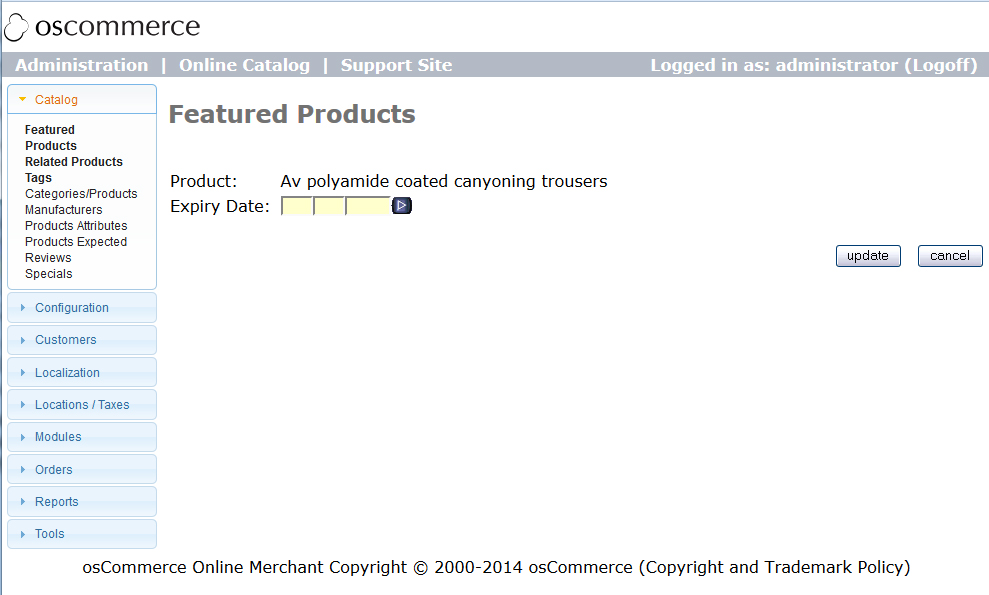
To modify the product details, you can click "Edit" button:
After filling in the required parameters, you can click "Update" button.
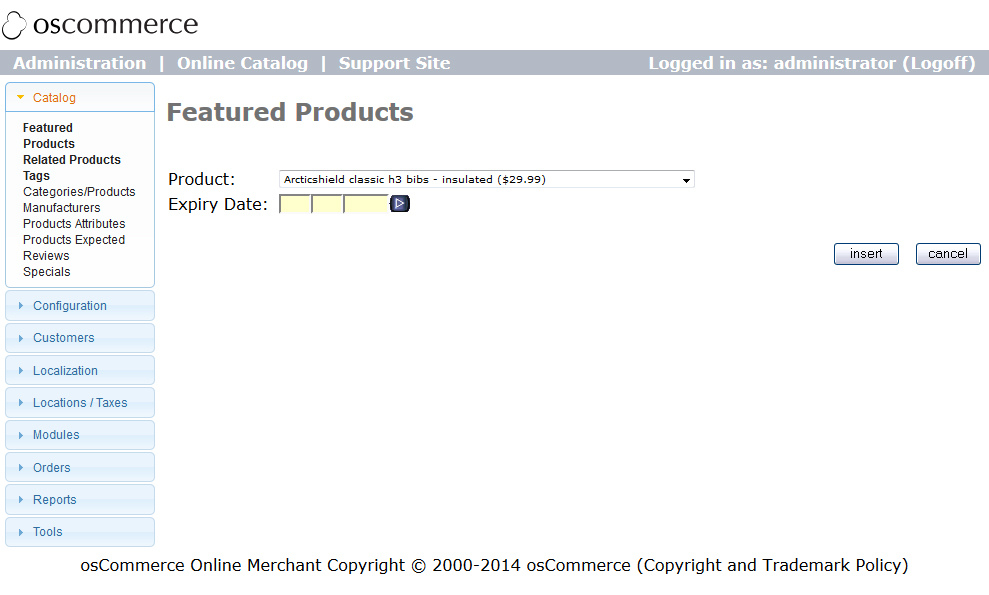
To add a new product to the Featured Products list, click "New product" button:
In the drop down list select the product you want to add and set the expiry date when it should be removed from the Featured products section, then click "Insert" button.
You can also use "Search" button:
You can search by product name and model.
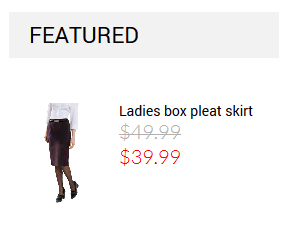
These products can be displayed in the sidebar block:
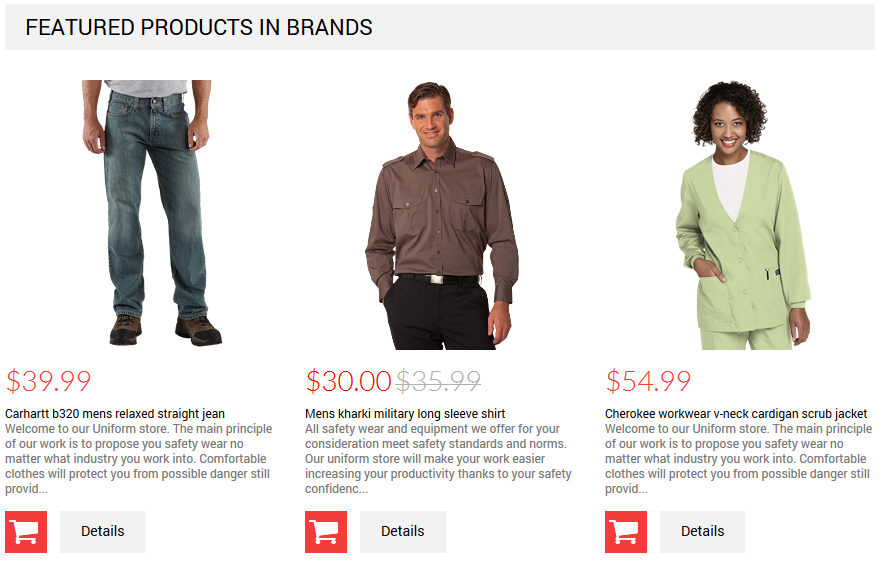
On home page or category page that has subcategories:
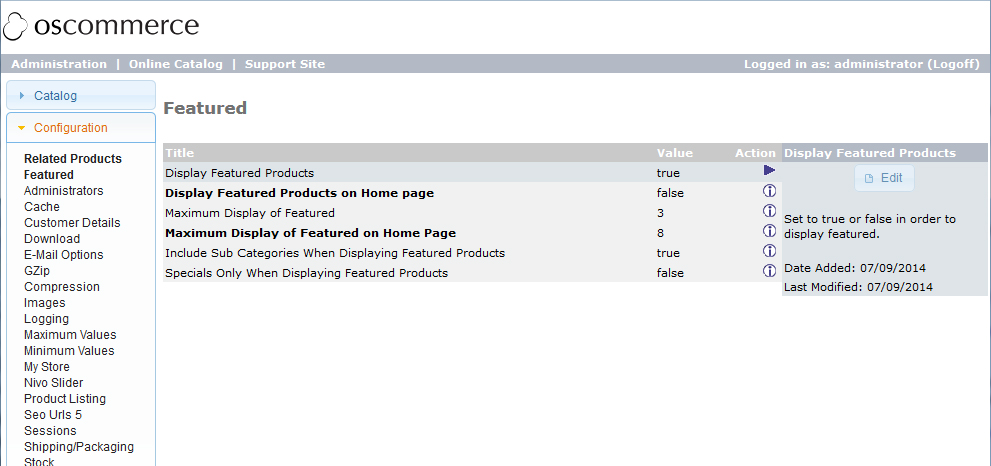
Configuring the Featured Products Display
To configure the display of Featured Products, navigate to Configuration > Featured and add the required settings:
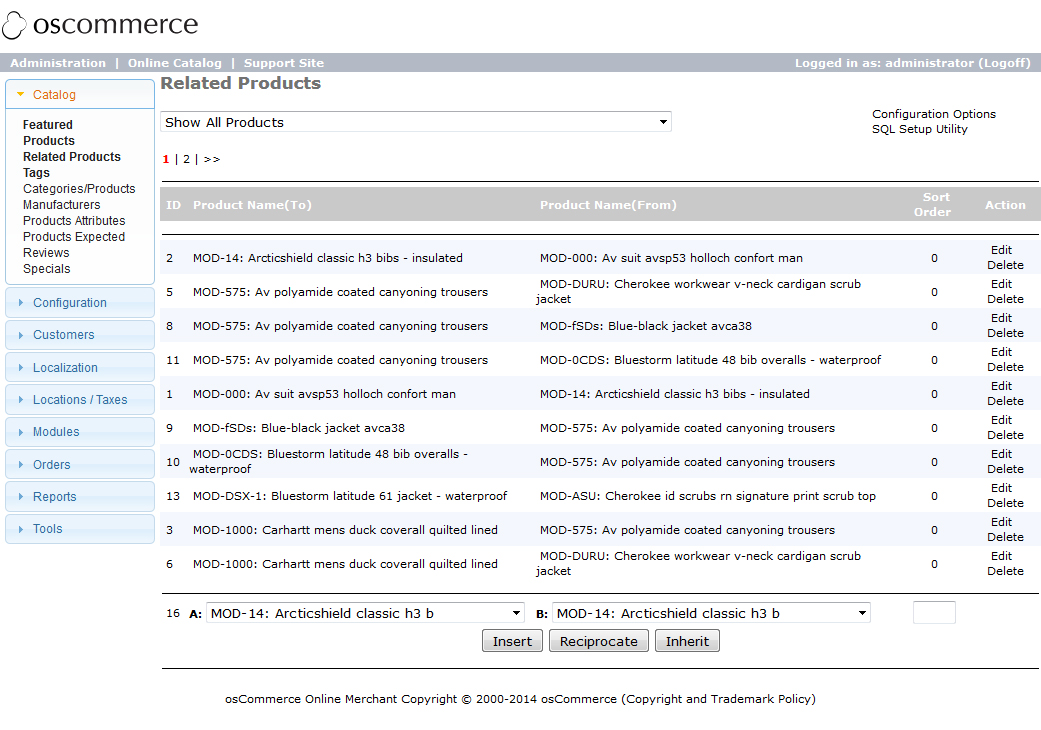
Related Products
This feature allows to add relations between products.
You can add relations under Catalog>Related Products section:
You will see the list of related products (if they exist) and tools to manage them.
The drop down list at the top will help you to filter relations for specific product or for all products, by default it is set to Show All Products.
Under the drop down list there is a pages navigation (required if the list has more than 10 items).
The list below has the following fields:
- Product to which another product relates.
- Product that relates.
- Sort order.
- Edit and Delete buttons.
You can add new relations using the drop down lists below. You should fill in the following fields:
- Product to which another product relates.
- Product that relates.
- Sort order.
After adding relations use the following buttons to save the changes:
-
- Insert
- will add new relation to the list.
-
- Reciprocate
- will add new relation to the list (for both products).
-
- Inherit
- will add new relation to the list (only for one product).
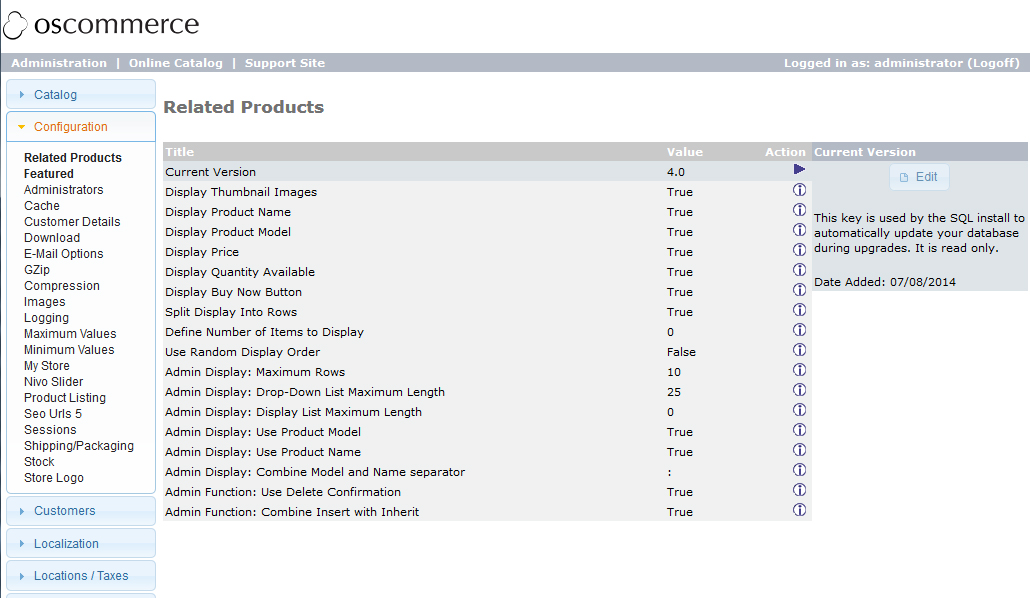
Configuring the Related Products Display
To configure the display of Featured Products, navigate to Configuration > Related Products and add the required settings:
Related products will show up in the carousel on product page.
Tags
This feature allows to add tags to the products and search products by these tags.
You can navigate to Catalog>Tags in order to add tags:
You will see the list of all products there.
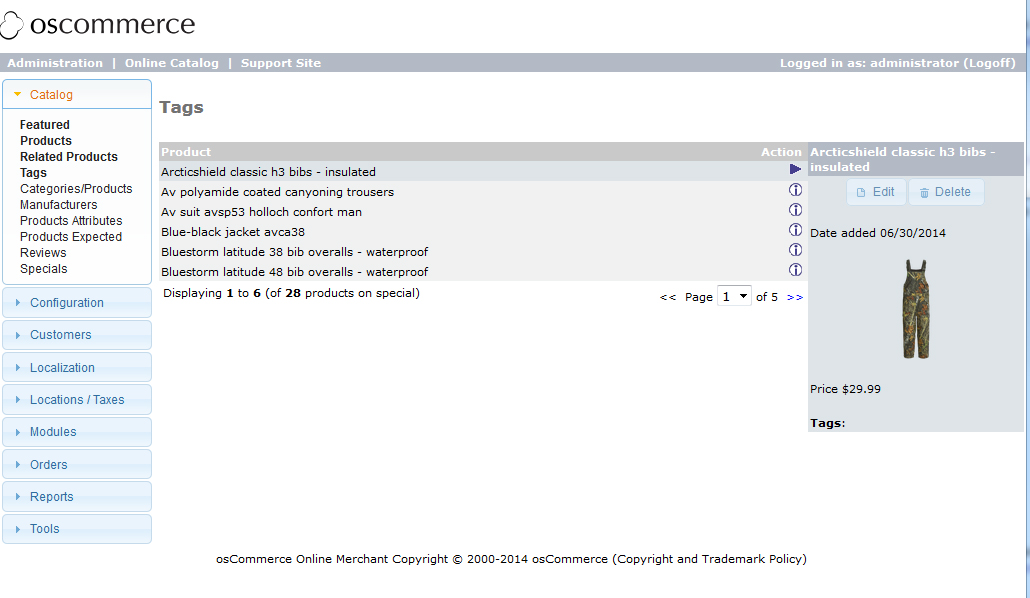
To add or modify tags, select the required product and click "Edit" button.
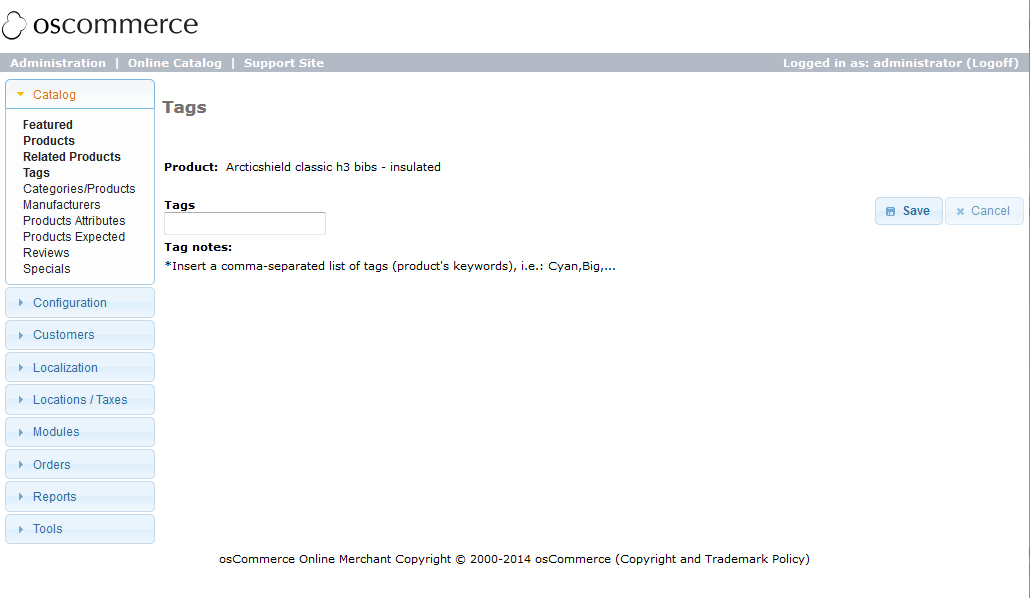
In Tags field, add tags separated with commas and click "Save".
If you want to remove all tags from the product, you can click "Delete" button.
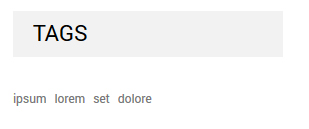
In your store tags will show up in the sidebar block:
In the block on product page:

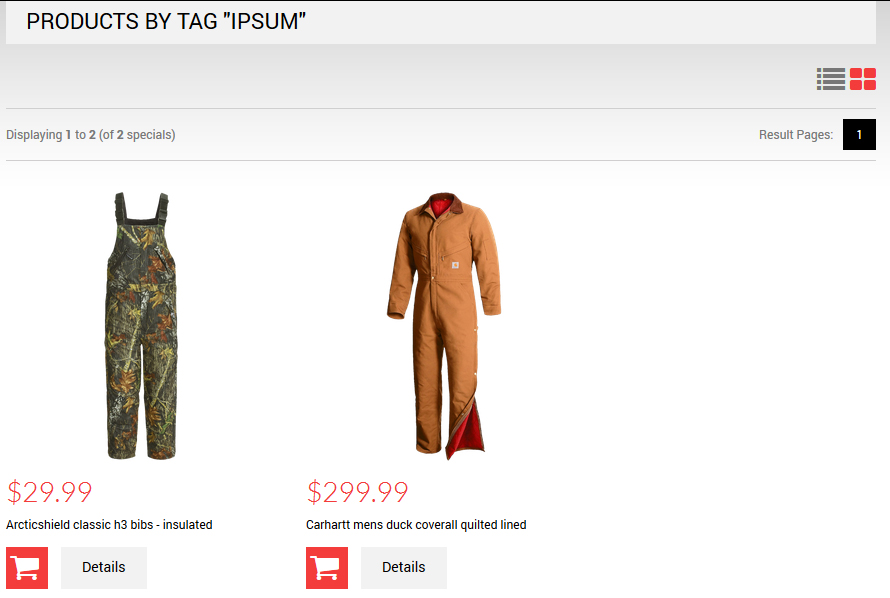
If you click the tag, you will see the list of products that have it:
Nivo Slider
This feature allows to add frontend banners with captions.
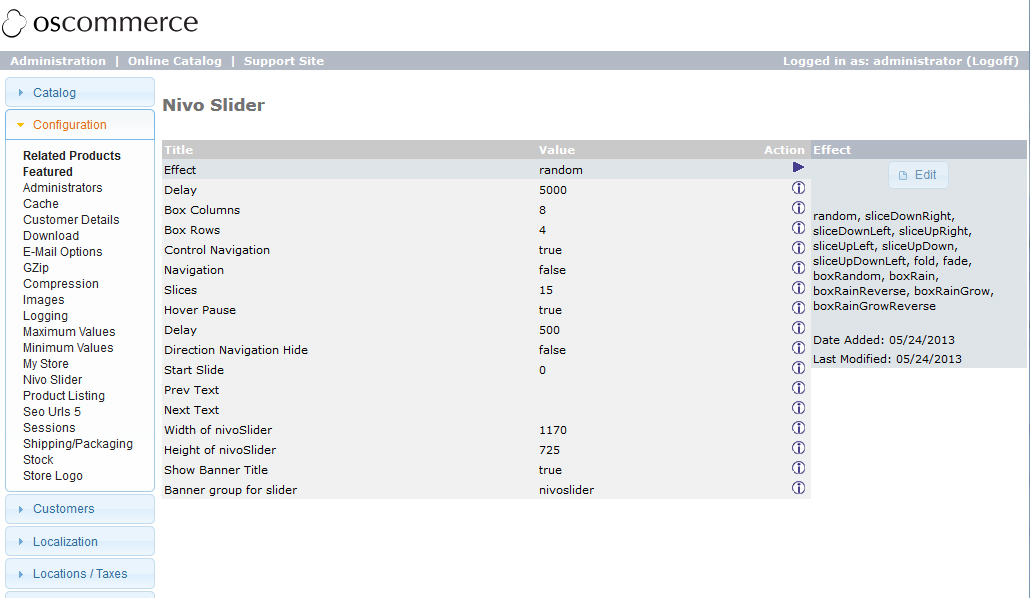
You can navigate to Configuration > Nivo Slider to configure the slider:
You can add all the required slider effects and select the group of banners that will show up in your slider.
We will describe how to add banners in the section Creating Banners.
To display the slider on your frontend, you can navigate to Modules > Boxes > Nivo Slider and select one of two positions (Under Header Block/Home Content Block) for your slider and its sort order.
Banner Box & Content Banner Box
Banner Box & Content Banner Box are two similar modules that allow to display groups of modules in different positions dynamically.
To configure the modules, navigate to Modules > Boxes and find the required module. Click "Edit" button and set position and group of banners.
SEO Url
This feature was added to improve the search engines indexing and, as a result, to have a higher position of your website in search engine results.
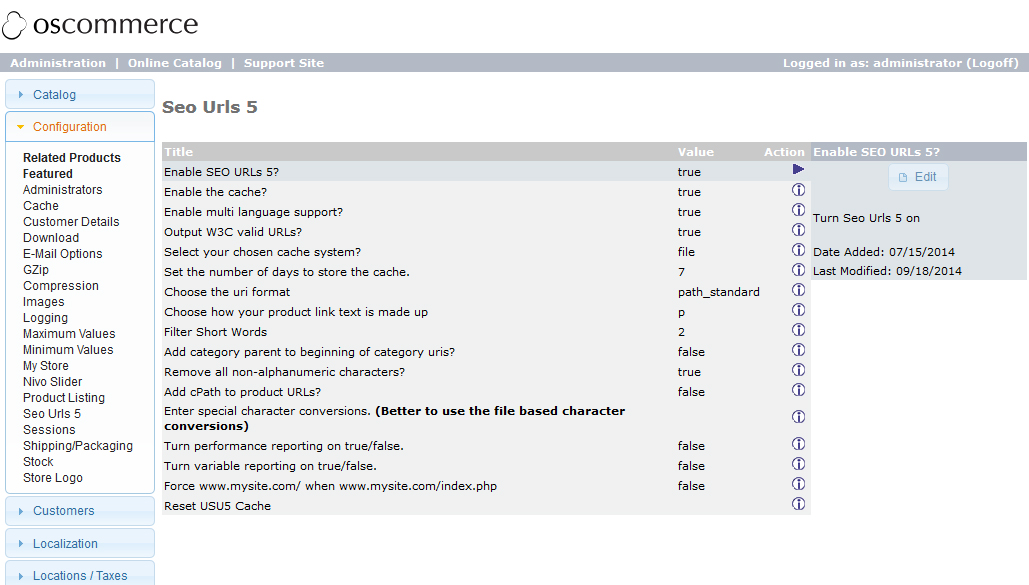
You can navigate to Configuration > SEO Urls to add all the settings:
It is multilingual and works with products and categories.
Live Chat Olark
The template includes Live Chat Olark.
You can navigate to Configuration > My Store > Live Chat Olark to enable/disable it.
By default, it has sample data details. To get your data, you can register on Olark website and do all the required steps to get your code.
Then, open includes/template_bottom.php file and insert the received code between the lines begin olark code and end olark code and save the file.
Customers who purchased the template are provided with 6 months Olark chat usage for free. To register 6 months Free bronze package you should follow Olark registration link
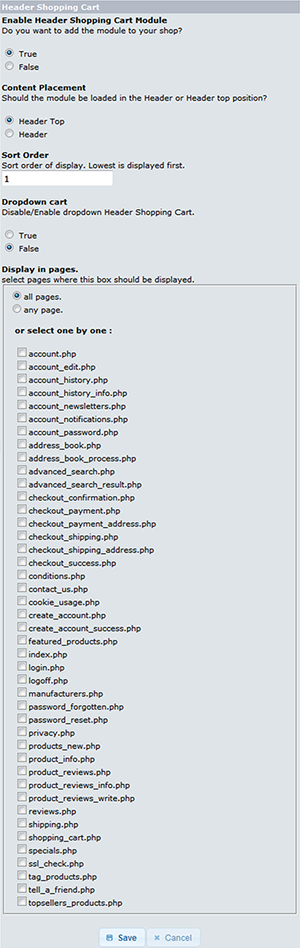
Modules > Boxes
16 modules were added to the template to extend functionality of the website. They are located under Modules > Boxes.
To set the module, select the module and click "Edit" button:
You will see the screen where you can add all the block settings (Module Header Hopping Cart is used as an example).
For example:
- Enable or disable on the frontend.
- Module position (positions in other modules may differ from positions described in the example) Header Top/Header.
- Sort order in the position where the module will show up.
- Enable/disable the hopping cart (only for the described module, other modules will have other options).
- Pages where the module will show up.
Click "Save" button to save the settings.