HTML Templates Documentation
Setting modules and extensions included
Google webfonts
Most templates use non-standard fonts. By default, browser can only use fonts, installed to operating system.
In other words, in case site design involves the use of custom fonts not installed to computer, these fonts won't be displayed at site from visitors side. Instead there will be standard fonts displayed.
That is the reason why web developers search for an alternative solution. Our templates custom fonts are added by using the most popular technology — Google Web Fonts.
Google fonts initialization procedure is described in details in official documentation: https://developers.google.com/fonts/docs/getting_started.
Feel free to check a detailed tutorial on using Google Web Fonts: How to work with Google web Fonts.
In case Google Fonts loading fails:
- Open 'site\index-*.html' or 'site\css\style.css' file
Locate this line:
//fonts.googleapis.com/css?family=[---your_web_font_name_here---]And change it to the following one:
//fonts.useso.com/css?family=[---your_web_font_name_here---]
Using additional Google Fonts characters sets
If your website content is written not in English, but in other language containing non-Latin characters, you might need to expand character set. In order to add new charset to initial Google Fonts one, follow these steps at Google Fonts service page:
- Select your font (i.e., Open Sans) by pressing Add to Collection button .
- Press Use button in the appearing panel. Fonts setting page will open.
- On this page at step “2. Choose the character sets you want:” choose the required encodings for your font.
- Select “@import” tab on step 3.
- Copy the content of this tab.
- Insert the copied content instead of previous font version initialization line into style.css file.
RD Google Map
Template uses plugin for Google Map inserting - RD Google Map.
Plugin settings allow you:
- To change map coordinates;
- To add custom markers to map;
- To add pop-up windows to your markers;
Map coordinates change
To replace map coordinates with your ones you need to edit .html file in block.
<div id=”google-map” class=”map_model”></div>
Specify two data attributes here: data-x (north latitude) and data-y (west longitude). As a result you'll have this line of code:
<div id=”google-map” class=”map_model” data-x="-73.9994068" data-y="40.643180"></div>
Coordinates can be received by using Google Maps service . Press on right mouse button at target map place and select “What's here?”. In the appearing modal window necessary coordinates will be displayed under location name. First number stands for data-x, second one for data-y.
In case you do not specify custom coordinates, default ones will be used instead.
Please also pay your attention, a common mistake is to change coordinates order so that map shows improper location from another hemisphere.
Adding custom markers to map
In order to add custom maker to map, please edit .html file by adding new
<ul class=”map_locations”></ul>
element to
<li></li>
list and specify its data attributes: data-x (north latitude) and data-y (west longitude). As a result you'll get line of code as follows:
<li data-x="-73.9994068" data-y="40.643180"></li>
In case you do not specify custom coordinates, plugin script will ignore empty list element and there will be no marker displayed.
Complete code example will appear as follows:
<div class="map">
<div id="google-map" class="map_model"></div>
<ul class="map_locations">
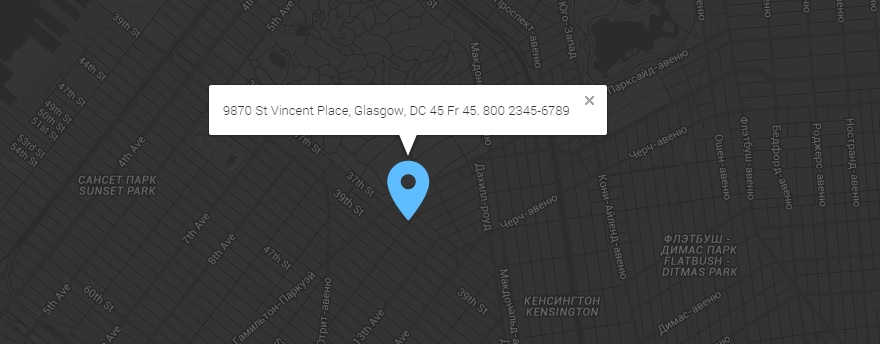
<li data-x="-73.9874068" data-y="40.643180">
<p> 9870 St Vincent Place, Glasgow, DC 45 Fr 45.
<span>800 2345-6789</span>
</p>
</li>
<li data-x="-72.9874068" data-y="39.643180">
<p> 9870 St Vincent Place, Glasgow, DC 45 Fr 45.
<span>800 2345-6789</span>
</p>
</li>
</ul>
</div>
- where:
<li data-x="-73.9874068" data-y="40.643180">
    <p> 9870 St Vincent Place, Glasgow, DC 45 Fr 45.
        <span>800 2345-6789</span>
    </p>
</li>
represents new map marker.
Adding pop-up windows to markers
In order to add pop-up window to custom map marker just insert window content to the respectable map markers list element
<li></li>
As a result you'll get line of code as follows:
<li data-x="-73.9994068" data-y="40.643180">Our office</li>
RD Mailform
Is a multipurpose form. Script allows to use form in three modes: Contact form, Newsletter form and Ordering form.
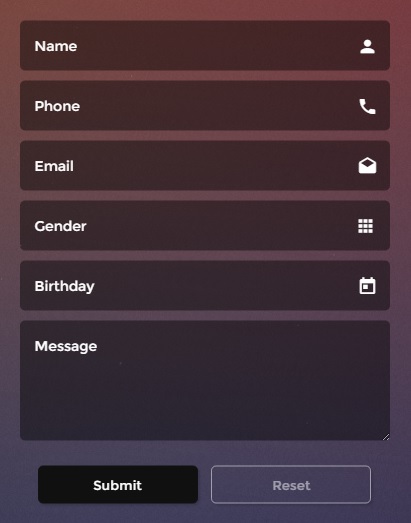
Template forms are already set to correct mode. You just need to specify site owner e-mail address, that will receive the results of site visitors form filling.
If necessary, you can specify several addresses. In order to do this, please perform the following:
- Open bat/rd-mailform.php.
- Locate $recipients variable using search tool (Ctrl + F)
-
Insert your e-mail address e-mail after “=” sign:
$recipients = “test@gmail.com” — for single address$recipients = “test@demolink.com test2@demolink.com” — for few e-mail addresses.
Changing form operating mode:
If you need to change form operating mode, open *.html page, and edit form code by adding field right after opening <form>, tag
<input type=”hidden” name=”form-type” value=”YOUR_FORM”>
Use the corresponding form operating mode instead of YOUR_FORM:
-
- contact
- for contact form;
-
- subscribe
- for subscription;
-
- order
- for ordering.
For example, to use contact form this HTML code is needed:
<input type=”hidden” name=”form-type” value=”contact”/>
Sending e-mails via SMTP-server:
SMTP server setting does not relate to form setting at all.
In order to send your site messages via SMTP-server you'll need to refer to official PhpMailer (library, used in form) documentation or check this tutorial from official documentation http://phpmailer.worxware.com/?pg=examplebsmtp.
Attention! Mail function does not work locally. It becomes active at hosting servers only, with PHP enabled.
Search
Attention! Search form is not a mandatory element, this means, it is included to template only in case it is pre-designed with .PSD layout. Search function does not work locally. It becomes active at hosting servers only, with PHP enabled.
RD Navbar
The following script adds functionality for creating navigation panel for mobile devices.
The script automatically adapts to the markup set in HTML and shows menu items marked as displayable on mobile in main site navigation.
There is no additional setup required.

Color schemes
If template has several color schemes, it includes corresponding files colorScheme-1.css, colorScheme-2.css, colorScheme-#.css delivered to template owner within the theme package.
To activate desired color scheme initialize appropriate color schemes in <head> section of your html files, before the closing </head> tag.
For example, to initialize colorScheme-1.css at index.html page, you should specify the following HTML markup in index.html file in <head> section before the closing </head> tag:
    <head>
    ….
    <link rel=”stylesheet” href=”css/colorScheme-1.css”/>
    </head>
Color scheme switcher, visible at template's Live Demo, is used for preview purpose only and is not provided within template package.
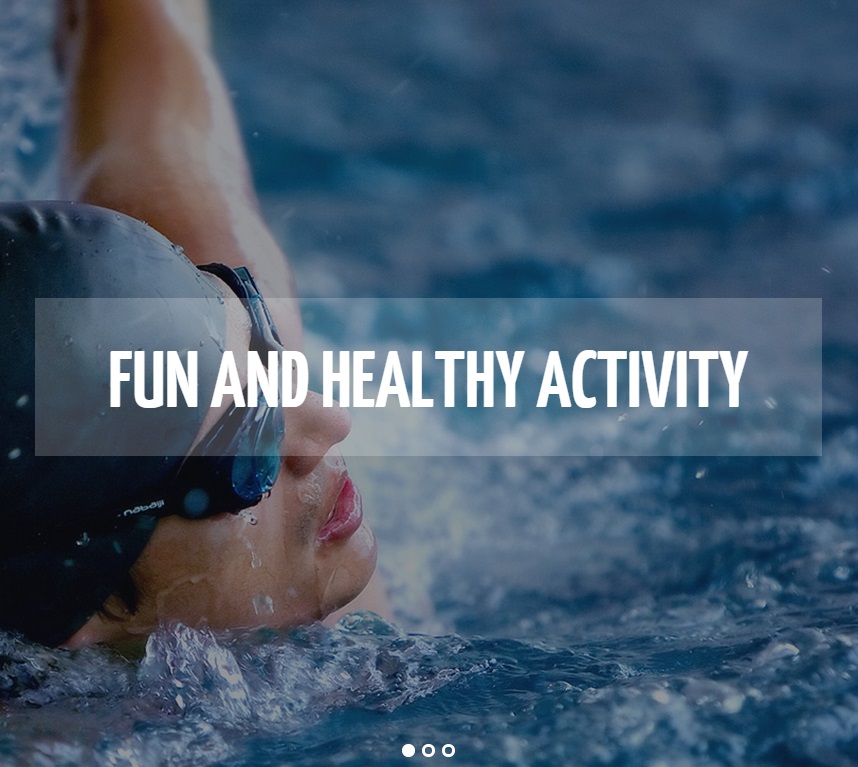
Slider
Our templates use Camera Slider jQuery-plugin. You might need to change slider images and description.
To create new slide in slider, you should insert the following HTML code in slider markup in the appropriate .html file:
<div data-src="images/page-1_slide02.jpg">
    <div class="camera_caption fadeIn">
        Slide content 2
    </div>
</div>
As a result you'll get code as follows (let's say there was 1 slide included already):
<div class="camera_container">
    <div id="camera" class="camera_wrap">
        <div data-src="images/page-1_slide01.jpg">
            <div class="camera_caption fadeIn">
                Slide content 1
            </div>
        </div>
        <div data-src="images/page-1_slide02.jpg">
            <div class="camera_caption fadeIn">
                Slide content 2
            </div>
        </div>
    </div>
</div>
Here every
<div data-src="images/page-1_slide01.jpg"> …
    </div>
part represents separate slide. Path to slide background image is set with data-src attribute, and slide content is inserted inside of
<div class="camera_caption fadeIn"> </div>
In order to enable/disable slider autoplay you should locate script initialization code in script.js file:
/* Camera
========================================================*/
;(function ($) {
var o = $('#camera');
    if (o.length > 0) {
        if (!(isIE() && (isIE() > 9))) {
            include('js/jquery.mobile.customized.min.js');
        }

        include('js/camera.js');

        $(document).ready(function () {
            o.camera({
                autoAdvance: true,
                height: '40.9375%',
                minHeight: '300px',
                pagination: false,
                thumbnails: false,
                playPause: false,
                hover: false,
                loader: 'none',
                navigation: true,
                navigationHover: false,
                mobileNavHover: false,
                fx: 'simpleFade'
            })
        });
    }
})(jQuery);
and specify required value for autoAdvance option. Like,
- autoAdvance: true,
- to enable autoplay
- autoAdvance: false,
- to disable autoplay
Gallery
Detailed documentation on gallery is available at official website:
RD Parallax
In order to implement parallax section to your .html page you should define the following HTML markup at a target place of page:
<section class="parallax" data-url="images/parallax1.jpg" data-mobile="true"> </section>
Where
-
- data-url
- path to background image,
-
- data-mobile
- True (to enable parallax display on mobile devices) / False (to load static image on mobile devices)
In order to observe parallax-effect, image has to be higher than a section you're applying effect to.
Background video
We use jQuery-plugin Vide. to implement background video to our templates.
Video is added to section background by using special script.
Different browsers support different video formats, therefore to ensure cross-browser functionality, please, perform the following:
- Convert your video file into 3 formats: *.mp4, *.ogv, *.webm (file names have to match);
- Prepare an image to display it in browsers, that do not support background video, including mobile devices;
-
In the appropriate block with .vide class specify path to previously created files in data attribute data-vide-bg Please, do not specify files extension.
Example:
<div class="vide" data-vide-bg="video/video-bg"> Your content </div>
Warning. Due to Apple and other mobile platforms policy background video will not appear on mobile devices!
RD Calendar
Calendar is an optional element, so it is included in the template package only in case it was pre-designed within .PSD layout.
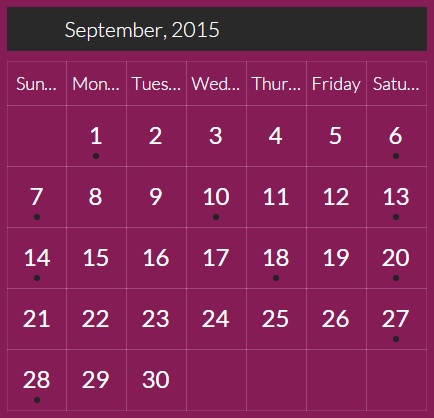
To add custom events to site calendar please specify list of appropriate events in calendar HTML markup, in a block with .rdc-events class. For example,
<div class="rd-calendar">
    .......
    <div class="rdc-events">
        …...
        <ul>
            <li class="rdc-event" data-date="6/3/2015">
                My Event 1
            </li>
            <li class="rdc-event" data-date="6/8/2015">
                My Event 2
            </li>
        </ul>
    </div>
</div>
where
<li class="rdc-event" data-date="6/3/2015"></li>
represents every separate event. Event date is set within data-date attribute as MM/DD/YYYY.
Countdown timer (“under construction” page)
Countdown timer is an optional element, so it is included in the template package only in case it was pre-designed within .PSD layout.
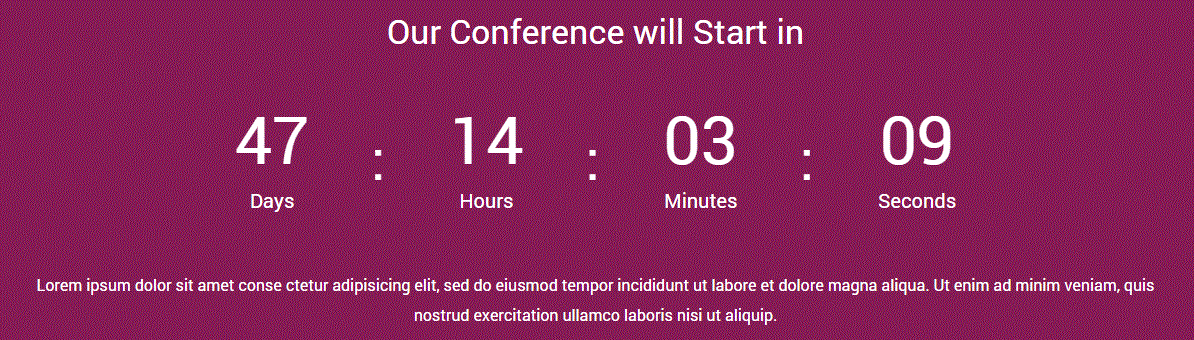
In order to set-up custom countdown timer, edit /js/script.js file in the following section:
/* Countdown
========================================================*/
;
(function ($) {
    var o = $('.countdown');
    if (o.length > 0) {
        include('js/jquery.plugin.js');
        include('js/jquery.countdown.js');

        $(document).ready(function () {
            var date = new Date(),
                countTo = new Date(date.getFullYear(), date.getMonth() + 2, date.getDay());
            $(o).countdown({until: countTo, padZeroes: true});
        });
    }
})(jQuery);
countTo variable has to include target date:
countTo = new Date(year, month + 1, day);
For example, project starts on 12 May 2020. In this case proper code line will look as follows:
countTo = new Date(2020, 6, 12);
Full code example is:
/* Countdown
========================================================*/
;
(function ($) {
    var o = $('.countdown');
    if (o.length > 0) {
        include('js/jquery.plugin.js');
        include('js/jquery.countdown.js');

        $(document).ready(function () {
            var date = new Date(),
                countTo = new Date(2020, 6, 12);

            $(o).countdown({until: countTo, padZeroes: true});
        });
    }
})(jQuery);
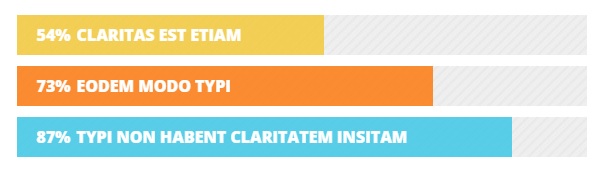
Digital progressbars
The following script is an optional element, so it is included in the template package only in case it was pre-designed within .PSD layout.

In order to define radial progressbar filling percent specify the required value at a target element:
<div class="radial-progress" data-border="15" data-border-bg="#80d2e0"
    data-border-fg="#1daec8">
    75%
</div>
Where
- 75%
- target progress bar fill level.
In order to change horizontal progress bar filling percent specify the required value at a target element in style attribute, by using width: Xpx parameter.
Where
- X
- target value for progress bar.
For example,
<div class=”horizontal-progress”>
    <div class=”horizontal-progress-value” style=”width: 80%”></div>
</div>
Social Icons
In order to define target links to customer's social networks accounts specify social network account page urls into relevant social links in href attribute.
For example,
<a href=”YOUR_SOCIAL_LINK” class=”fa fa-facebook”></a>
Where YOUR_SOCIAL_LINK - Facebook page URL.
Youtube & Vimeo
Use the following HTML code to embed Youtube, Vimeo video:
<iframe class=”video” src="//player.vimeo.com/video/37582125?wmode=transparent" allowfullscreen></iframe>
where src attribute includes link to video at the relevant video-hosting.
Facebook Page Plugin
Facebook Page Plugin implementation process is described in details in the official documentation:
Flickr
You may use easy and free Builder: http://www.flickrbadge.com/ to insert Flickr Badge widget.
Olark Livechat
To set up online chat same as at template's Live Demo, you should register at official Olark website.
After filling all fields you'll get a code to insert it into your template before the closing </body>tag:
The code is quite voluminous, so don't be scared because of this. It will appear like the one below:
    <!-- begin olark code -->
    <script data-cfasync="false" type='text/javascript'>/*<![CDATA[*/
        window.olark || (function (c) {
            var f = window, d = document, l = f.location.protocol == "https:" ? "https:" : "http:", z = c.name, r = "load";
            var nt = function () {
                f[z] = function () {
                    (a.s = a.s || []).push(arguments)
                };
                var a = f[z]._ = {}, q = c.methods.length;
                while (q--) {
                    (function (n) {
                        f[z][n] = function () {
                            f[z]("call", n, arguments)
                        }
                    })(c.methods[q])
                }
                a.l = c.loader;
                a.i = nt;
                a.p = {
                    0: +new Date
                };
                a.P = function (u) {
                    a.p[u] = new Date - a.p[0]
                };
                function s() {
                    a.P(r);
                    f[z](r)
                }

                f.addEventListener ? f.addEventListener(r, s, false) : f.attachEvent("on" + r, s);
                var ld = function () {
                    function p(hd) {
                        hd = "head";
                        return ["<", hd, "></", hd, "><", i, ' onl' + 'oad="var d=', g, ";d.getElementsByTagName('head')[0].", j, "(d.", h, "('script')).", k, "='", l, "//", a.l, "'", '"', "></", i, ">"].join("")
                    }

                    var i = "body", m = d[i];
                    if (!m) {
                        return setTimeout(ld, 100)
                    }
                    a.P(1);
                    var j = "appendChild", h = "createElement", k = "src", n = d[h]("div"), v = n[j](d[h](z)), b = d[h]("iframe"), g = "document", e = "domain", o;
                    n.style.display = "none";
                    m.insertBefore(n, m.firstChild).id = z;
                    b.frameBorder = "0";
                    b.id = z + "-loader";
                    if (/MSIE[ ]+6/.test(navigator.userAgent)) {
                        b.src = "javascript:false"
                    }
                    b.allowTransparency = "true";
                    v[j](b);
                    try {
                        b.contentWindow[g].open()
                    } catch (w) {
                        c[e] = d[e];
                        o = "javascript:var d=" + g + ".open();d.domain='" + d.domain + "';";
                        b[k] = o + "void(0);"
                    }
                    try {
                        var t = b.contentWindow[g];
                        t.write(p());
                        t.close()
                    } catch (x) {
                        b[k] = o + 'd.write("' + p().replace(/"/g, String.fromCharCode(92) + '"') + '");d.close();'
                    }
                    a.P(2)
                };
                ld()
            };
            nt()
        })({
            loader: "static.olark.com/jsclient/loader0.js",
            name: "olark",
            methods: ["configure", "extend", "declare", "identify"]
        });
        /* custom configuration goes here (www.olark.com/documentation) */
        olark.identify('xxxx-xxx-xx-xxxx');
        /*]]>*/</script>
<noscript><a href="https://www.olark.com/site/'xxxx-xxx-xx-xxxx/contact" title="Contact us" target="_blank">Questions?
            Feedback?</a> powered by <a href="http://www.olark.com?welcome" title="Olark live chat software">Olark live
            chat software</a></noscript>
    <!-- end olark code -->