Zen Cart Documentation
Zen Cart Add-ons:
Megamenu
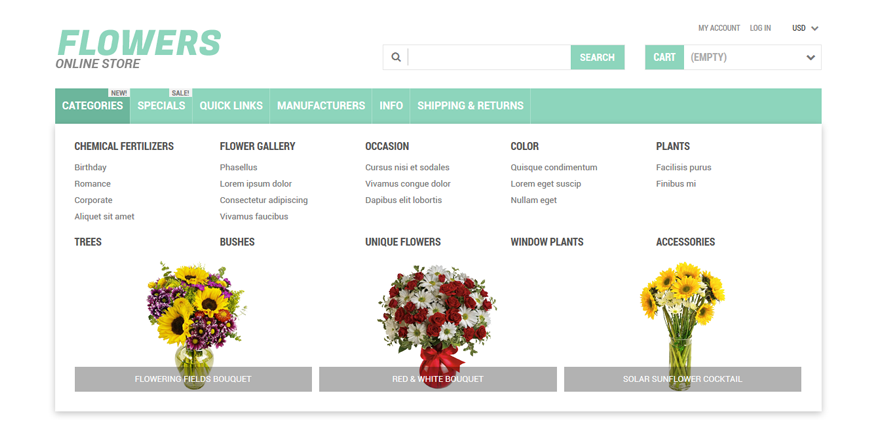
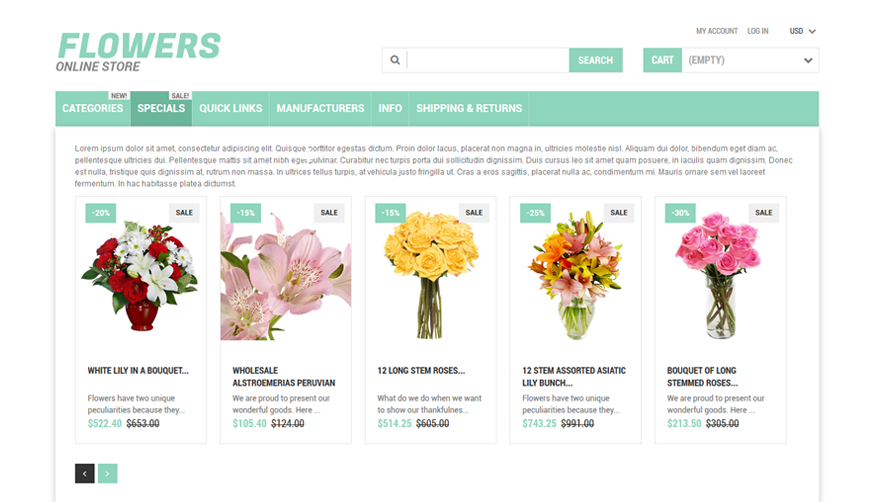
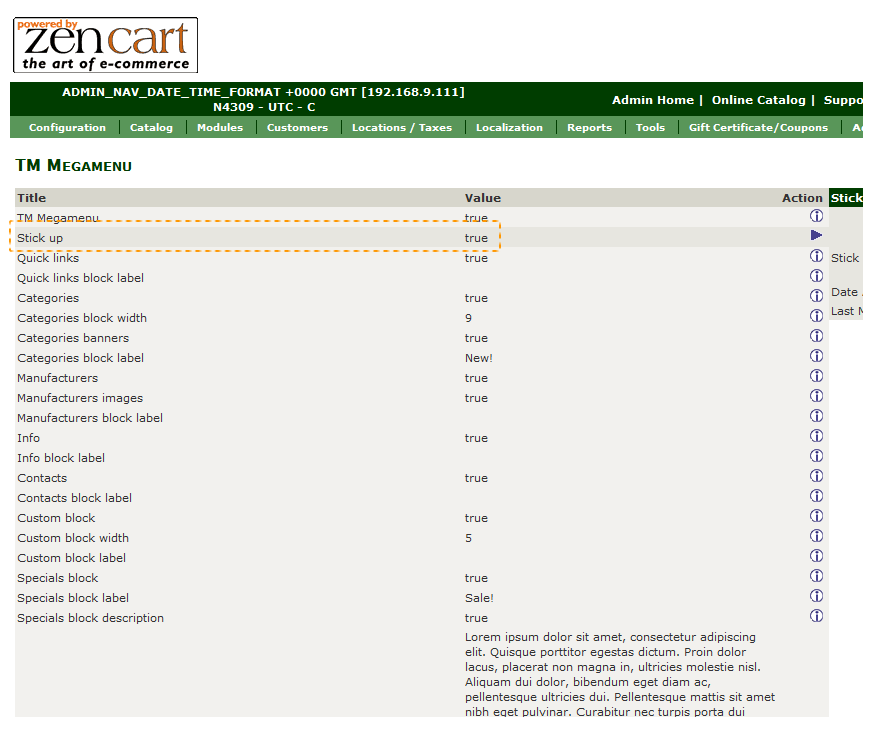
Megamenu is a custom navigation component that uses the standard Navbar markup and contains additional links of your website such as Categories, Services, Quick links, Manufacturers, Info, Shipping & Returns. Also, you can use description text & carousel elements for Specials, custom banners for Categories, Images for Manufacturers, label text, resizable columns, etc. Menu is compatible with mobile devices and popular web browsers.
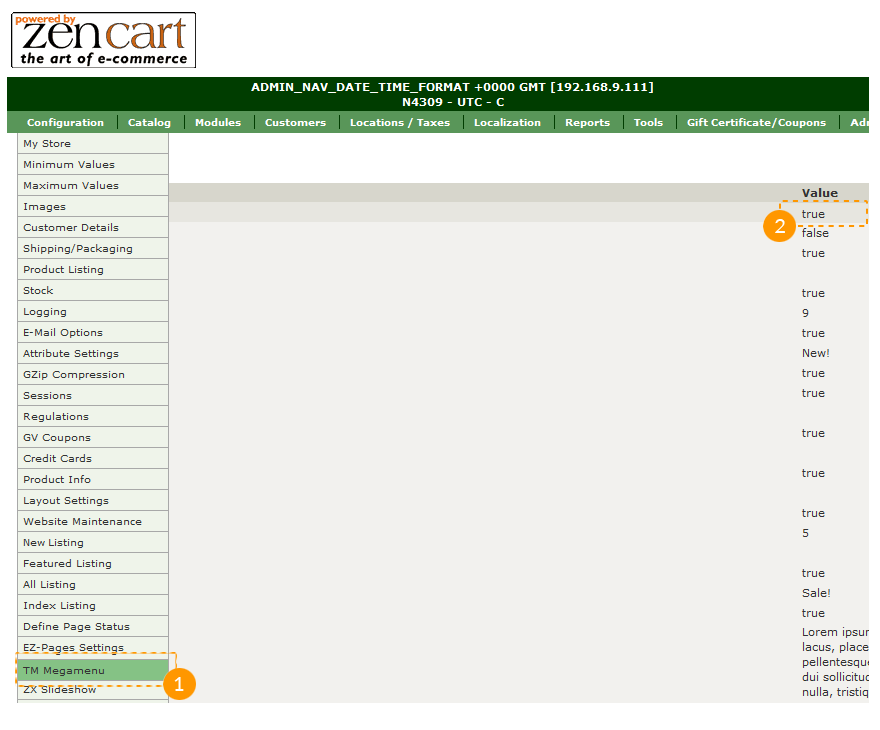
Megamenu includes stickUp menu plugin that makes your navigation stick to the top of your page when scrolling down the window.
Slider
This feature allows to add frontend banners with slideshow effect.
You can navigate to Configuration > ZC Slideshow to configure the slider:
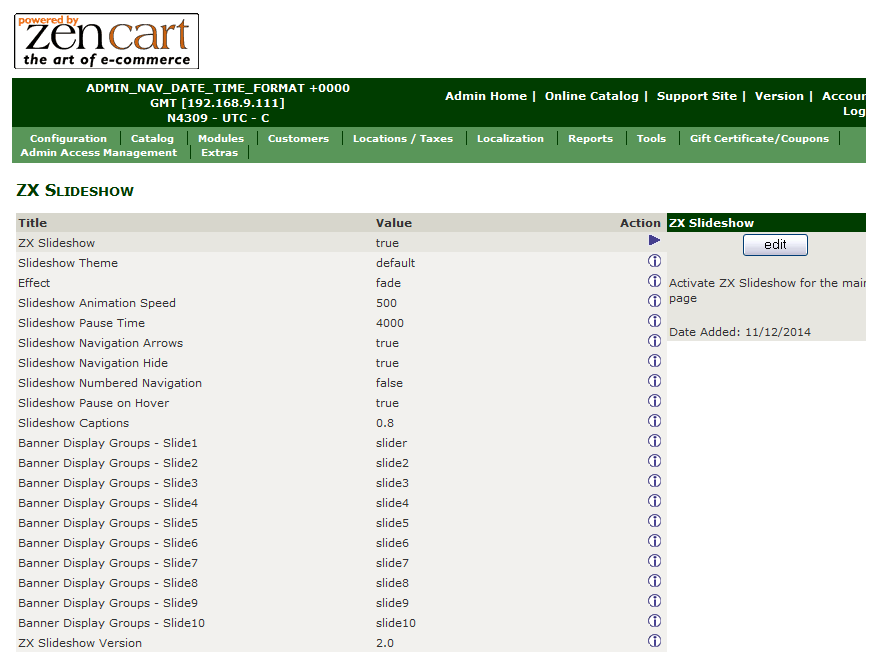
Slider provides several functions that can be changed manually:
-
- Slideshow Theme
- Allows you to select one of four themes of your slider;
-
- Effect
- Sets the transition options between slides;
-
- Slideshow Animation Speed
- Slideshow transition speed in milliseconds;
-
- Slideshow Pause Time
- How long each slide will show in milliseconds;
-
- Slideshow Navigation Arrows
- Show Prev/Next navigation arrows;
-
- Slideshow Navigation Hide
- Show Prev/Next navigation arrows only on hover;
-
- Slideshow Numbered Navigation
- Show numbered navigation;
-
- Slideshow Pause on Hover
- Stop animation while hovering;
-
- Slideshow Captions
- Caption opacity (set it to 0 to make it invisible).
You can add all the required slider effects and select the group of banners that will show up in your slider.
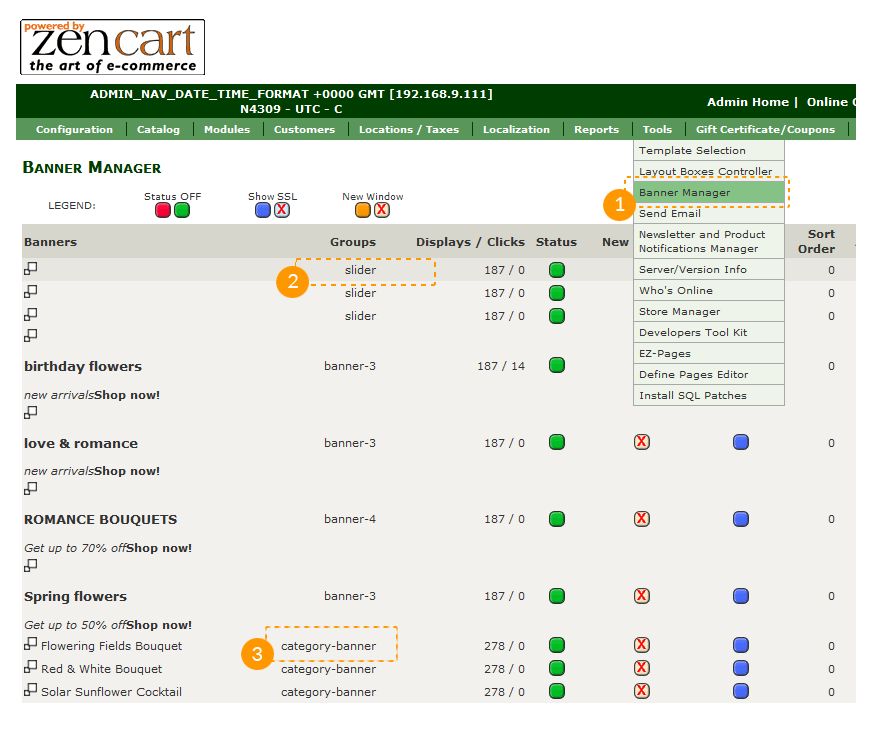
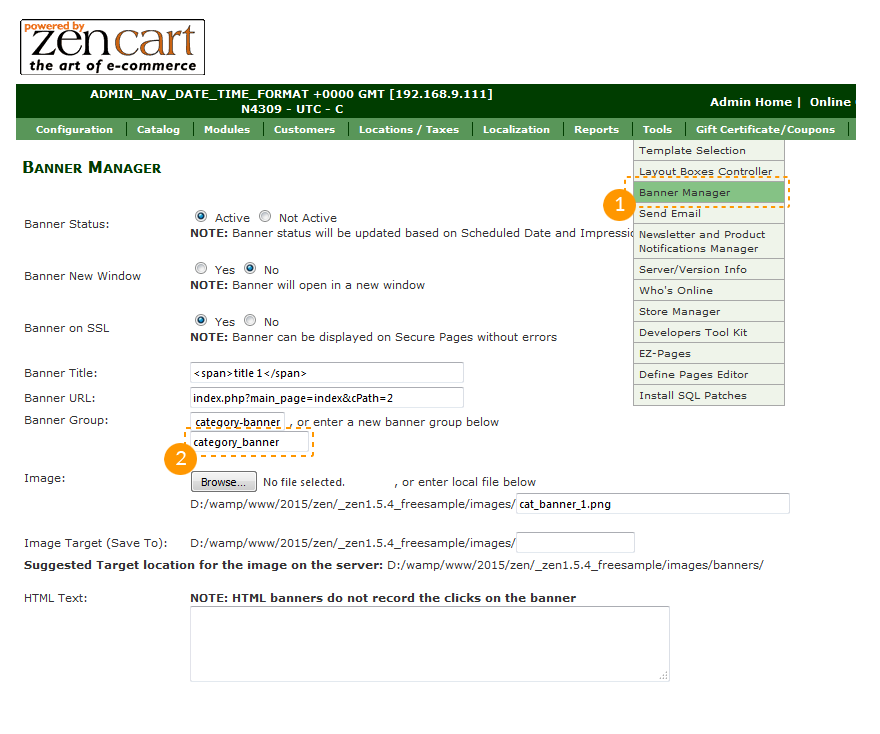
NOTE: After installing ZENCART_SLIDER.sql or ZENCART_MEGAMENU.sql you need to name the appropriate group in the Banner Manager. Navigate to Tools > Banner Manager > new banner > Banner group > and name the field "slider", otherwise your slider will not display. The same applies to the Megamenu, but with "category_banner" name.
Custom Block
With Custom block you can display additional content with images and text.
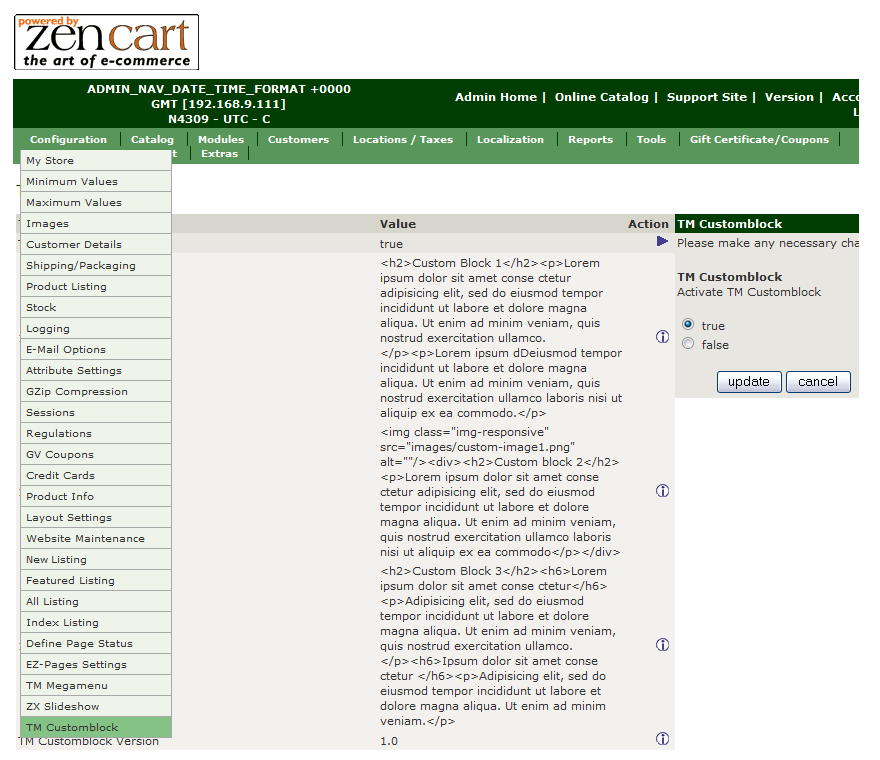
Custom block consists of three independent units which can be edited to meet your needs.

Ajax Search
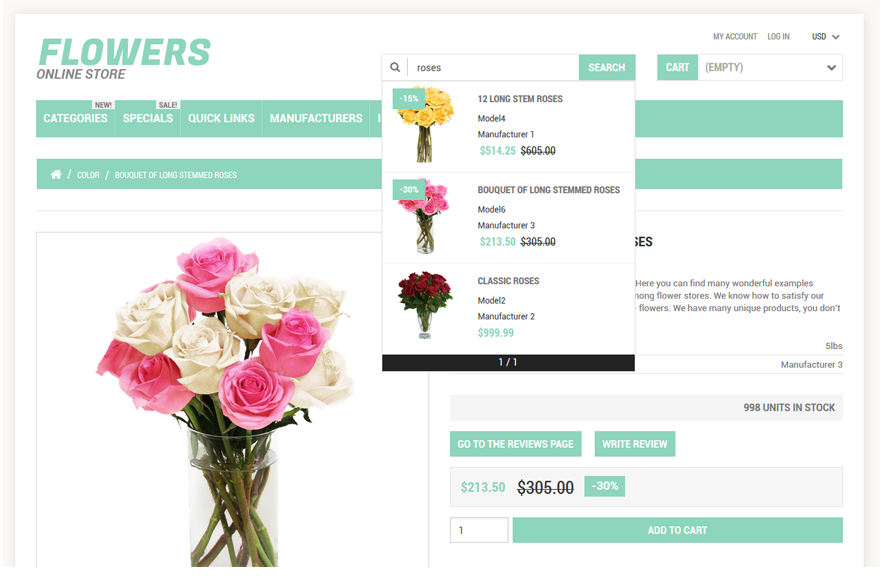
This module was added to the template to extend functionality of the default search. Ajax Search allows you to find the right content and immediately display it without reloading the page under the search field. The results are presented with images, so they look more attractive.
In order to add this Ajax-search to your website, it is enough to install ZENCART_AJAX_SEARCH.sql via Admin panel > Tools > Install SQL Patches. Additional settings are not required.
Social Media Icons Module
This module enables the display of social network icons on the product page as well as the option of sharing your product info in the social network sites (Goolge Plus, Facebook, Twitter, Pinterest).
Module Setup: To set up Social Media Icons Module, import of ZENCART_SOCIAL.sql file is required. The SQL patch can be imported using the Zen Cart Admin panel > Tools > Insall SQL Patches option.
Configuration: To configure the module, please go to Configuration > Social Media Icons in Zen Cart admin. All icons are active by default.
Deactivate all icons - Social Media Buttons - set value to 0 Switch on/off certain icons: choose icon title - set value to 1 or 0 (1 = on, 0 = off).
Footer Links in Columns Module
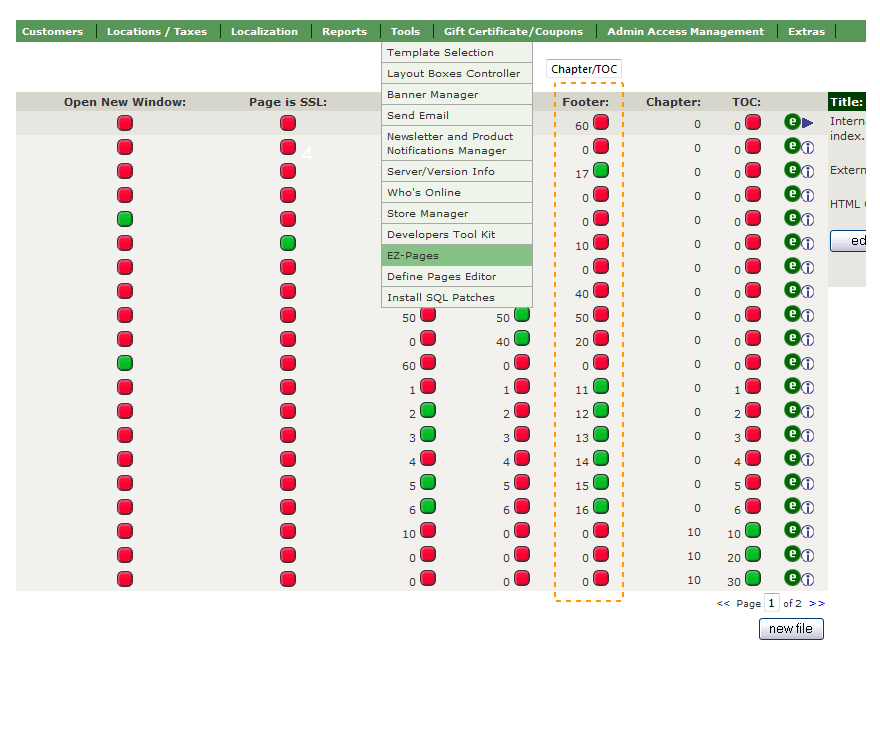
The module enables the display of footer links in lines as well as in columns. The number of columns and the position of every item in the column are defined by the order that is set in Admin > Tools > EZ-Pages.
The first digit in the sort order sets the column number for the link location, the number of columns depends on the quantity of first digits available. The second digit in the sort order defines the link location in the column.
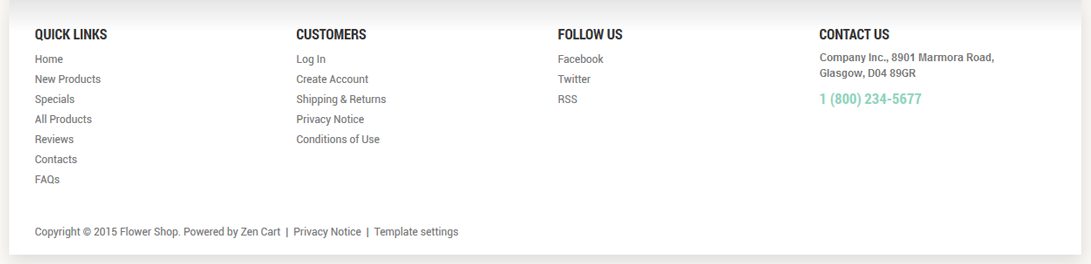
For example:
in the first column the links with sort order 11, 12, 13, 14, 15 will be displayed
in the second column the links with the sort order set to 21, 22, 23, 24, 25 will be displayed
in the third one the links with the sort order set to 31, 32, 33, 34, 35 will be displayed, etc.
Extra Product Images
The new Zen-cart feature allows you to display the additional product images on the product page and open them in the lightbox. To make the extra images display on the product page, please put them into the folder with the product images.
- Open Zen Cart admin panel
- Go to Catalog > On the product editing screen scroll down and find the image file name and open the product you want to modify.
- On the product editing screen scroll down and find the image file name.
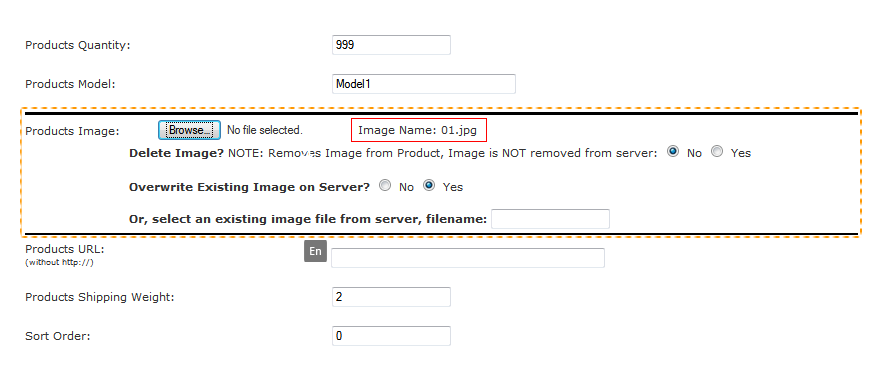
Create new product images with the names that contain the default product image file name.
For example:
Default product image name: 01.png
Additional product image names: 01_1.png, 01-2.png, etc.
or
Default product image name: my_product.jpg
Additional product image names: my_product_1.png, my_product-2.png, etc.
Upload the additional images to the directory where the default image is located. Usually the product images are stored in the 'images' directory of your Zen Cart installation.
When the upload is complete, open the product page in the browser and refresh it. You should see additional images at the bottom of the page.
The number of additional images is unlimited.