Zen Cart Documentation
Template installation
How to install a Zen Cart Template.
First, you need to download the purchased template onto your computer. The download link is available on your order details page.
When the template download is complete, you need to extract the files from the downloaded package. This can be done using the WinZip (Windows OS) or Stuffit Expander (MAC OS) applications. Don't forget to extract the files from the inner sources_XXXX.zip package. The sources archive is password protected and contains the template source files. The password can be obtained from the order details page.
Open the 'themeXXX' folder and upload the 'includes' folder to Zen Cart installation root on your server.
Check your 'admin' folder, in our template the folder is called 'admin123', it is necessary that the folder names match. If the folders are named differently, rename them so that they are identical.
Please note: Replacement of these files will not damage your store.
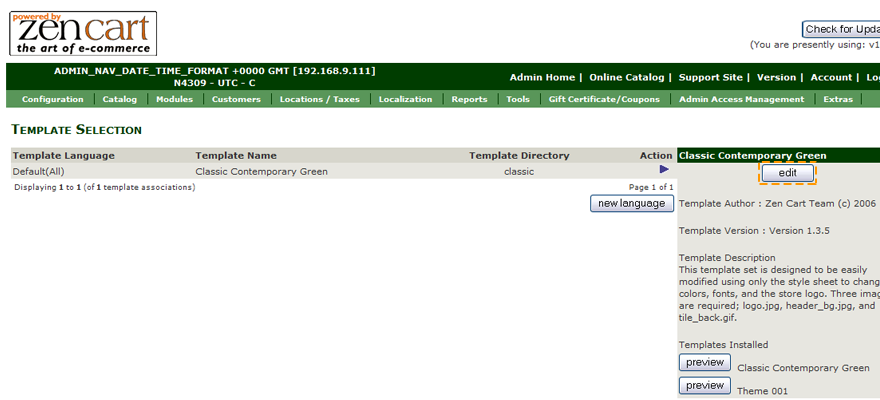
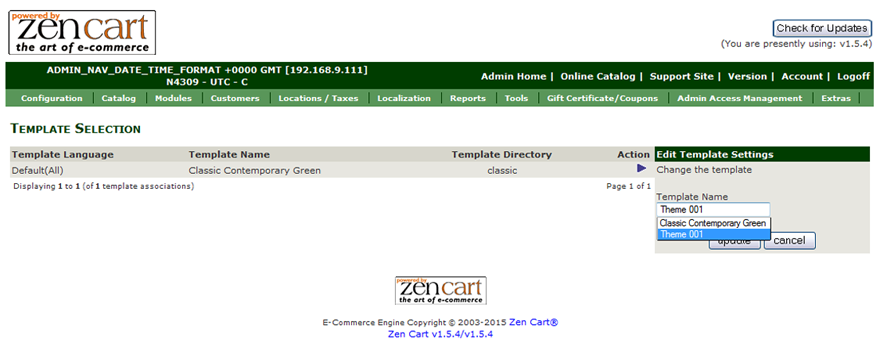
Then open Zen Cart store admin panel and go to 'Tools > Template Selection'.
In the right column click Edit button and in the appeared select box choose a new template (themeXXX).
How to install Zen Cart sample data
To make your template look like on the live demo, you need to install the template sample data. Sample data contains the website settings, sample products, modules, menus, images, etc. It is useful when you want to see the template functionality or the examples of the pages design and layout.
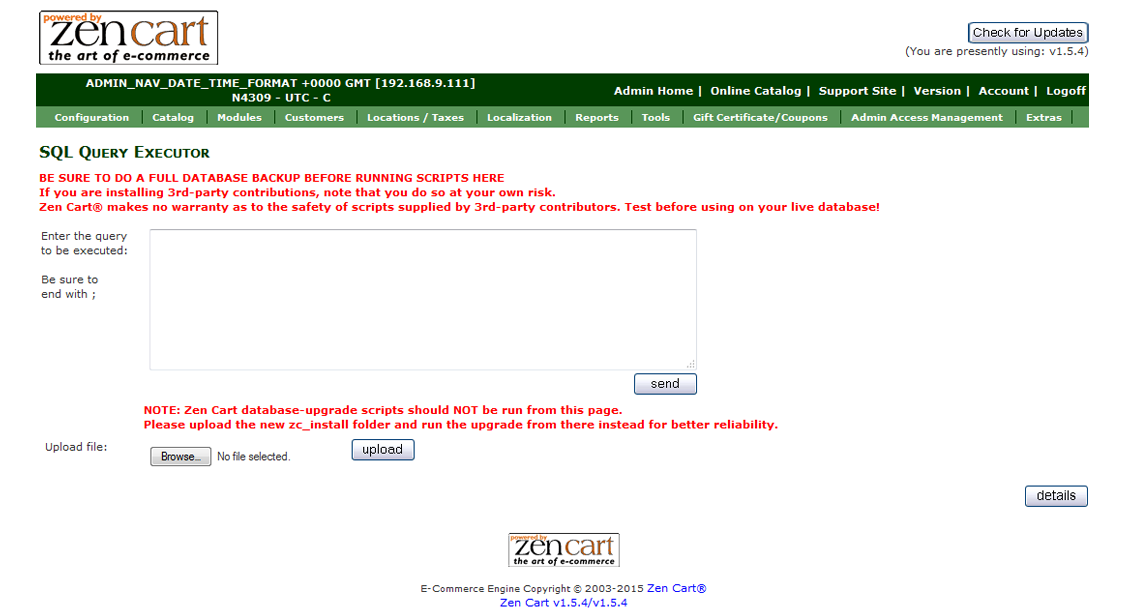
Zen Cart templates are provided with one main SQL file (ZENCART_FULL.sql) that contains all website sample content and sample website settings, and seven additional SQL files that can be installed on the existing store for your choice. The SQL files can be imported into your database using your database management tool (usually phpMyAdmin) or directly through Zen Cart admin panel: Tools > Install SQL Patches.
-
- ZENCART_FULL.sql
- contains store and theme settings, sample banners, categories, products settings, megamenu, custom block, social icons on the product page, slider on homepage. Use it with clear Zen Cart installation.
-
- ZENCART_SHORT.sql
- contains only store and theme settings. Installing short dump won't replace your store goods.
-
- ZENCART_AJAX_SEARCH.sql
- provides extended search settings.
-
- ZENCART_CUSTOM_BLOCK.sql
- sets the extra editable content blocks.
-
- ZENCART_MEGAMENU.sql
- sets the megamenu into your site.
-
- ZENCART_SHORT.sql
- contains only store and theme settings.
-
- ZENCART_SLIDER.sql
- slider on homepage.
-
- ZENCART_SOCIAL.sql
- set of social icons on the product page.
-
- ZENCART_YOUTUBE.sql
- displays YouTube video on the product page.
NOTE: All the SQL files can be installed in any order, except ZENCART_FULL that contains all the other SQL files and imported into the clear Zen Cart.
ATTENTION: Importing the SQL file to your database will overwrite your existing content and website settings. DO NOT import the SQL file if you want to keep the existing content.
NOTE: ALWAYS back up your database before performing any modifications.
You will get 2 options, either execute SQL query or upload .sql file. The result will be the same either option you choose.

Click on the 'Browse' button and navigate to 'sources' folder of the template package, select the .sql file and press the 'Upload' button to execute it.
Feel free to check the detailed tutorial on how to install Zen Cart template sample data