- Web templates
- E-commerce Templates
- CMS & Blog Templates
- Facebook Templates
- Website Builders
Replacing the “dummy” logo with another one
November 15, 2010
This tutorial will show you how to replace the ‘dummy’ logo with another one.
-
Open the PSD file you need to edit. Usually it is located in the sources folder of your template.
-
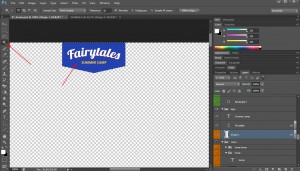
First you need to locate the appropriate layers group. Usually it is named ‘Logo‘. To do it quickly, you may use the Move tool by pressing the appropriate icon or using the ‘V‘ key. Once the tool is active, click on the logo holding the Ctrl button (for Windows users) or Command button (for Mac users).

-
Now the logo layers group is highlighted in the working panel on the right. Let’s edit the text.
-
Select the text layer with your mouse and press the ‘T’ activating text editing tool. Now you are able to edit the text on the logo.


-
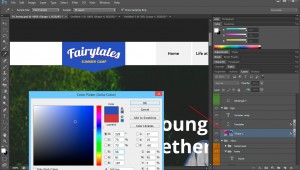
To change the background select the background layer and click twice on the layer thumbnail. You may pick any color you need.

-
The background is changed. Now we can save the logo using the ‘File’ > ‘Save for Web’ option. However, you might need to set a transparent background for your logo.
-
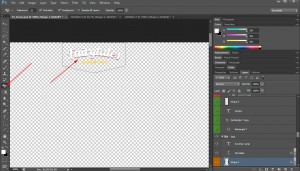
In order to do that, do a right-click on the small eye in the layers panel. Use ‘Hide all other layers’ option. It will make the process easier.

-
Now select the background layer. Do a right-click and choose ‘Rasterize layer’ option.

-
Using the ‘Magic wand’ tool click on the logo background. After that use the ‘Magic eraser’ tool on the same background.


-
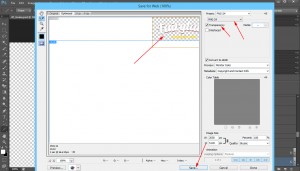
Now you can save the logo using the ‘File’ > ‘Save for Web’ option. In the ‘Save for Web’ window, select the ‘Slice tool’ (or hit the ‘C’ tab, select the logo by clicking on it and click ‘Save.’ Be sure you have selected .png format and the ‘Transparency’ checkmark is selected as well. In the path browsing window also choose the ‘Slices’ Save selected slices’.

This is the end of the tutorial. Now you know how to replace the ‘dummy’ logo in a PSD file.
Feel free to check the detailed video tutorial below:
Photoshop. Replacing the ‘dummy’ logo with another one


