


- Web templates
- E-commerce Templates
- CMS & Blog Templates
- Facebook Templates
- Website Builders
FAQs
General Tutorials
Featured templates
MonsterONE Subscrioption


This tutorial will show you how to add an attribute selector on product listing in Shopify.
Shopify. How to add an attribute selector on product listing
Log into your Admin panel and navigate to Online Store -> Themes.
Select Edit HTML/CSS option:
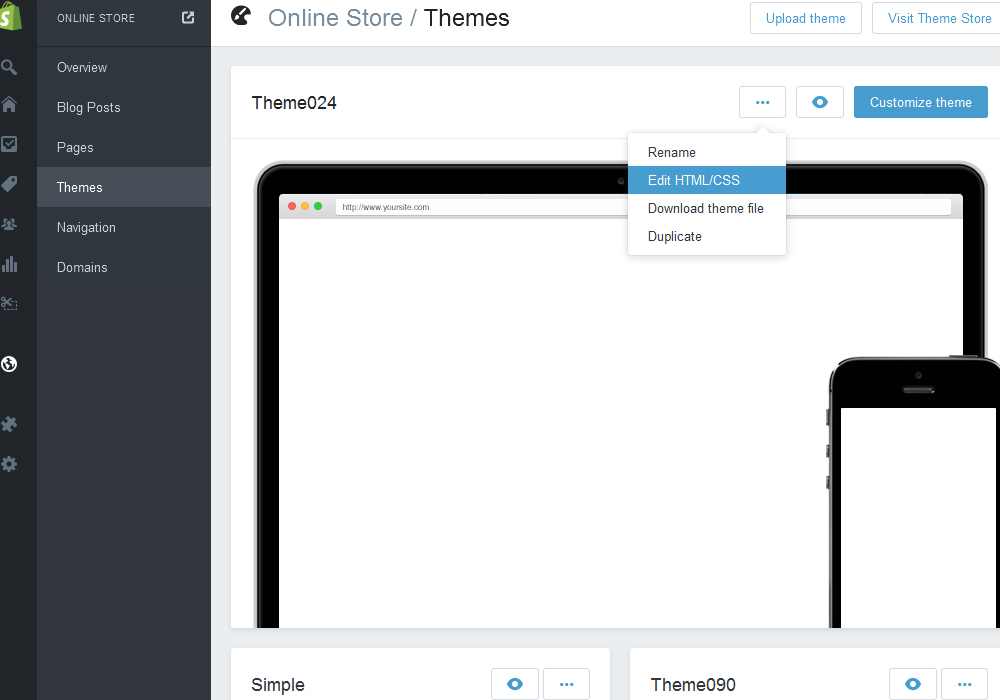
Open product-listing-item.liquid or product-grid-item.liquid under Snippets tab.
Look for the following code:
{% include "snippet-add-to-cart" %}
Replace it with the code:
<input type="submit" value="Buy now" />
  <form action="/cart/add" method="post" style="text-align:center;">
  <select name="id">
  {% for variant in product.variants %}
  {% if variant.available %}
  <option value="{{ variant.id }}">{{ variant.title }} - {{ variant.price | money }}</option>
  {% else %}
  <option disabled="disabled">{{ variant.title }} - Sold Out</option>
  {% endif %}
  {% endfor %}
  </select>
  <button type="submit" class="btn btn-cart">Add to cart</button>
  </form>
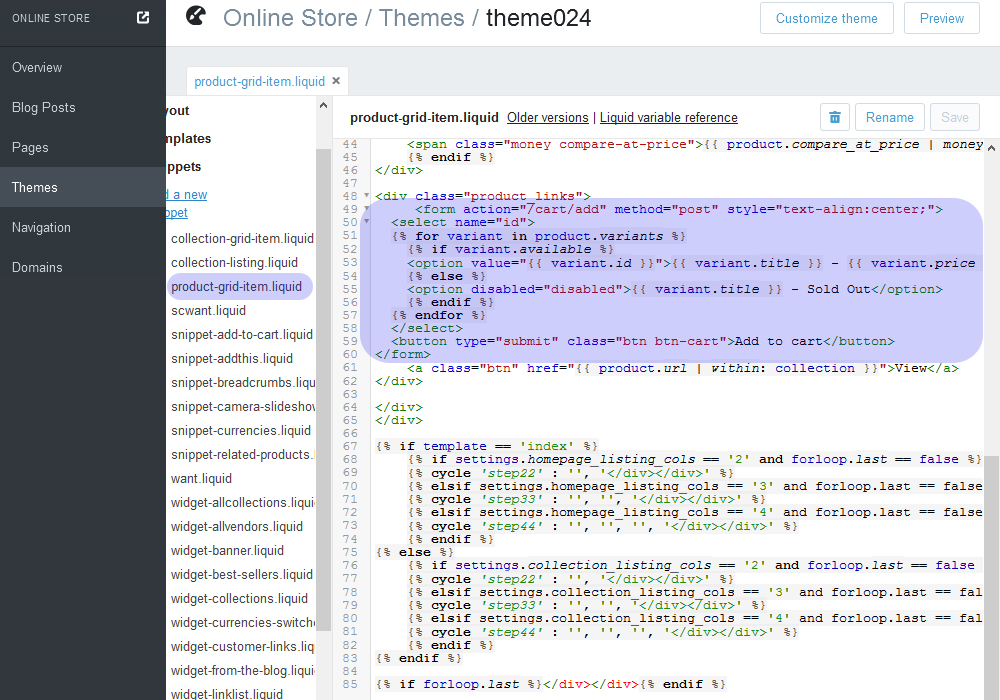
Save this file and check your site.
Feel free to check the detailed video tutorial below:
Shopify. How to add an attribute selector on product listing
